 2___Matching_pair.jpg (153502 bytes)
|
The Railfaneurope.net Picture Gallery
Directory: /pix/gb/signalling/colour-light
Last update: Sat Nov 15 20:29:06 CET 2014
|
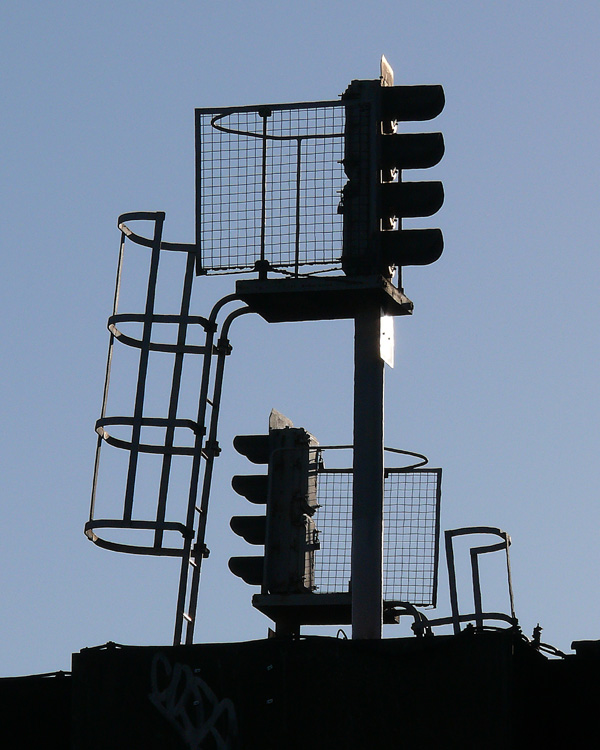
| Two signals catch the winter sunlight outside London Bridge Station. Saturday, 12 January, 2008. D h Thomas (thomdh@hotmail.com) |
|
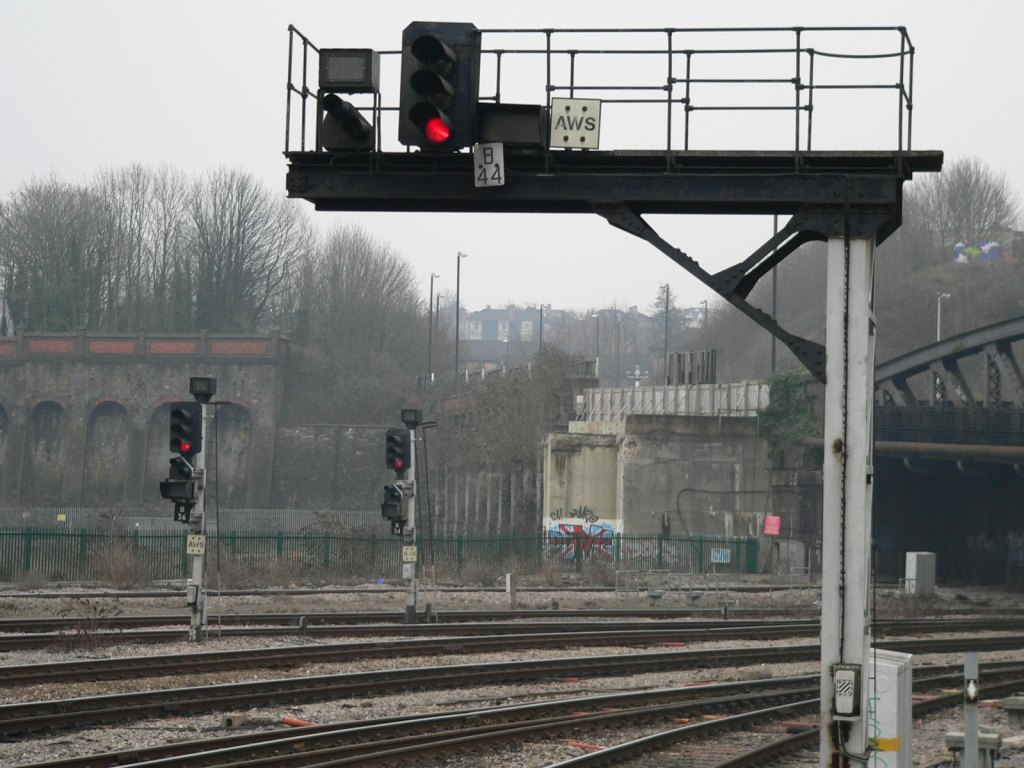
Signals B34, B36 and B44 at the southern end of Bristol Temple Meads station, all shown at danger.
Photo by Chris McKenna23/01/2006. |
|
The shunt signal (the diagonally aligned white lights on the left) at signal C316 at the western end of Cardiff Central railway station allow a First Great Western HST to access the sidings.
Photo by Chris McKenna 10/05/2006. |
|
Looking west from the western end of Cardiff Central railway station.
Photo by Chris McKenna 10/05/2006. |
|
Signal B244 at the south end of Filton Abbey Wood station, protecting trains on the line towards Bristol Temple Meads
Photo by Chris McKenna19/01/2006. |
|
Signal B259 at the north end of platform 1 at Filton Abbey Wood station. This is exclusively a wrong-line signal as trains normally pass southbound on this line and as such arrive at the back of this signal. The two junction indicators show there there are three possible routes north of this signal, with no inidcator the route is set to continue on the wrong-road northbound. With the 45� indicator set, the train will head towards Bristol Parkway but on the correct line; the 90� indicator shows that the route is set for the train to continue over the northbound line to Bristol Parkway onto the line towards South Wales.
Photo by Chris McKenna19/01/2006. |
|
The signals on the Great Western Main Line west of Paddington for westbound trains. The large numbers above the signals identify the national rail lines (the rightmost track is the London Underground Hammersmith & City Line) and I believe are a legacy of the Ladbroke Grove rail crash. This photograph was taken from the platform at Royal Oak London Underground station.
Photo by Chris McKenna 31/05/2006. |
|
The signals on the Great Western Main Line west of Paddington for eastbound trains. The large numbers above the signals identify the national rail lines (the leftmost track is the London Underground Hammersmith & City Line) and I believe are a legacy of the Ladbroke Grove rail crash. These signals being so close to the line terminus at Paddington can display only "danger" (red) or "caution" (yellow) aspects. Caution aspects are always accompanied by a route indicator of the platform number at Paddington into which the train will arrive. This photograph was taken from the platform of the adjacent Royal Oak London Underground station.
Photo by Chris McKenna 31/05/2006. |
|
Signal G35 for one of the through tracks at Gloucester station has three route option feathers. In the background on the left are rather sad looking locomotives 31206 in Dutch livery and 47365 in Railfreight Distribution livery in Horton Road sidings.
Photo by Chris McKenna 20/05/2006. |
|
The signals at the northern end of Kensington Olympia station in West London, from left to right VC799, VC801 and VC803.
Photo by Chris McKenna 13/01/2005. Photo by Chris McKenna If you wish to use this, or any other of my photographs, under a different license see my relicensing policy. Feedback on my pictures is always welcome. |
|
Signals NS167 and NS165 at the eastern end of Birmingham New Street railway station, the latter is displaying a "D" indication in addition to the green aspect. The NS designation indicates that these signals are controlled from the New Street signal box, located a short distance past the opposite end of this station.
Photo by Chris McKenna07/04/2006. |
|
Signals NS167 and NS165 at the eastern end of Birmingham New Street railway station, the latter is displaying "D" and "RA"indications in addition to the green aspect. The NS designation indicates that these signals are controlled from the New Street signal box, located a short distance past the opposite end of this station.
Photo by Chris McKenna07/04/2006. |
|
Signal NS176 at the eastern end of Birmingham New Street railway station has its three aspects arranged horizontally with red at the right rather than the conentional vertial arangement with red lowermost.
Photo by Chris McKenna07/04/2006. |
|
Signals NS177 and NS175 at the eastern end of Birmingham New Street railway station, both displayed red aspects. The NS designation indicates that these signals are controlled from the New Street signal box, located a short distance past the opposite end of this station.
Photo by Chris McKenna07/04/2006. |
|
Looking east from Hampton Road bridge at the Severn Beach Line between Clifton Down and Redland stations. Signal B358 in the foreground protects the single track section ahead.
Photo by Chris McKenna 6/12/2006. |
|
Signal B3 at the northern end of the northbound platform at Bridgwater station in Somerset. It comprises a standard three-aspect signal head for mainline services, but also has a two-aspect position light signal that controls the shunting movements into the adjacent Eastover Sidings (aka Bridgwater railhead).
Photo by Chris McKenna 30/10/2006. |
|
Signals PT132 and PT32 at the western end of Port Talbot Parkway station in South Wales. PT32 controls the track that serves platform 1 at the station, while PT132 relates to the south-side loop; both tracks are used by westbound trains. This photograph was taken from the rear of the first carraige on a westbound First Great Western HST en-route from London Paddington to Swansea stopped at the station.
Photo by Chris McKenna 09/11/2006. |
|
Signals PT179, PT279, PT379 and PT479 at the northern end of platforms 1, 2, 3 and 4 respectively of Swansea (Abertawe) station in South Wales. The PT prefix presumably refers to Port Talbot.
Photo by Chris McKenna 09/11/2006. |
|
The northern end of Stapleton Road railway station in the Easton area of Bristol. Signal B235 in the foreground controls Narroways Junction ahead, where the Severn Beach Line diverges from the main Bristol Temple Meads to Bristol Parkway/South Wales line. The bridges ahead (in use on the left and disused on the right) take/took two tracks each over the A432 Stapleton Road that runs nearly parallel to the M32 at this point.
Photo by Chris McKenna 01/12/2006. |
|
"R" boards beneath signals E120 and E20 at the southern end of platform 2 of Taunton station. I don't know the meaning of the signs, but presume they are related to the currently ongoing resignaling scheme at Norton Fitzwarren junction, where the West Somerset Railway branches off the mainline, a couple of miles down the line. Once the resignalling is completed there will be no restriction on access between the mainline and WSR metals, opening the way for the long-discussed through services and a greater number of charters.
Photo by Chris McKenna 11/05/2006. |
|
Empty Wessex Trains Class 153 DMU 153377 is detained at a red singal at the southern end of the central track at Bristol Temple Meads, while signal B40 dislpays a green aspect and a route indication of DM (Down Main presumably) at the exit of platforms 5 and 6.
Photo by Chris McKenna 05/01/2005. Photo by Chris McKenna If you wish to use this, or any other of my photographs, under a different license see my relicensing policy. Feedback on my pictures is always welcome. |
|
The signals at the western end of Bristol Parkway station. B112 on the left is showing a plain greed aspect, indicating that the next train will be heading towards the Severn Tunnel and South Wales.
Photo by Chris McKenna 05/01/2005. Photo by Chris McKenna If you wish to use this, or any other of my photographs, under a different license see my relicensing policy. Feedback on my pictures is always welcome. |
|
Looking west from the western end of platform 2 at Bristol Parkway station. Note that signal B112 in the centre of the photograph has two routes diverging to the left, indicated by the two rows of junction route indicator lights at 90� and 45� above the signal.
Photo by Chris McKenna 07/12/2005. |
|
Looking west from the western end of platform 2 at Bristol Parkway station. Note that signal B112 in the centre of the photograph has two routes diverging to the left, in this photograph the signal is at double amber and the 90� route indicator is set - the next train will procede towards Bristol Temple Meads. The 45� indicator will presumably only be seen by trains heading towards Avonmouth, while the straight ahead route is that towards the Severn Tunnel and South Wales.fa
Photo by Chris McKenna 07/12/2005. |
|
Looking west from the western end of platform 2 at Bristol Parkway station. Note that signal B112 on the left of the photograph has two routes diverging to the left, in this photograph the signal is at green and the 90� route indicator is set - the next train will procede towards Bristol Temple Meads. The 45� indicator will presumably only be seen by trains heading towards Avonmouth, while the straight ahead route is that towards the Severn Tunnel and South Wales.fa
Photo by Chris McKenna 07/12/2005. |
|
Signal B39 at the north end of platfom 3 at Bristol Temple Meads station. In this photograph the three-aspect signal is showing amber with a route indication of "UR" - possibly for "Up Relief".
Photo by Chris McKenna 07/12/2005. |
|
Signal B39 at the north end of platfom 3 at Bristol Temple Meads station. In this photograph the three-aspect signal is showing green with a route indication of "UR" - possibly for "Up Relief".
Photo by Chris McKenna 07/12/2005. |
|
Signal B39 at the north end of platfom 3 at Bristol Temple Meads station. In this photograph the three-aspect signal is showing red.
Photo by Chris McKenna 07/12/2005. |
|
Signals B45 and B47 at the north end of platfom 7 at Bristol Temple Meads station. B45 is at amber with a route indicator showing UF (Up Fast?). B47 is at red.
Photo by Chris McKenna 07/12/2005. |
|
Signals B45 and B47 at the north end of platfom 7 at Bristol Temple Meads station. B45 is at red. B47 is at green with a UM route indicator (Up Main?)
Photo by Chris McKenna 07/12/2005. |
|
The view south from Beriwick-upon-Tweed station onto the Royal Border Bridge.
Photo by Chris McKenna 05/03/2005. |
|
The signals at the eastern end of Taunton station show that trains can depart northbound from any of the four through platforms. The exit signal from platform 6, a bay platform is visible in the middle distance to the left of the right hand gantry.
Photo by Chris McKenna 11/01/2005. Photo by Chris McKenna If you wish to use this, or any other of my photographs, under a different license see my relicensing policy. Feedback on my pictures is always welcome. |
|
Signals E120 and E20 at the western end of platfom 2 at Taunton station control departure from the station for southbound trains. Both are currently showing a red aspect.
Photo by Chris McKenna 11/01/2005. Photo by Chris McKenna If you wish to use this, or any other of my photographs, under a different license see my relicensing policy. Feedback on my pictures is always welcome. |
|
Signals E120 and E20 at the western end of platfom 2 at Taunton station control departure from the station for southbound trains. E120 on the left is showing a green aspect with a right-hand route indicator.
Photo by Chris McKenna 11/01/2005. Photo by Chris McKenna If you wish to use this, or any other of my photographs, under a different license see my relicensing policy. Feedback on my pictures is always welcome. |
|
Signals E120 and E20 at the western end of platfom 2 at Taunton station control departure from the station for southbound trains. E120 on the left is showing a green aspect with a right-hand route indicator. A left-hand indication would only be seen by trains heading onto a line that looks mostly disused.
Photo by Chris McKenna 11/01/2005. Photo by Chris McKenna If you wish to use this, or any other of my photographs, under a different license see my relicensing policy. Feedback on my pictures is always welcome. |
|
Signals E120 and E20 at the western end of platfom 2 at Taunton station control departure from the station for southbound trains. E120 on the left is showing a yellow aspect with a right-hand route indicator.
Photo by Chris McKenna 11/01/2005. Photo by Chris McKenna If you wish to use this, or any other of my photographs, under a different license see my relicensing policy. Feedback on my pictures is always welcome. |
|
Signals E85 and E185 at the eastern end of platfom 5 at Taunton station control departure from the station for northbound trains. E185 on the left is showing a green aspectm while E85 is at danger.
Photo by Chris McKenna 11/01/2005. Photo by Chris McKenna If you wish to use this, or any other of my photographs, under a different license see my relicensing policy. Feedback on my pictures is always welcome. |
|
Signal TT279, located just beyond the concourse-bridge at Nottingham station, at amber and with a theatre-type route indicator displaying "M" - presumably for "Main line" or possibly "Mansfield line".
Photo by Chris McKenna 14/11/2005. |
|
Signal W168 at the north end of Wimbledon station in south London can be set to allow passage onto a straight ahead route (a green light with no other indication, as in the photograph) or one of two diverging routes, in which case a row of 5 white lights at on top of the signal arranged in a line at an angle of either 45� or -45� from vertical. The V-shape of these diverge indicators resulted in the nickname "rabbit ears" for this type of signal.
Photo by Chris McKenna 24/10/2005. |
|
Network rail signals T45, T47 and T49 viewed from the Tyne and Wear Metro station at Pelaw. The 1500 volt DC OHLE and "Limit of Shunt" sign in the foreground are for Metro services.
Photo by Chris McKenna 10/10/2005. |
|
The signals at the eastern end of the goods lines bypassing the platforms at Bristol Parkway station. These lines pass between the platforms and the main station building.
Photo by Chris McKenna 03-05-2005 |
|
The signals at the eastern end of the goods lines bypassing the platforms at Bristol Parkway station. These lines pass between the platforms and the main station building.
Photo by Chris McKenna 03-05-2005 |
|
The signals at the eastern end of the goods lines bypassing the platforms at Bristol Parkway station. These lines pass between the platforms and the main station building.
Photo by Chris McKenna 03-05-2005 |
|
The signals seen by trains leaving Newport in South Wales westbound from the southern side of the station. The route indicators display 2 for the down main towards Cardiff while 4 indicates the down relief.
Photo by Chris McKenna 17/05/2006. |
|
Signal R251 at the eastern end of platform 8 at Reading station has three diverging route indicators.
Photo by Chris McKenna 31/05/2006. |
|
3 Aspect Signal. This is a 3 aspect signal taken at Didcot on sunday 13th June 1999.
Photo and scan: Ross Aitken (aos@cableinet.co.uk)
|
|
Signal W156 at the southern end of platform 2 at Castle Cary railway station. The junction indicator shows the next train at this platform will be a service to Weymouth.
Photo by Chris McKenna 06/09/2006. |
|
A signal east of Newport station in South Wales offers the route indicator 5 in conjunction with a double yellow aspect to a westbound First Great Western HST.
Photo by Chris McKenna 17/05/2006. |
|
Signals PT179 and PT279 at the northern end of platforms 1 and 2 respectively of Swansea (Abertawe) station in South Wales. The PT prefix presumably refers to Port Talbot.
Photo by Chris McKenna 09/11/2006. |
|
Signals PT379 and PT479 at the northern end of platforms 3 and 4 respectively of Swansea (Abertawe) station in South Wales. The PT prefix presumably refers to Port Talbot.
Photo by Chris McKenna 09/11/2006. |
 BTM-southendsignals.jpg (161335 bytes)
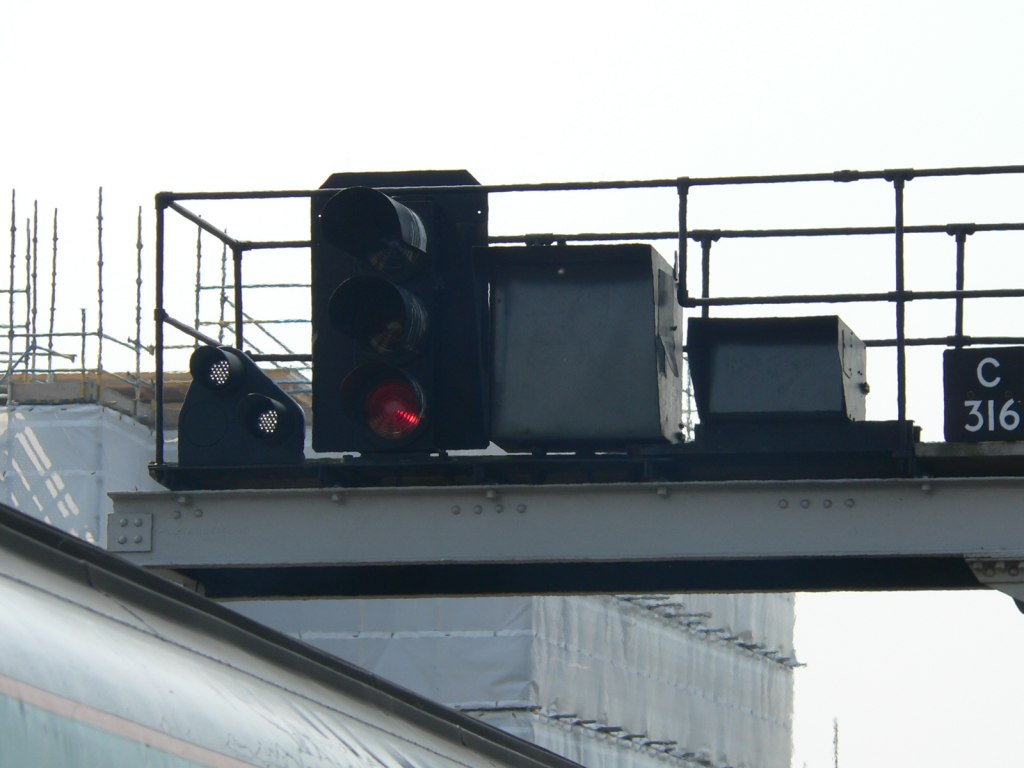 CardiffCentral-C316shuntsignal.jpg (98671 bytes)
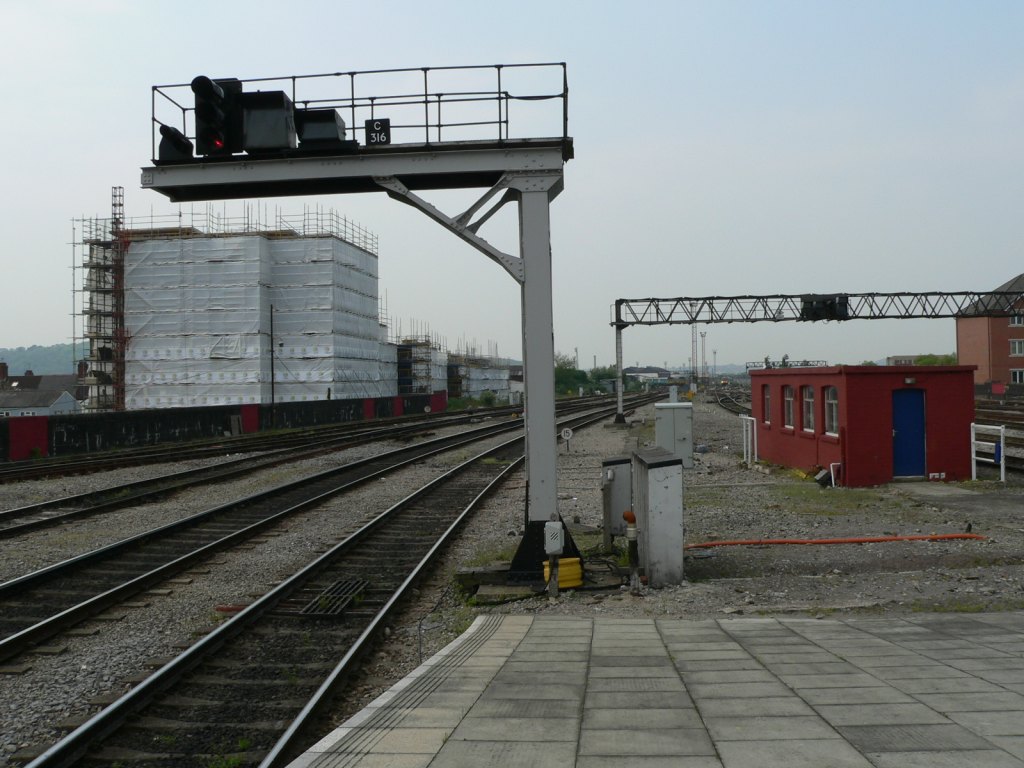 CardiffCentral-viewwest-01.jpg (159015 bytes)
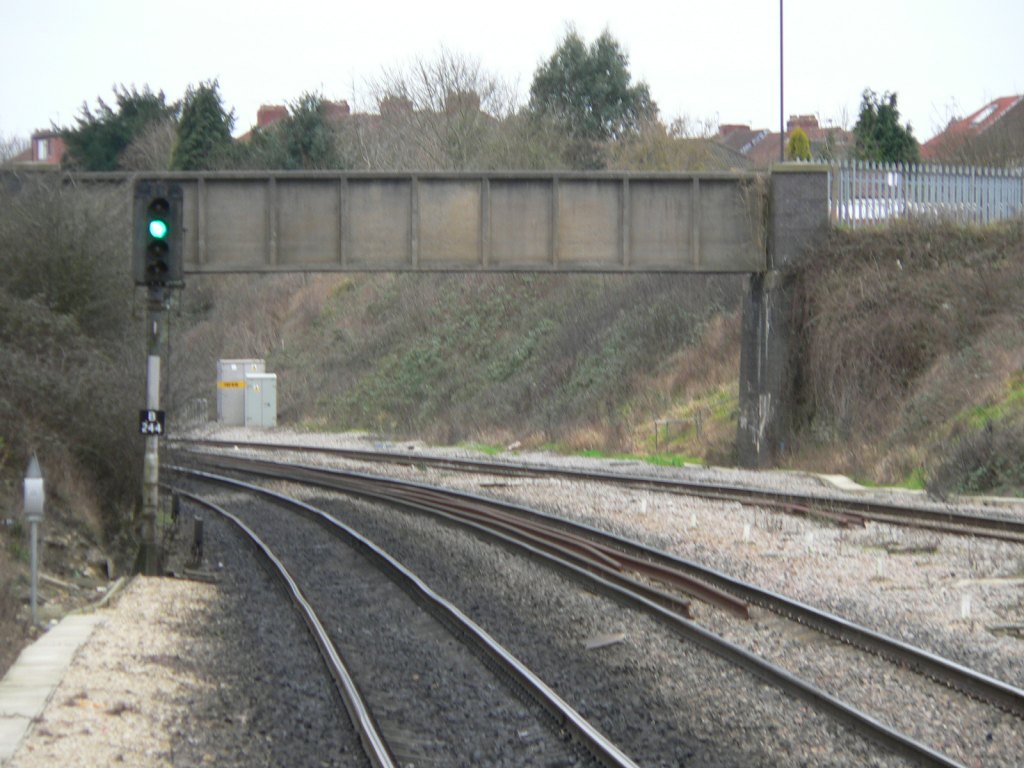 FAW-signal-B244.jpg (160567 bytes)
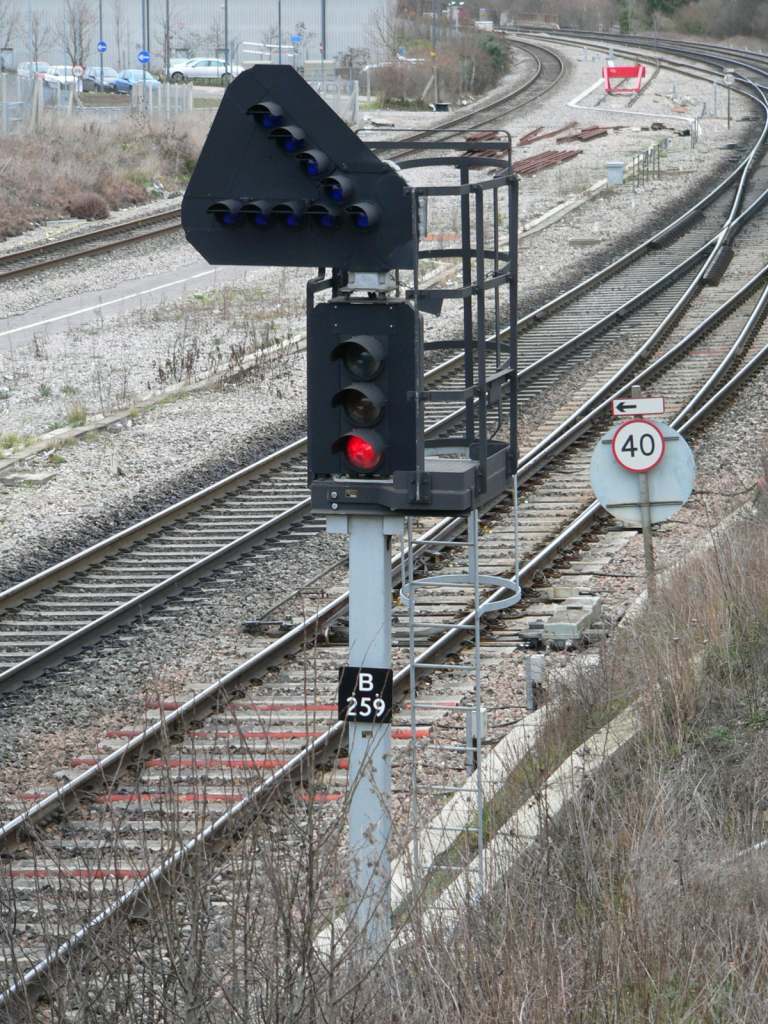 FAW-signal-B259.jpg (161641 bytes)
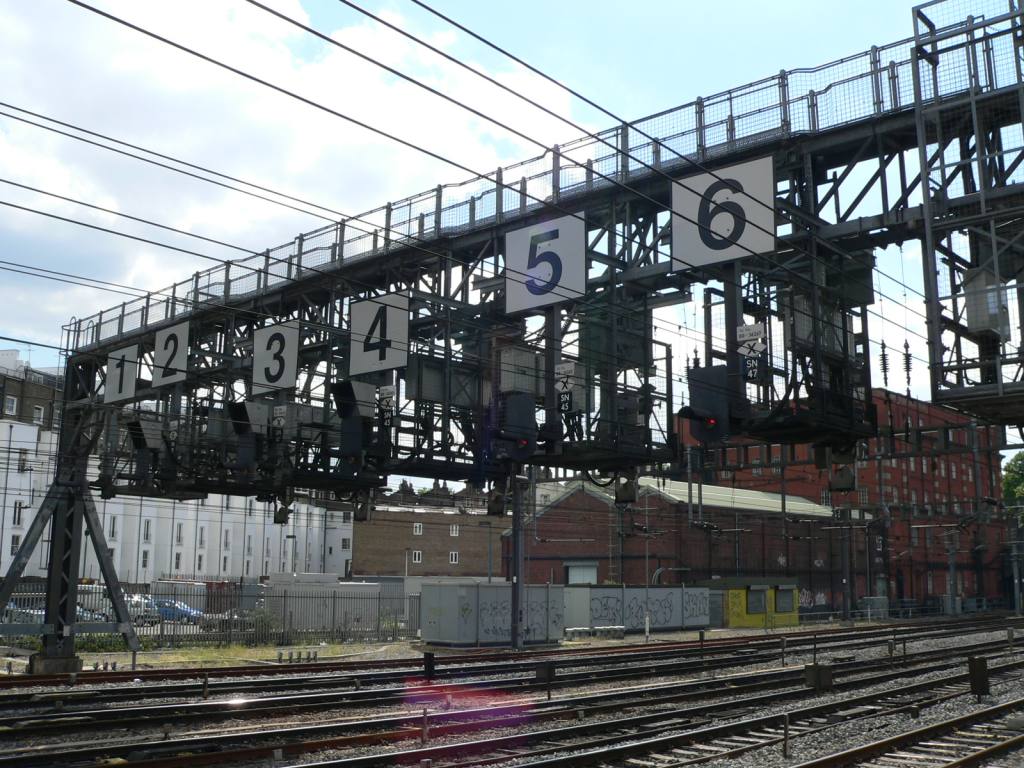 GWMLsignals-RoyalOak-01.jpg (163173 bytes)
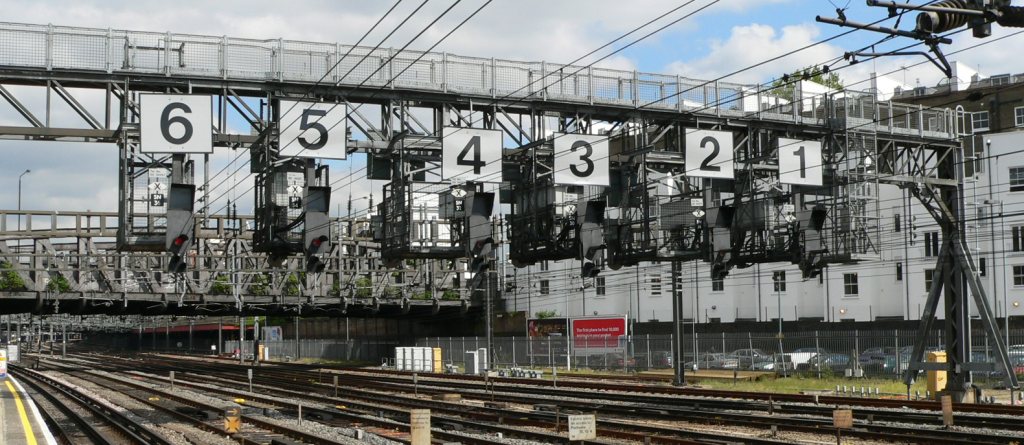 GWMLsignals-RoyalOak-02.jpg (161021 bytes)
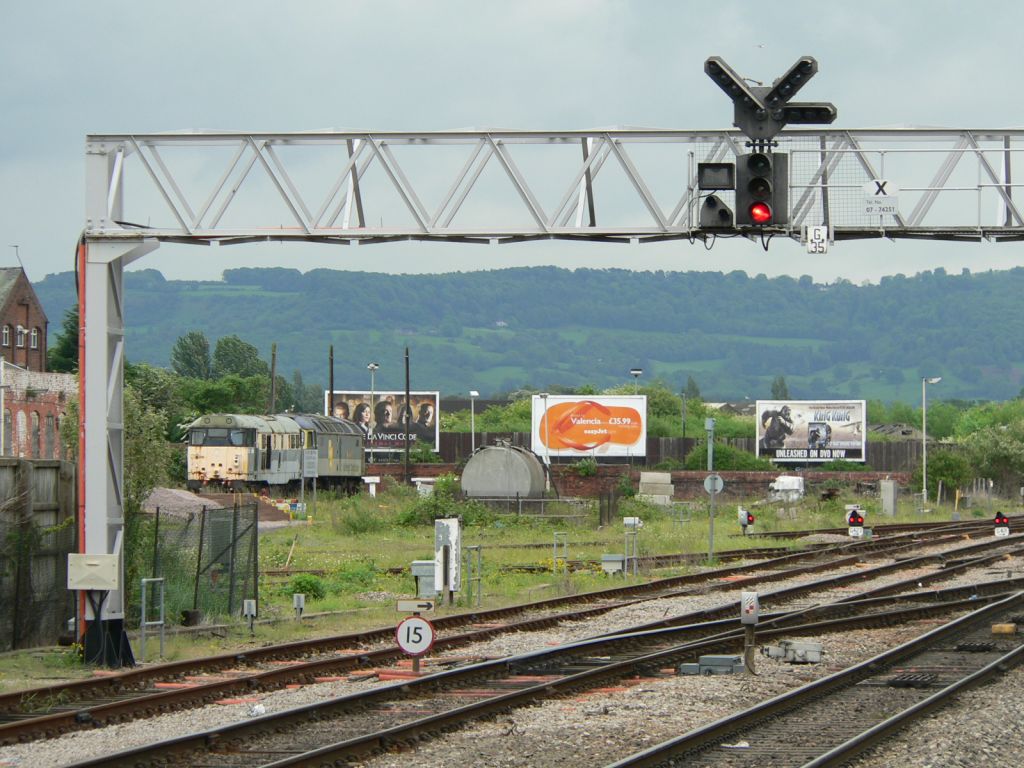 Gloucester-signal-G35.jpg (160571 bytes)
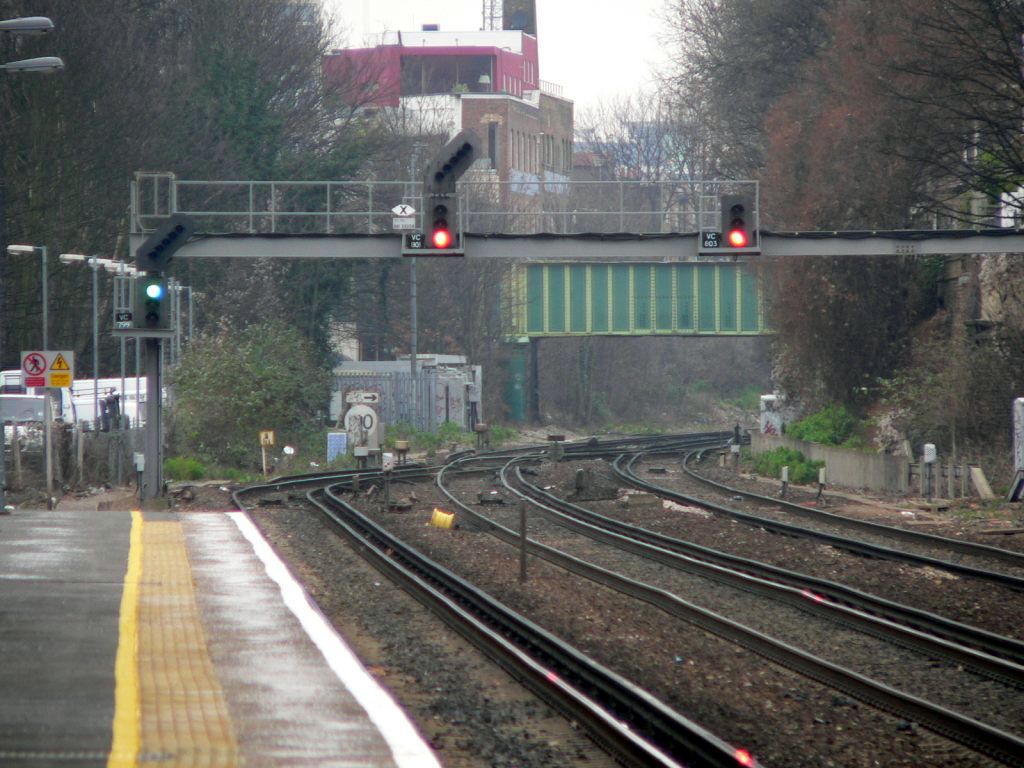 KensingtonOlympia-signals-north1.jpg (140026 bytes)
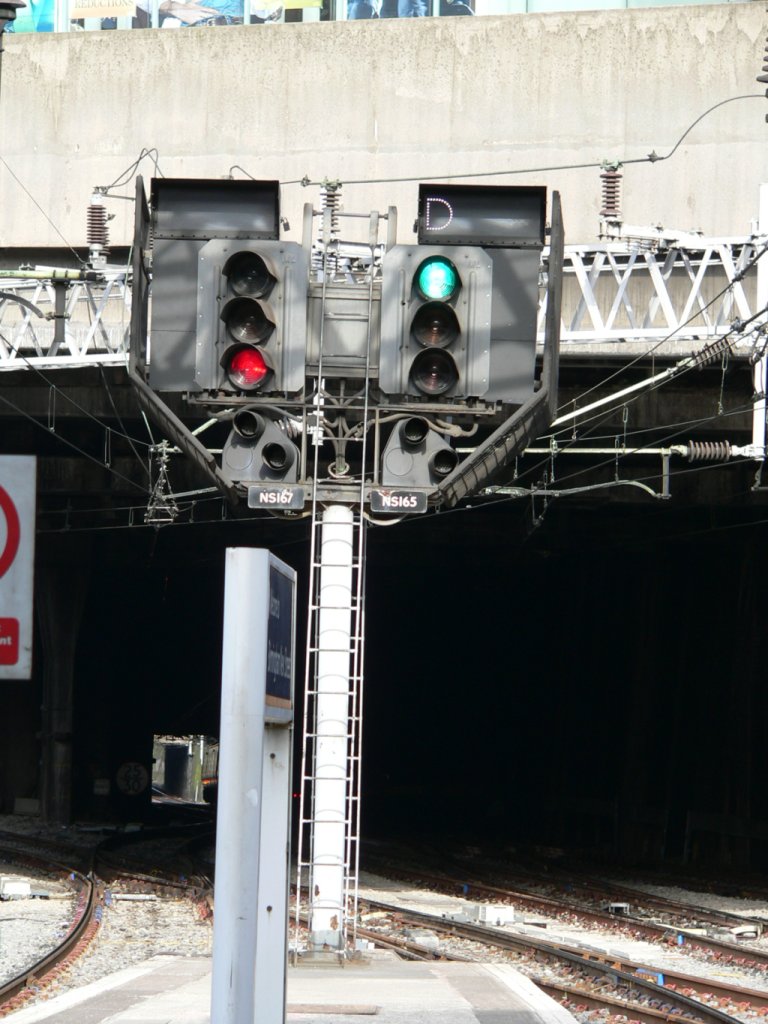 NS167+NS165-01.jpg (157893 bytes)
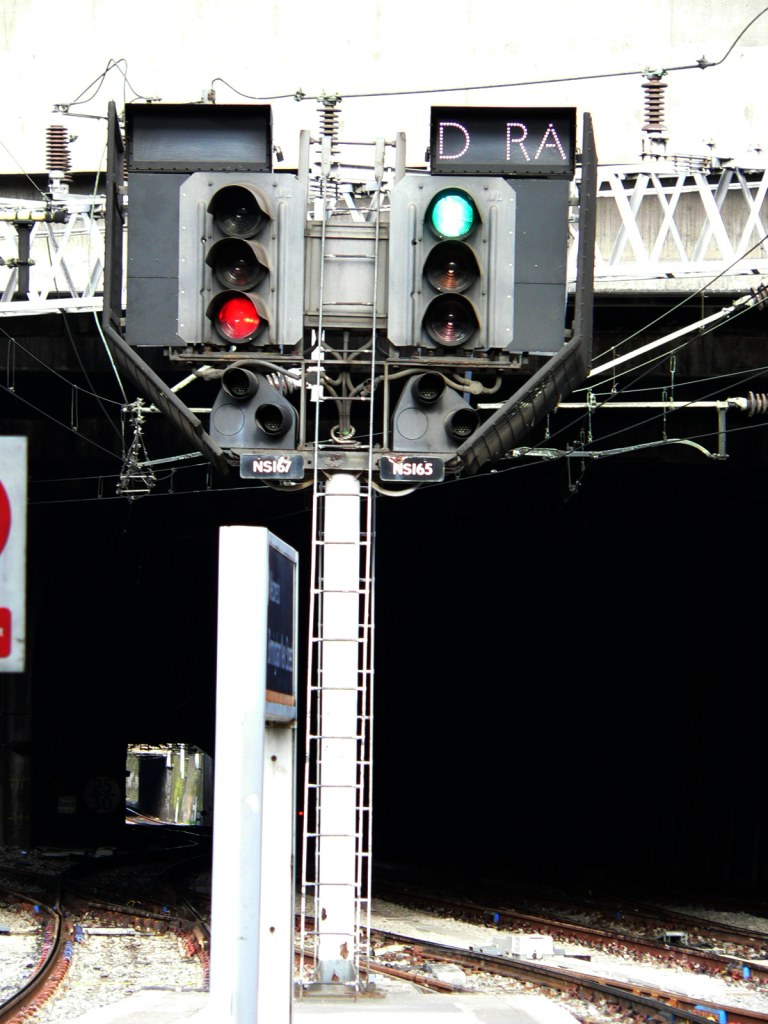 NS167+NS165-02.jpg (162606 bytes)
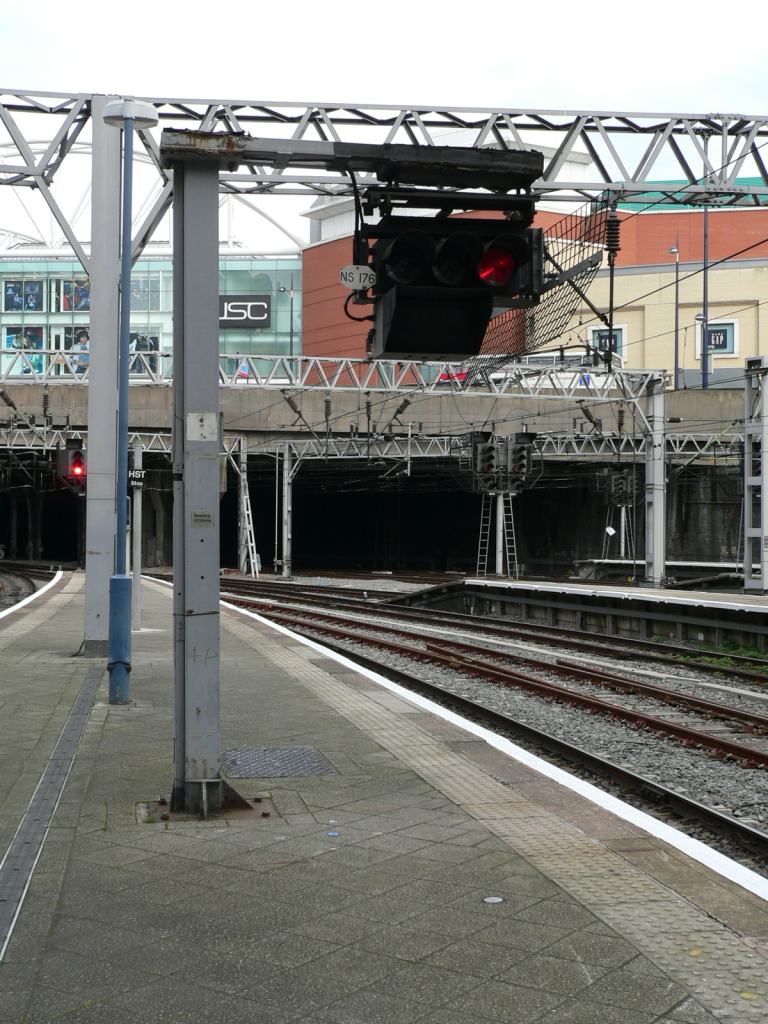 NS176-01.jpg (159533 bytes)
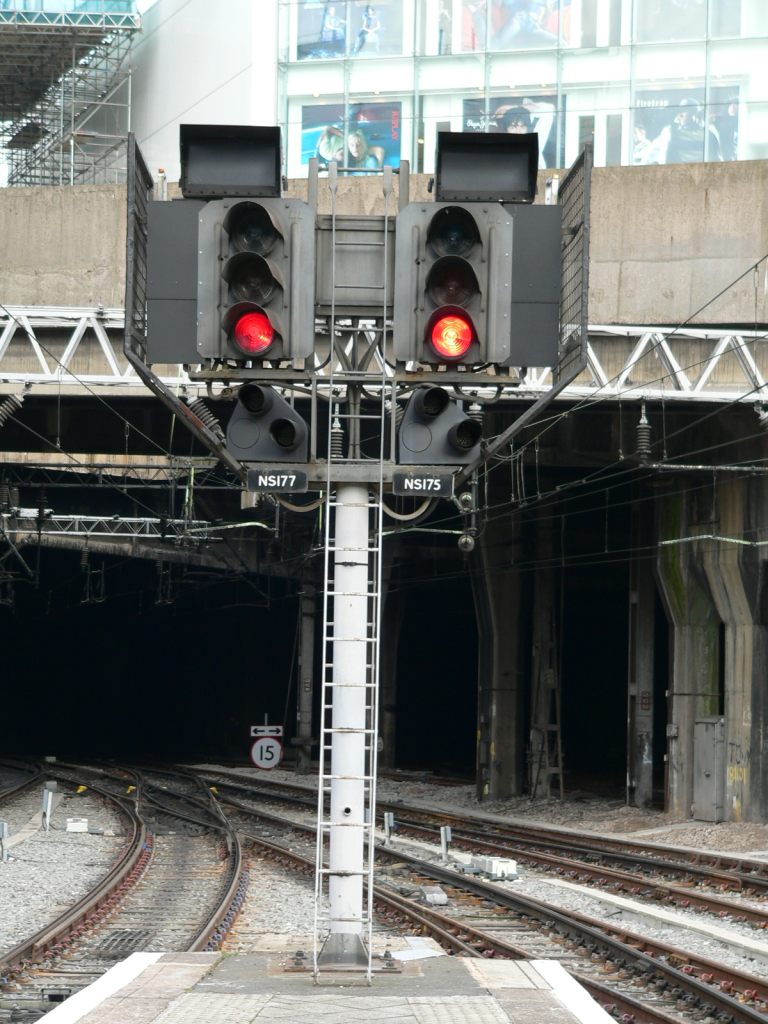 NS177+NS175-01.jpg (163141 bytes)
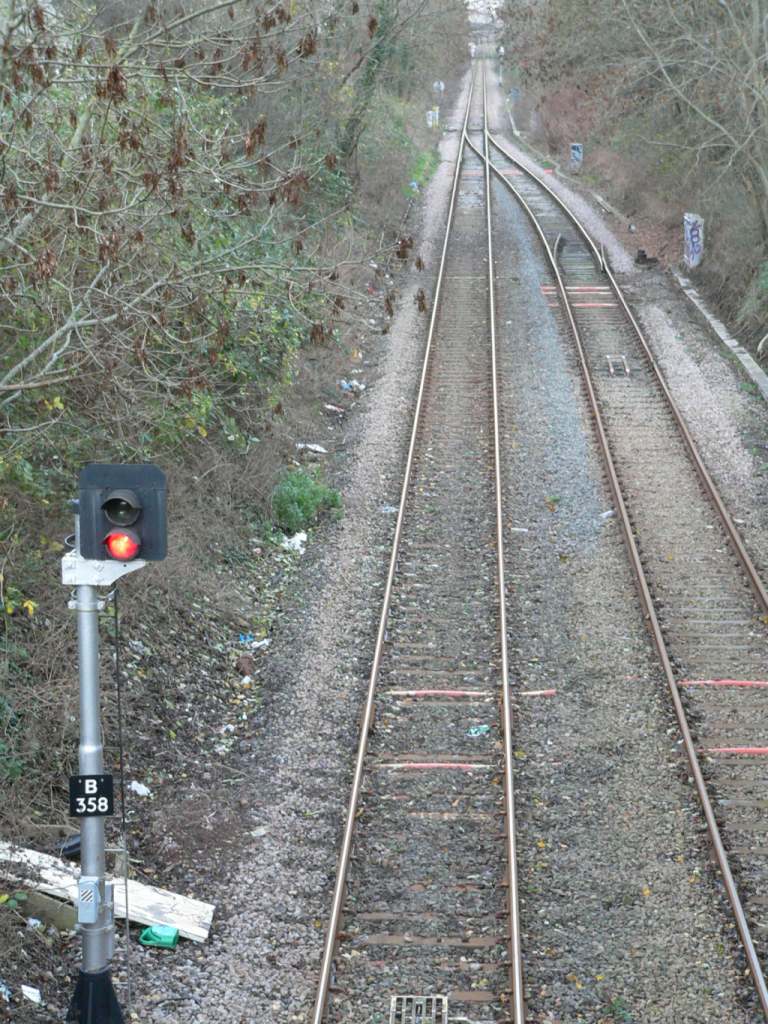 Signal-B358-01.jpg (163632 bytes)
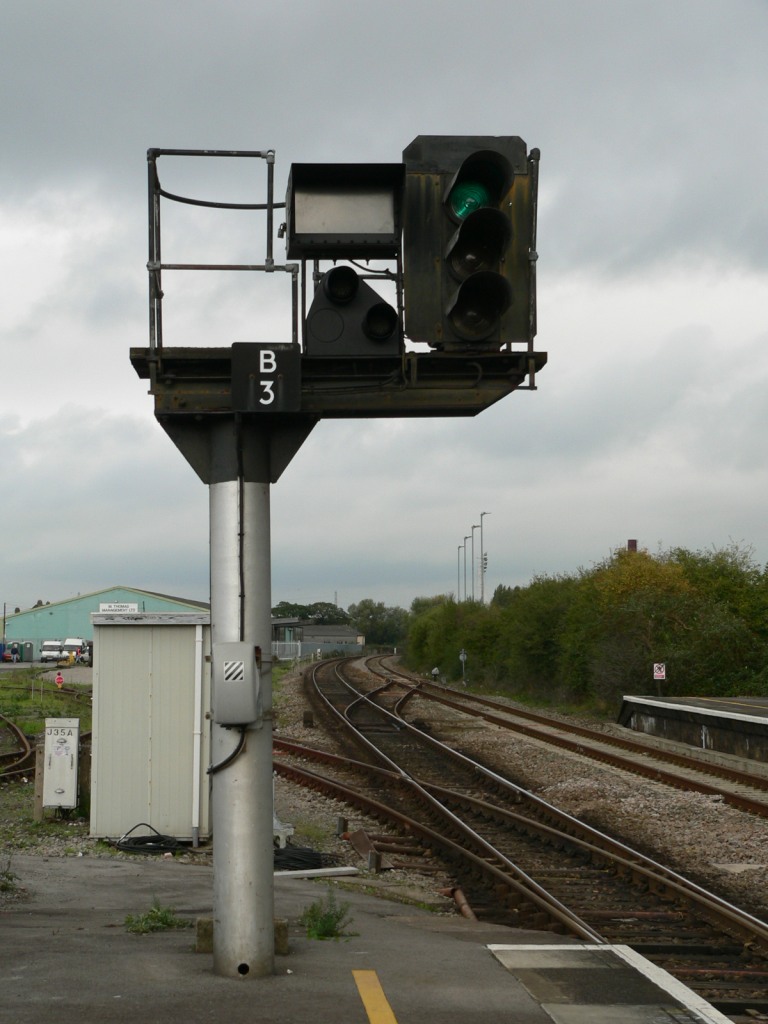 SignalB3-01.jpg (158730 bytes)
 SignalsPT132+PT32-fromwestboundHST-01.jpg (160223 bytes)
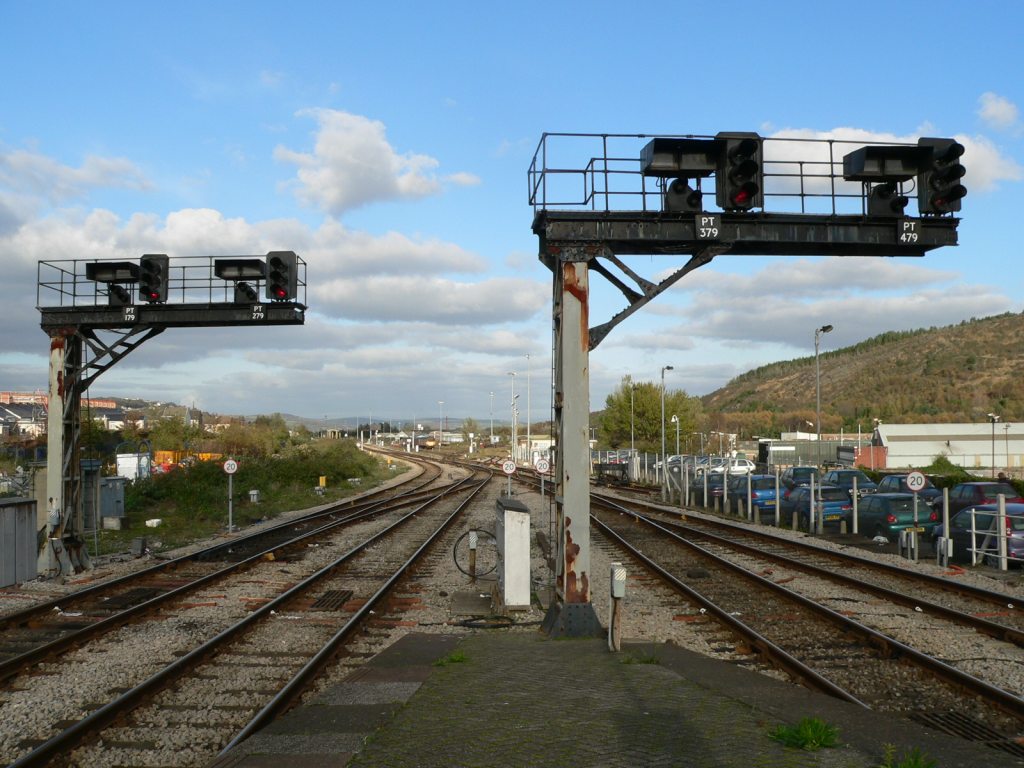 SignalsPT179+PT279+PT379+PT479.jpg (163445 bytes)
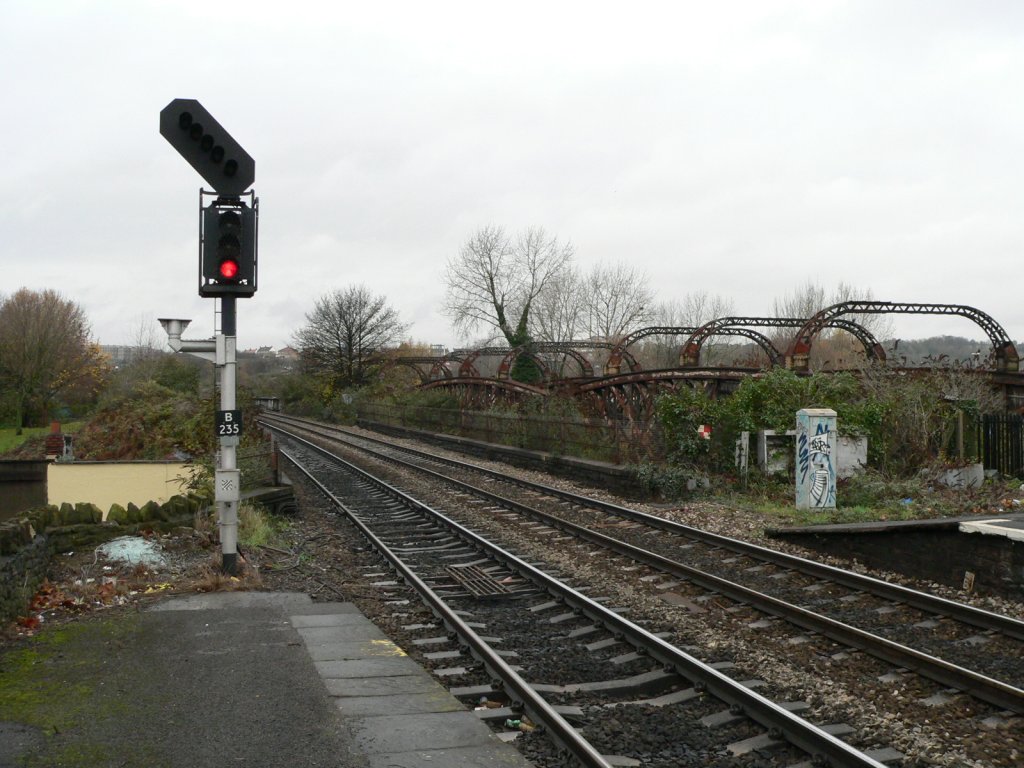 StapletonRoad-northend-02.jpg (159369 bytes)
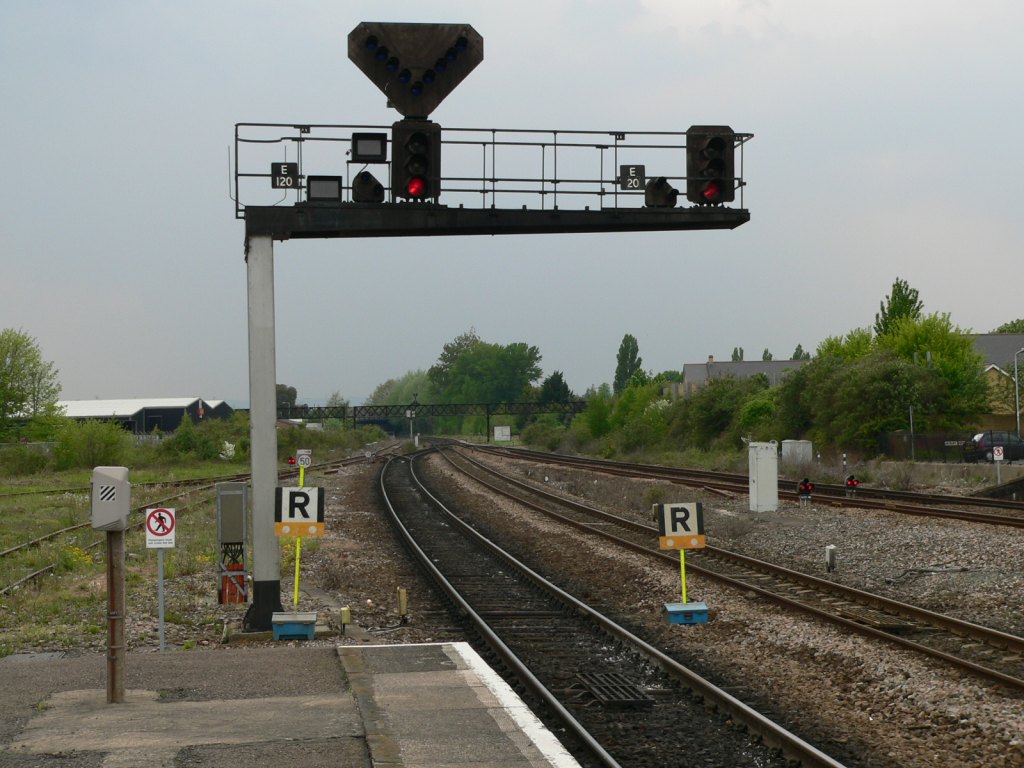 Tauntonsignals-R-boards-01.jpg (163116 bytes)
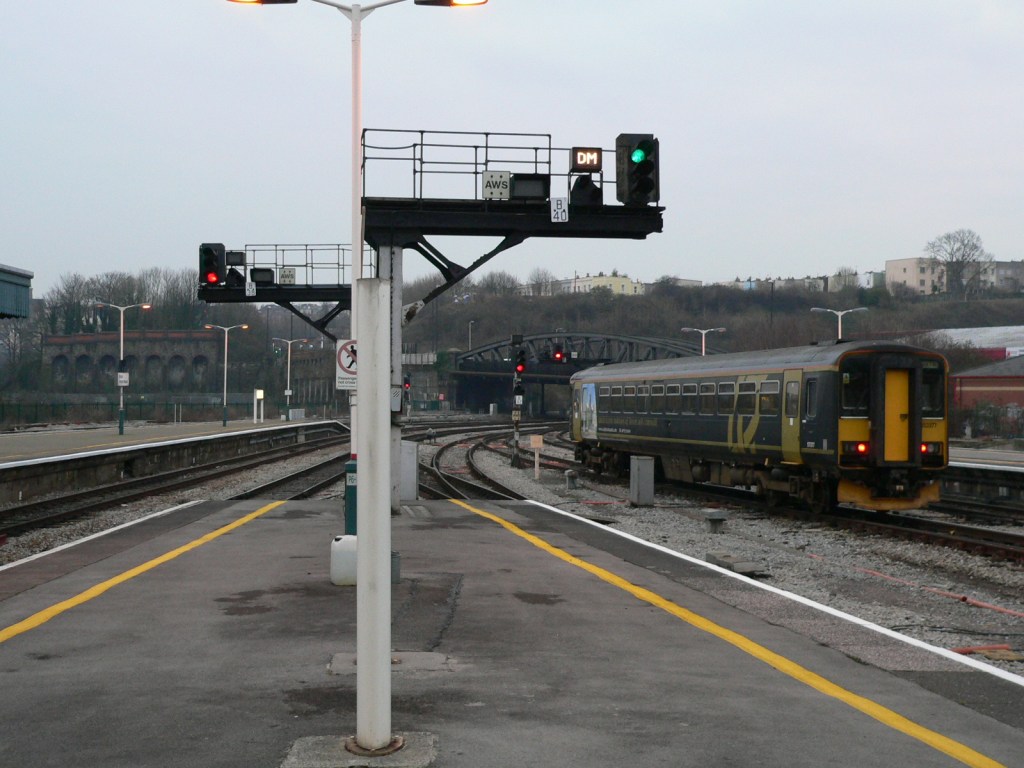 gb-BTM-signals+153377.jpg (163085 bytes)
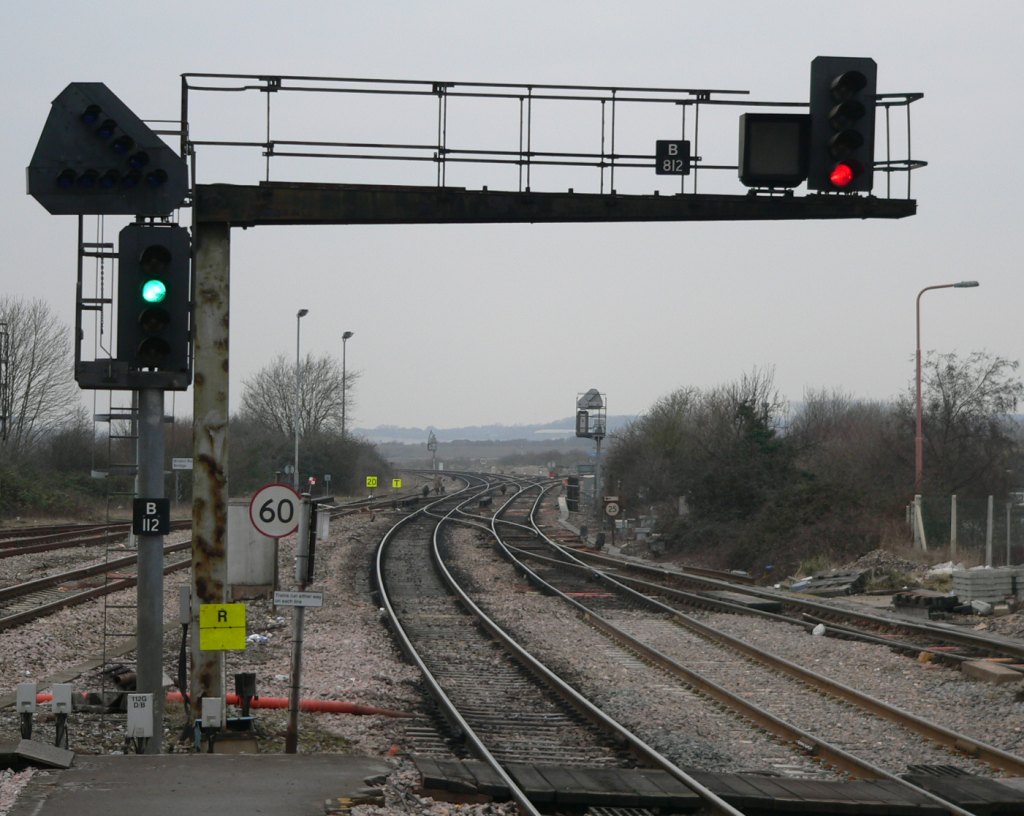 gb-BristolParkway-signalsB112+B812-01.jpg (162870 bytes)
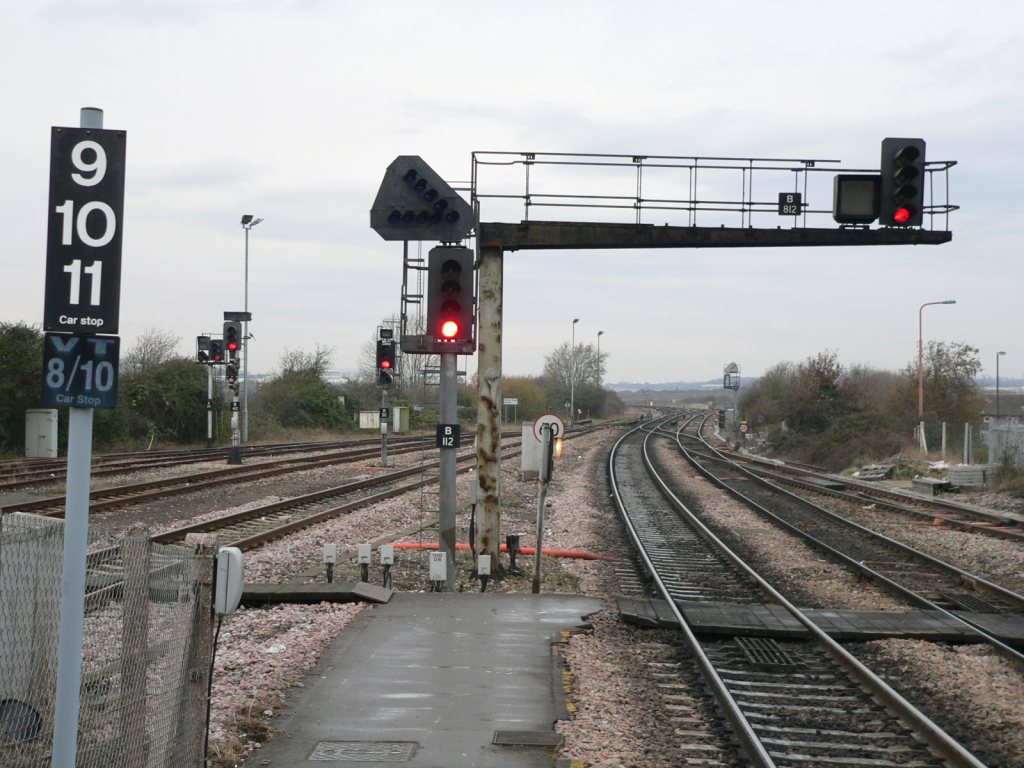 gb-BristolParkway-westendsignals-01.jpg (159511 bytes)
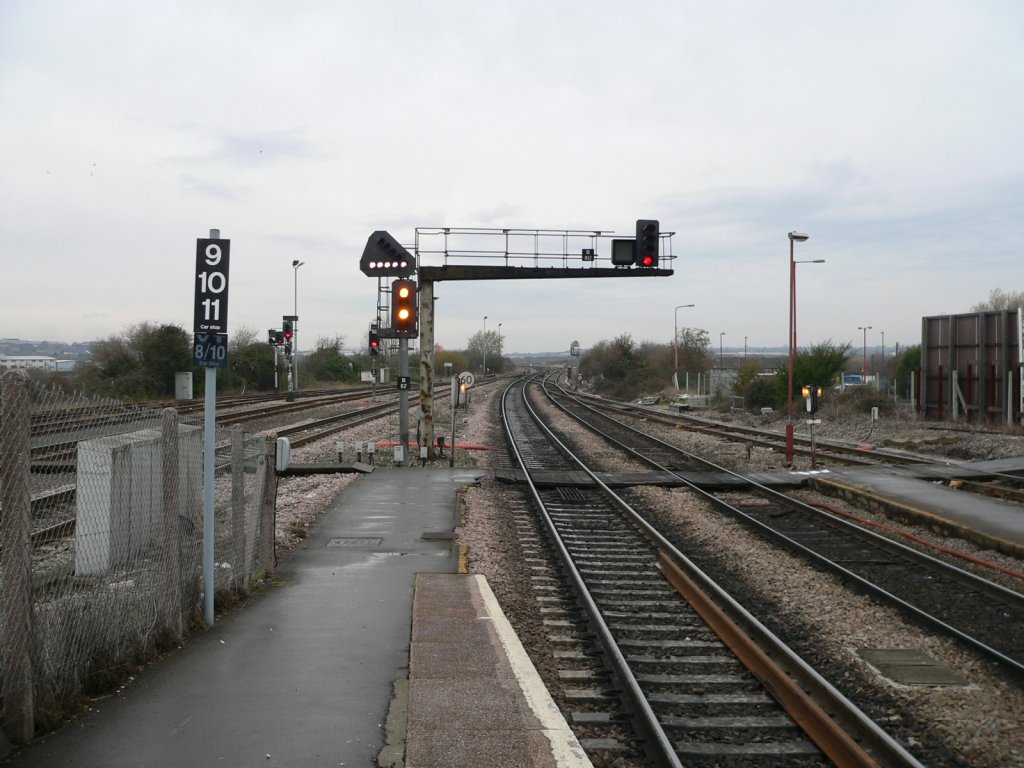 gb-BristolParkway-westendsignals-02.jpg (147741 bytes)
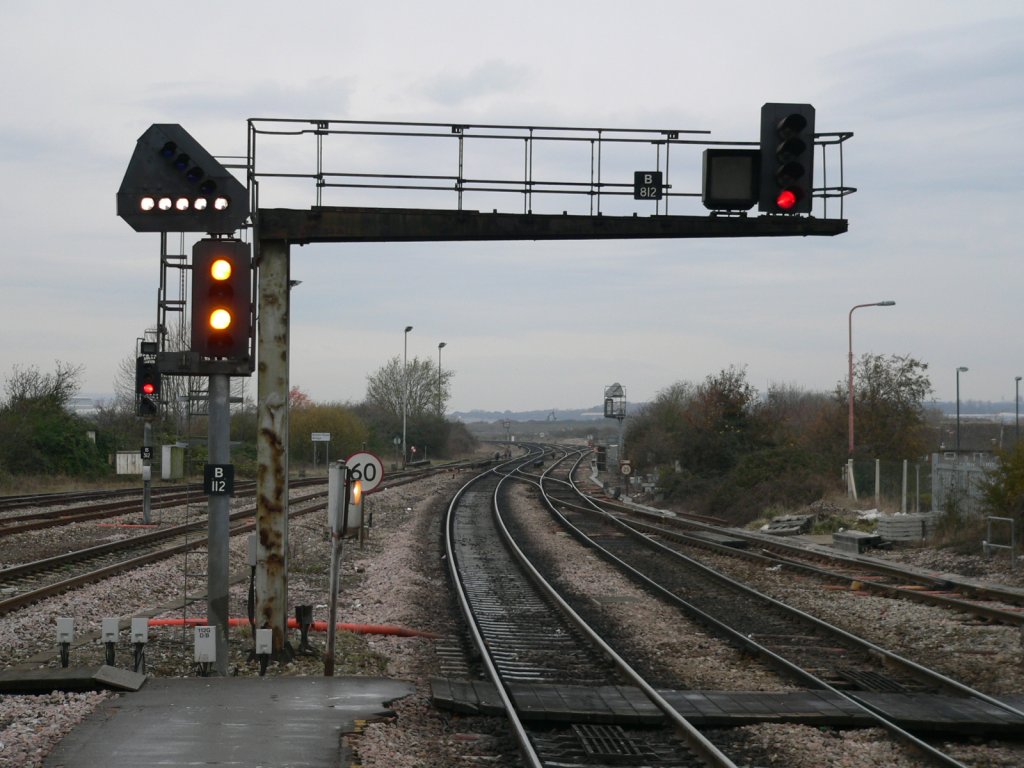 gb-BristolParkway-westendsignals-03.jpg (146719 bytes)
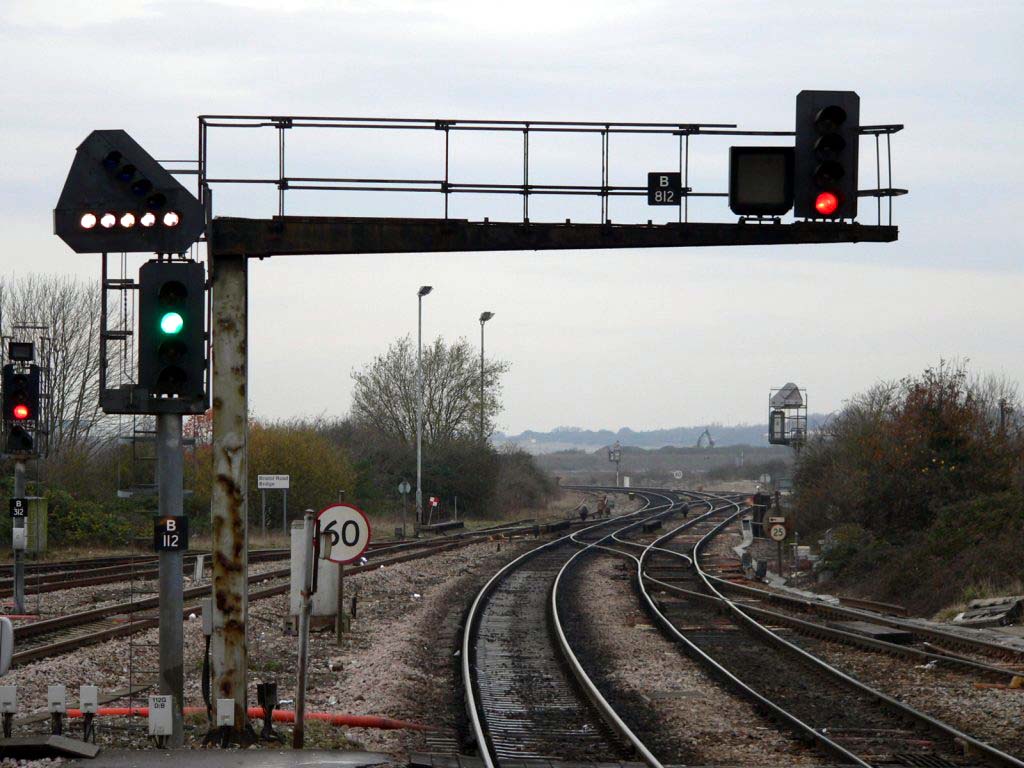 gb-BristolParkway-westendsignals-04.jpg (122885 bytes)
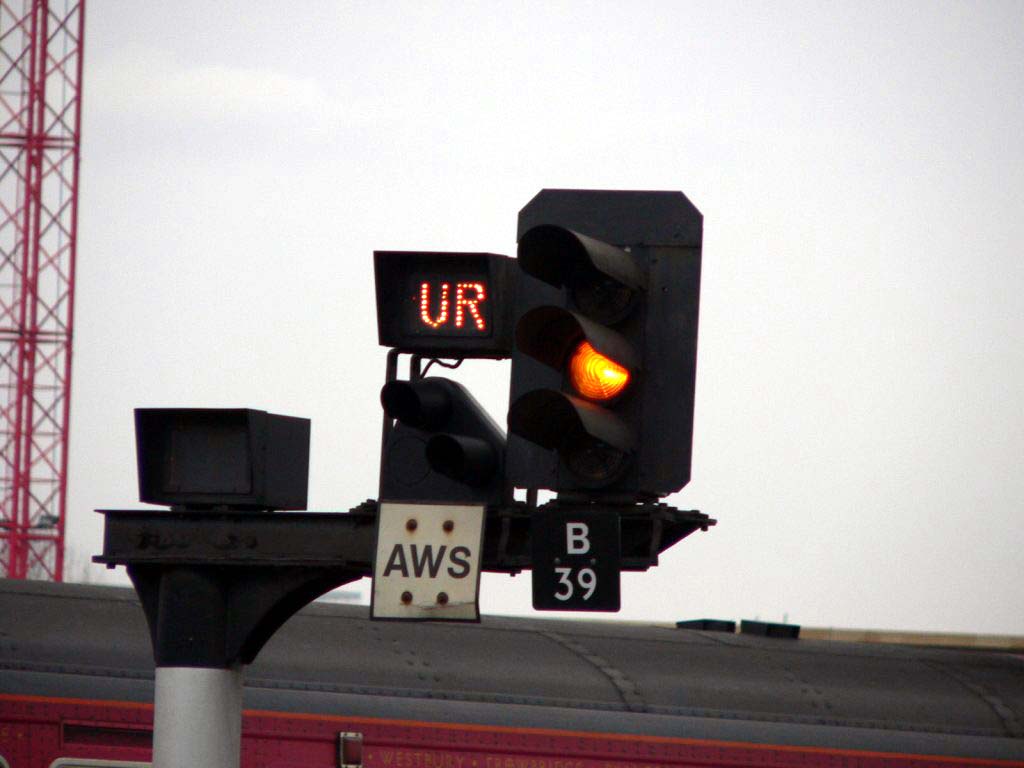 gb-BristolTMsignals-B39-amberUR.jpg (59986 bytes)
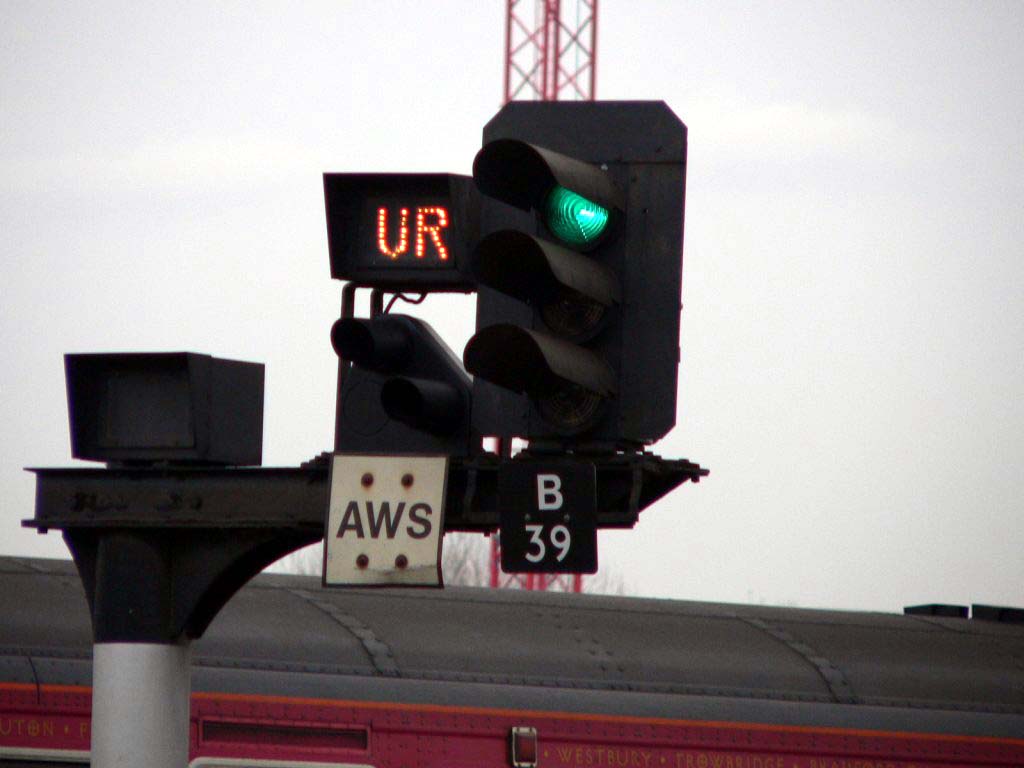 gb-BristolTMsignals-B39-greenUR.jpg (58291 bytes)
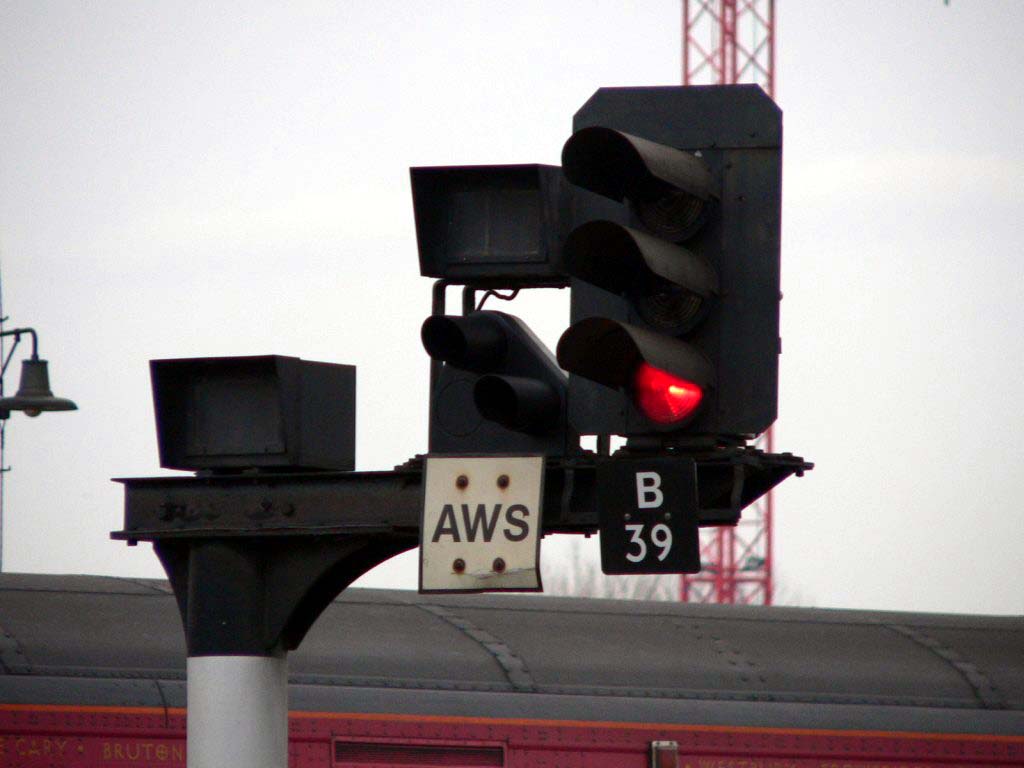 gb-BristolTMsignals-B39-red.jpg (61647 bytes)
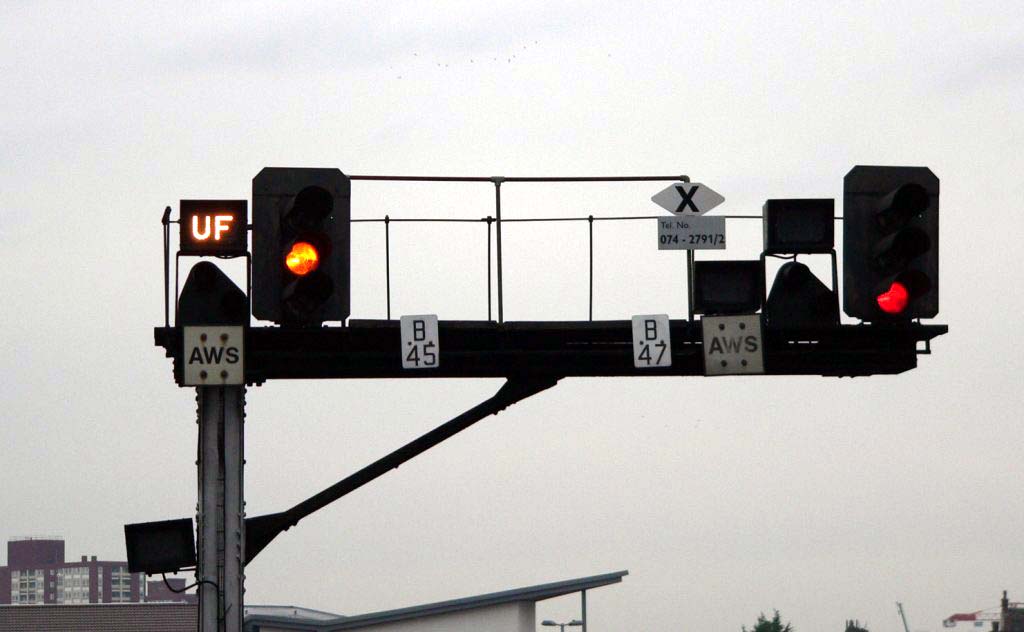 gb-BristolTMsignals-B45-amberUF+B47red.jpg (55942 bytes)
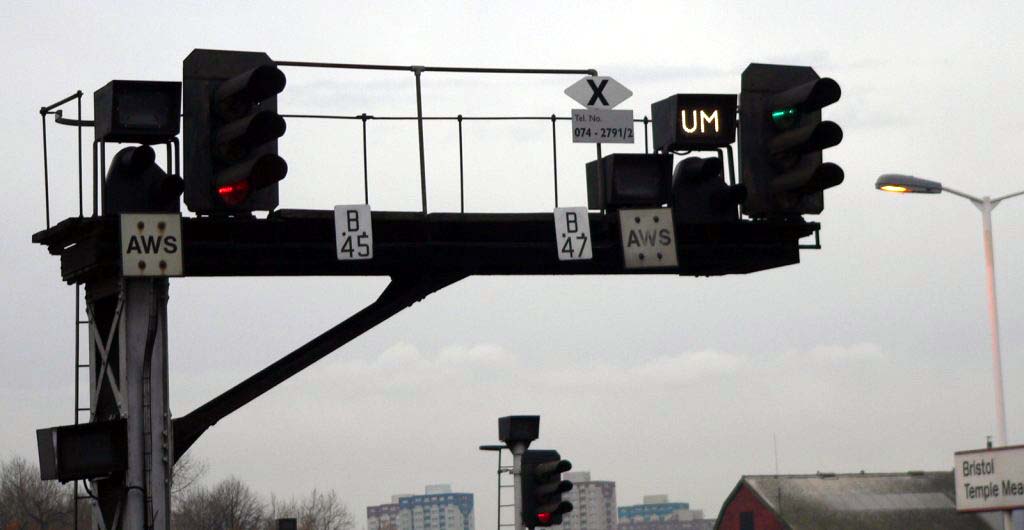 gb-BristolTMsignals-B45-red+B47greenUM.jpg (51355 bytes)
 gb-RoyalBorderBridge-ViewFromStation01.jpg (159720 bytes)
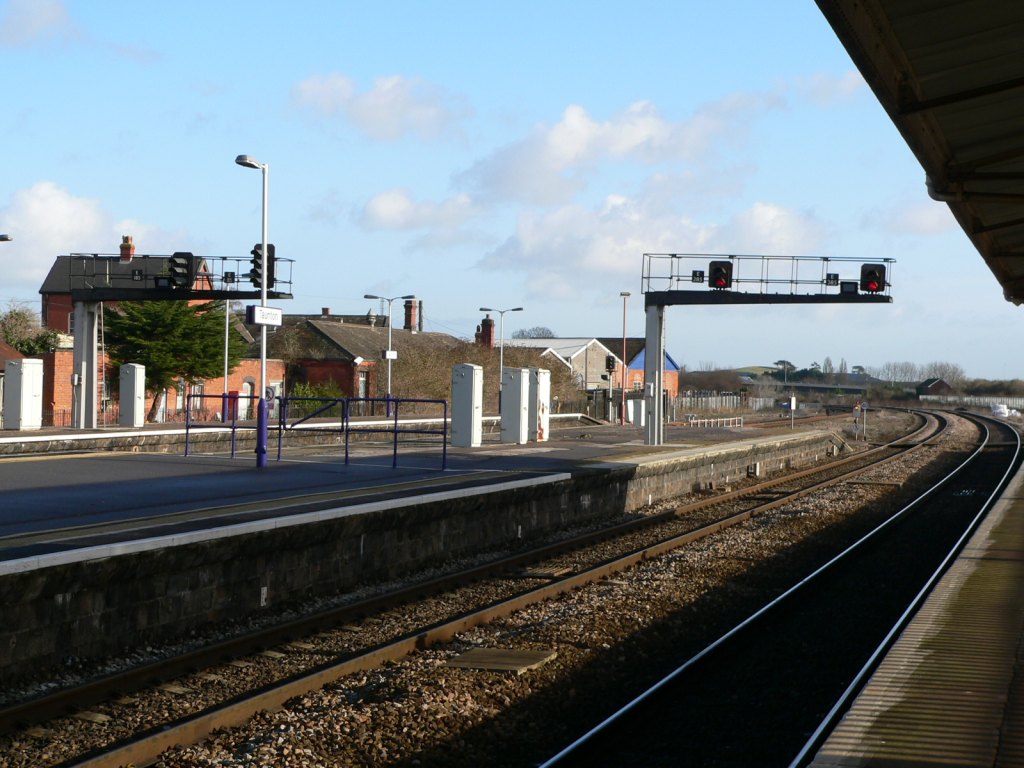 gb-Taunton-eastendsignals-01.jpg (163518 bytes)
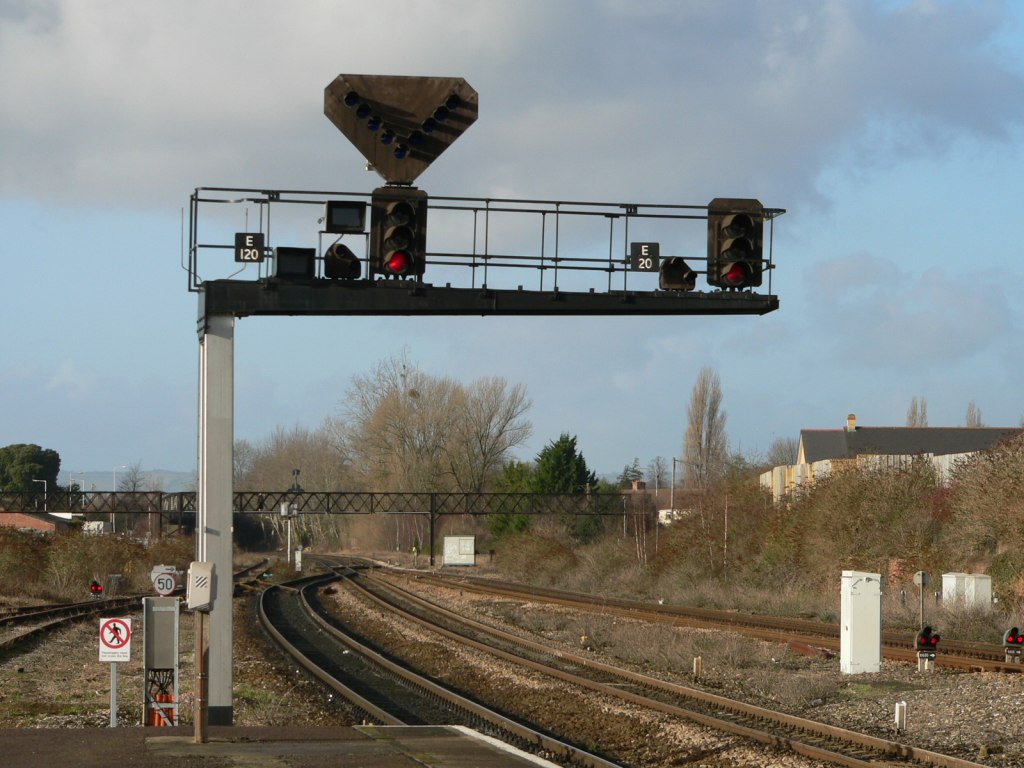 gb-Taunton-signals-E20+E120-01.jpg (161325 bytes)
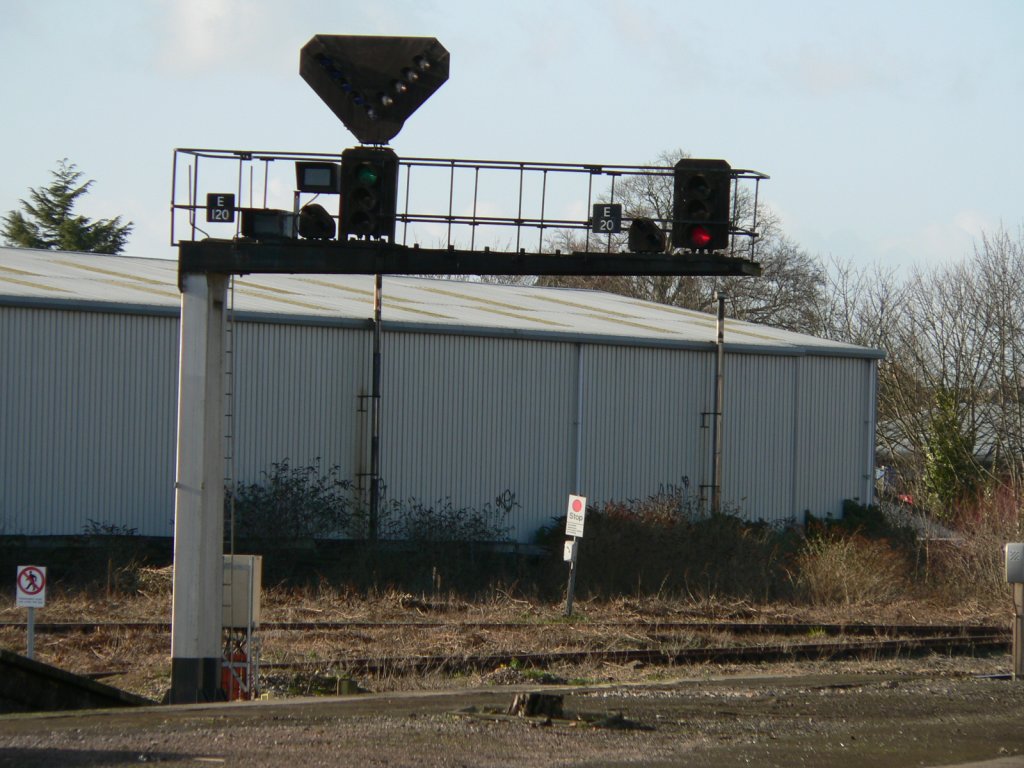 gb-Taunton-signals-E20+E120-02.jpg (159666 bytes)
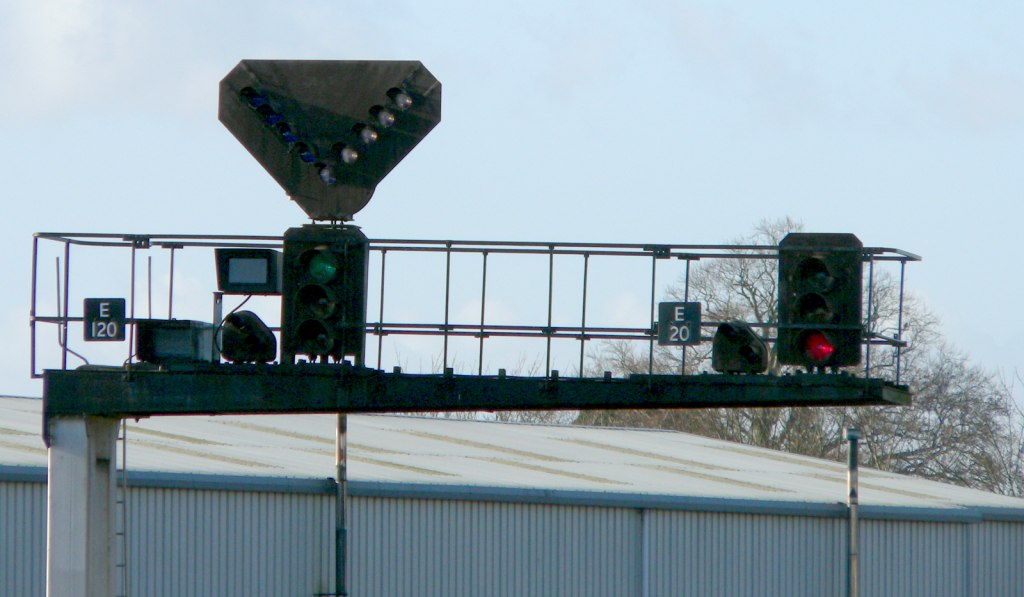 gb-Taunton-signals-E20+E120-03.jpg (106072 bytes)
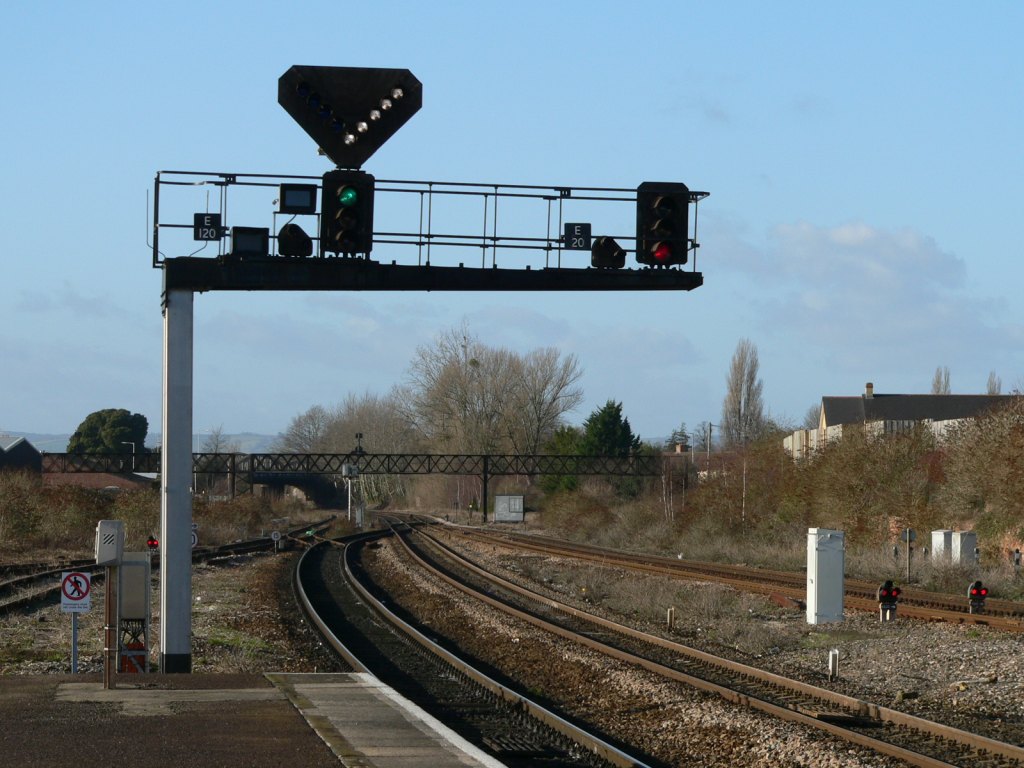 gb-Taunton-signals-E20+E120-04.jpg (163851 bytes)
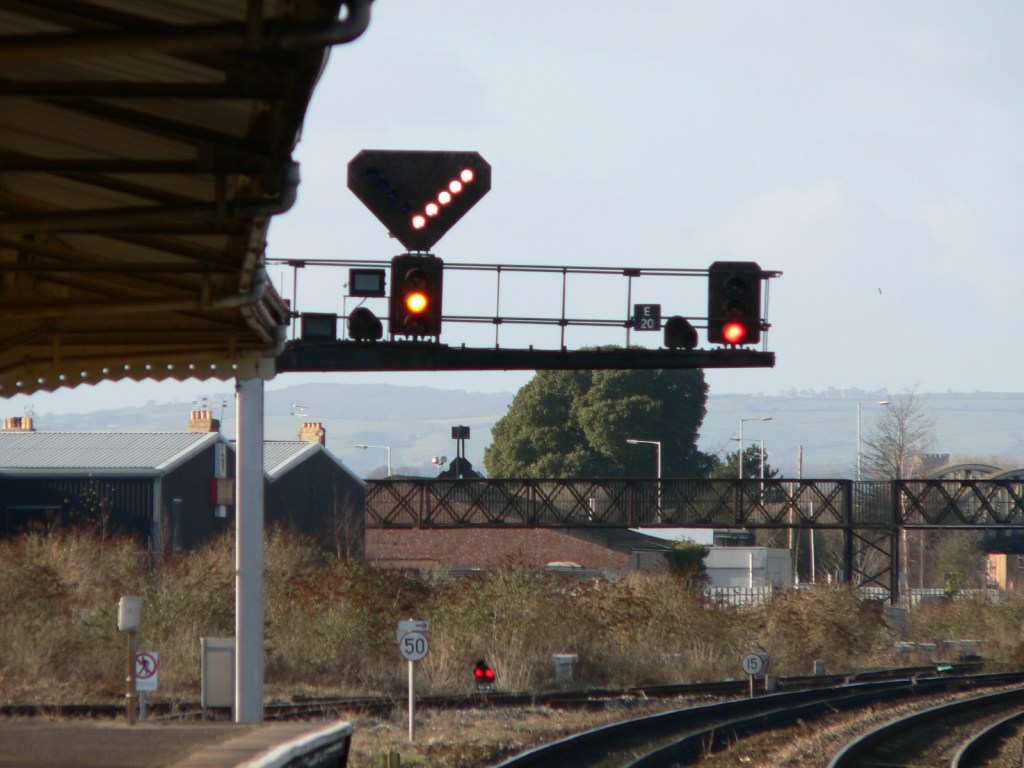 gb-Taunton-signals-E20+E120-05.jpg (150054 bytes)
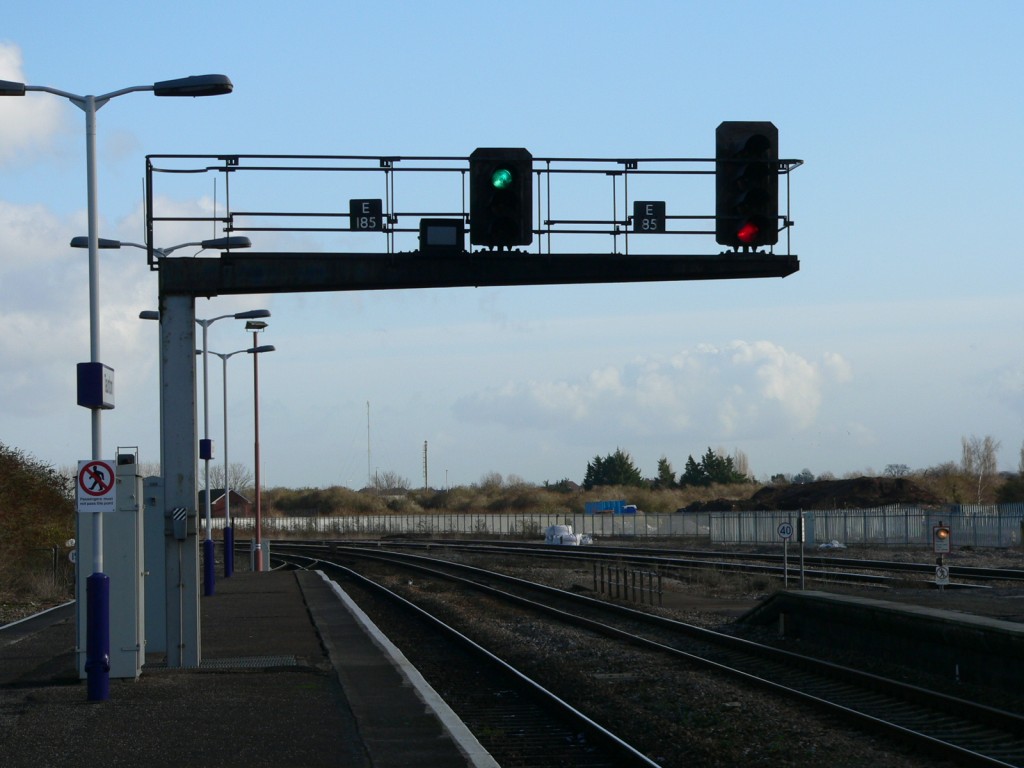 gb-Taunton-signals-E85+E185-01.jpg (142736 bytes)
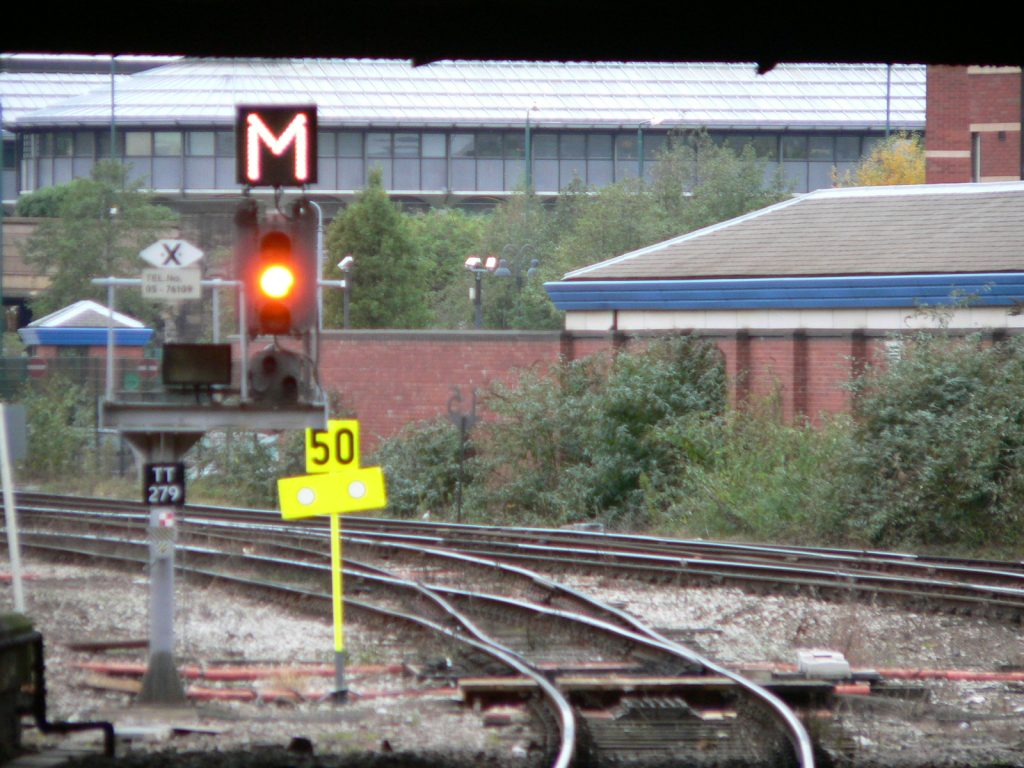 gb-signal-TT279.jpg (162879 bytes)
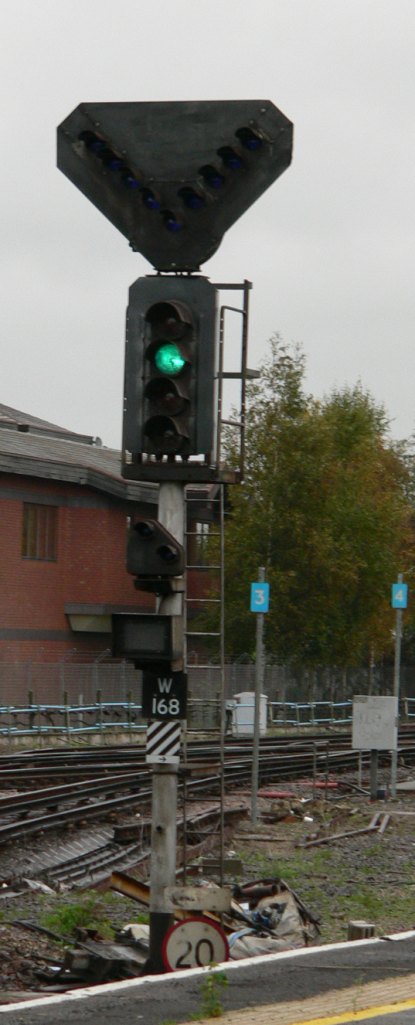 gb-signal-rabbitears.jpg (91358 bytes)
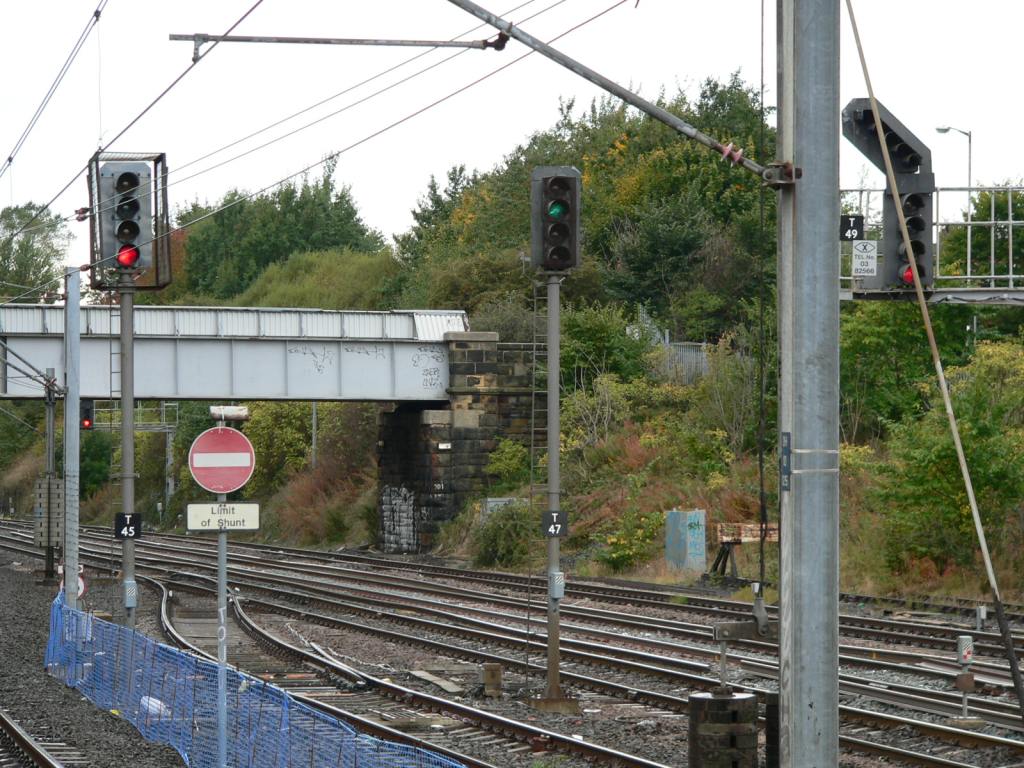 gb-signaling-pelaw-networkrail.jpg (165200 bytes)
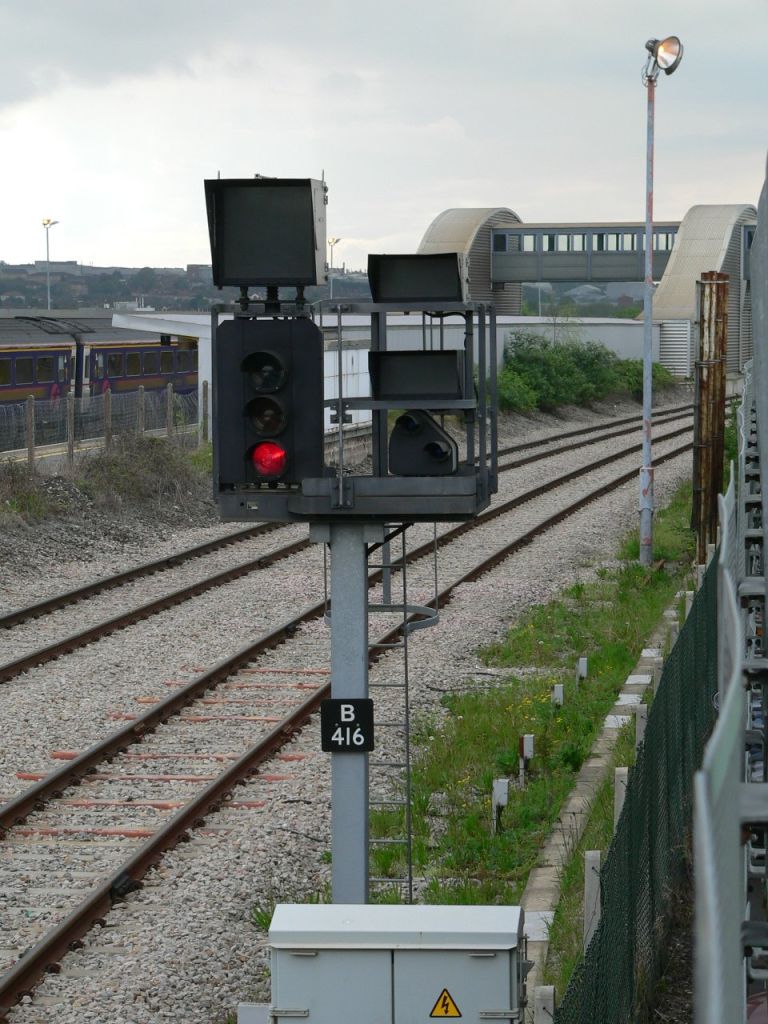 gb-signals-BristolParkway-northlines-01.jpg (159073 bytes)
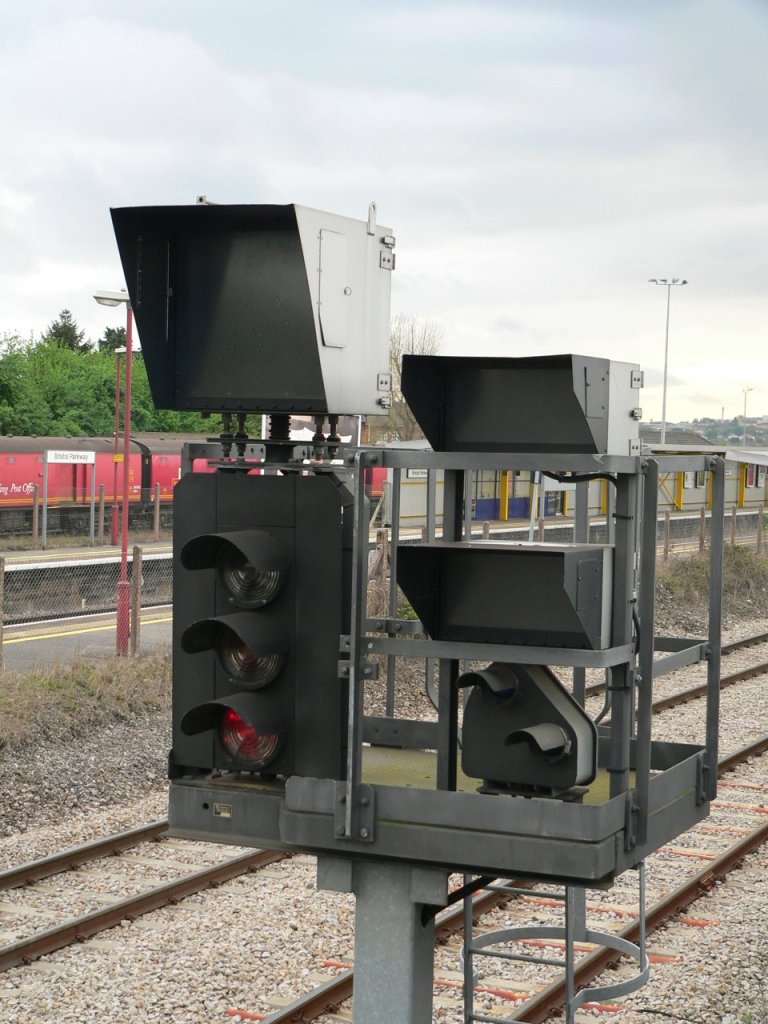 gb-signals-BristolParkway-northlines-02.jpg (160274 bytes)
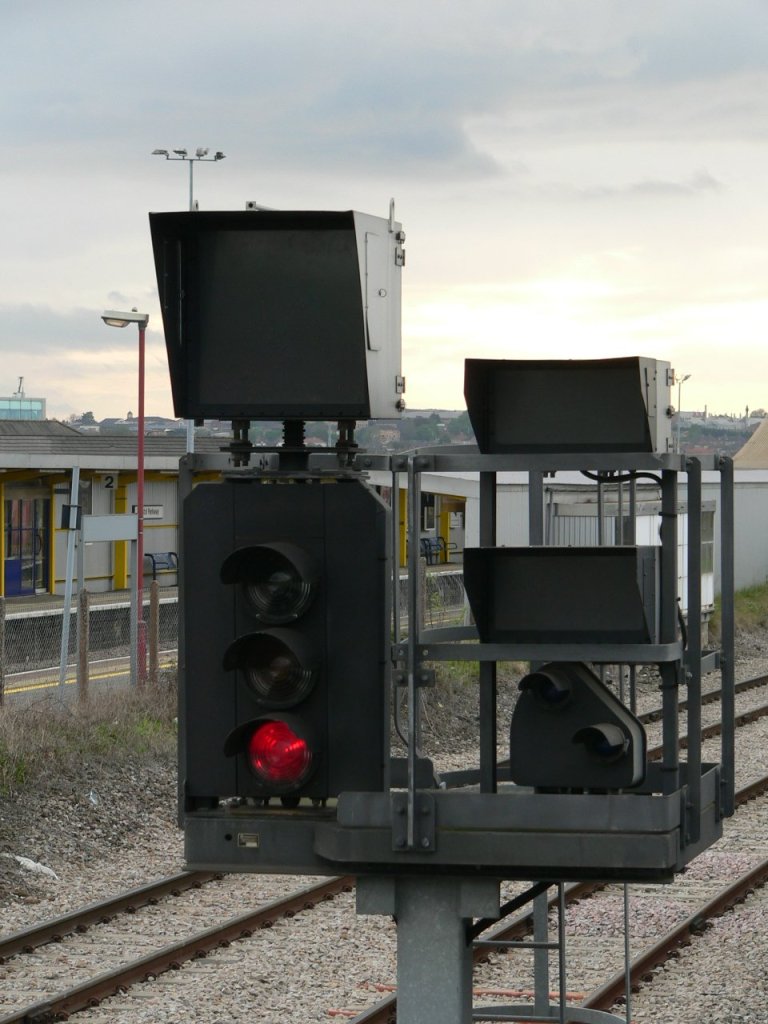 gb-signals-BristolParkway-northlines-03.jpg (136585 bytes)
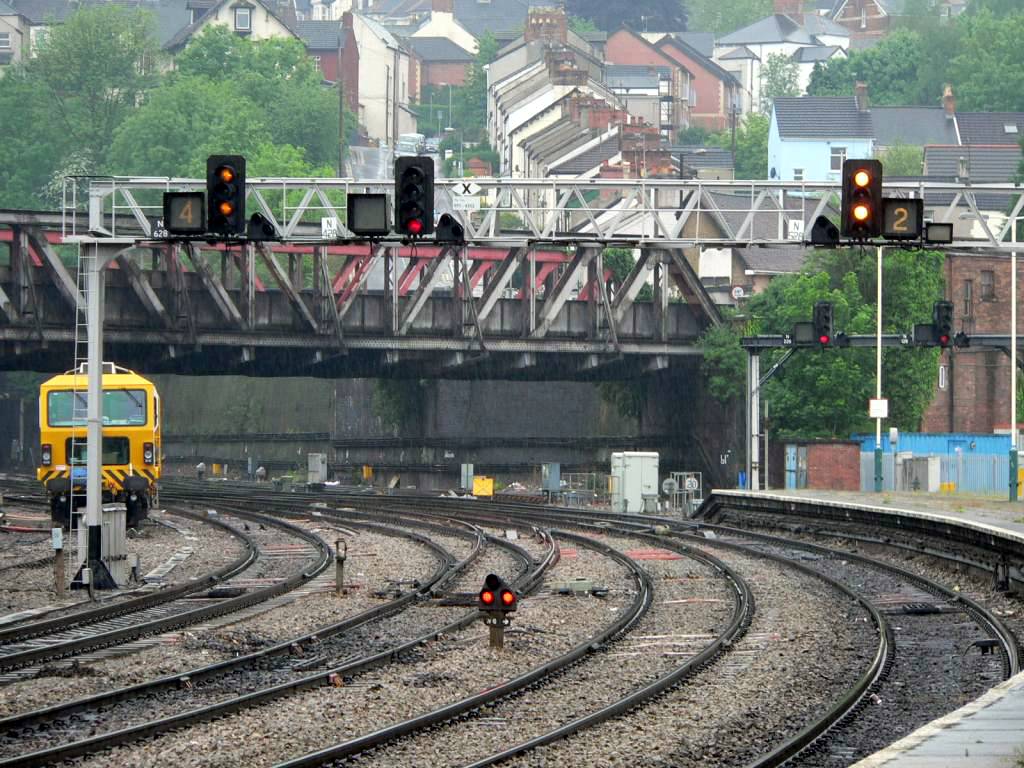 newport-signals428+528+628.jpg (153706 bytes)
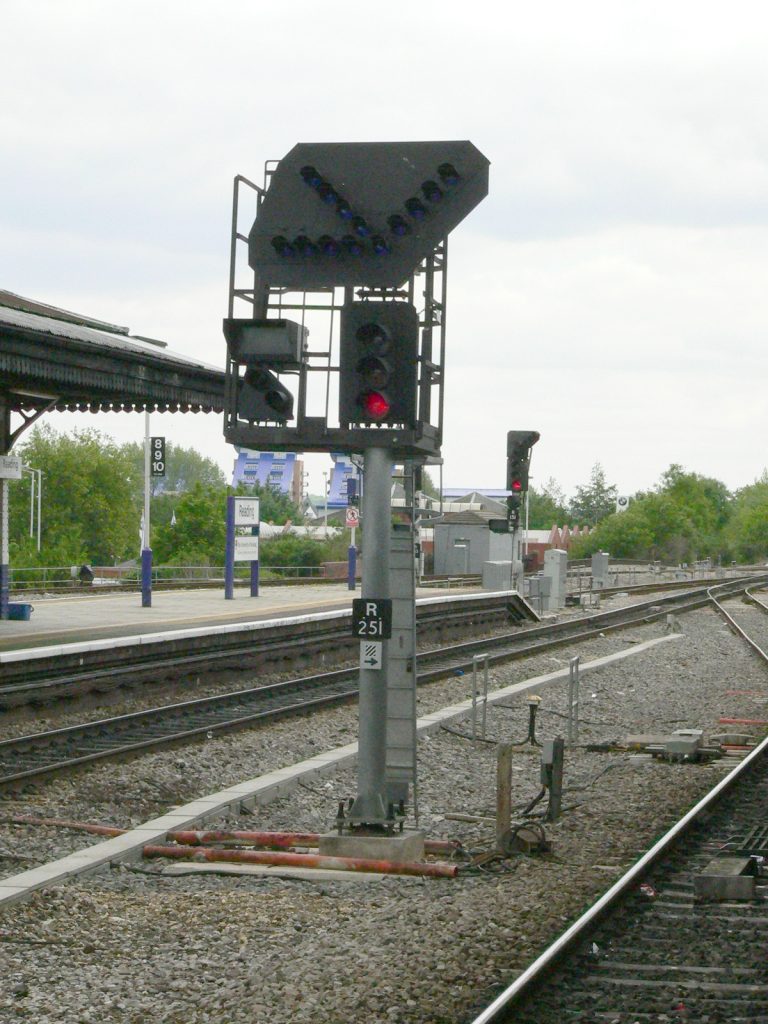 signal-R251.jpg (160144 bytes)
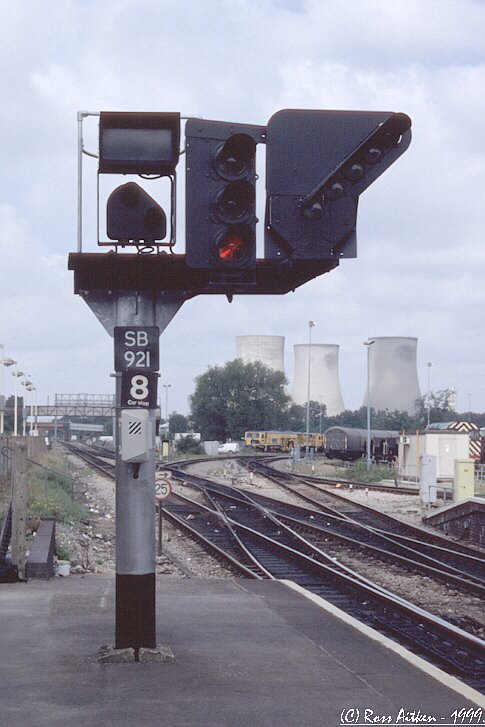 signal-S77.jpg (75697 bytes)
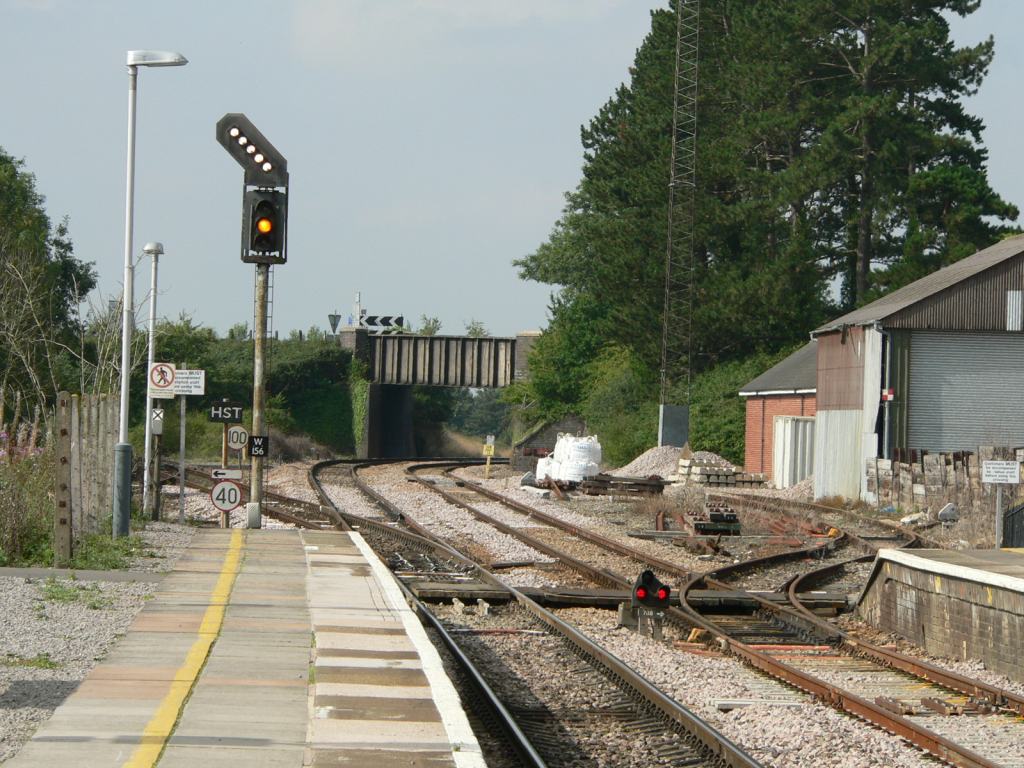 signal-W156-01.jpg (162487 bytes)
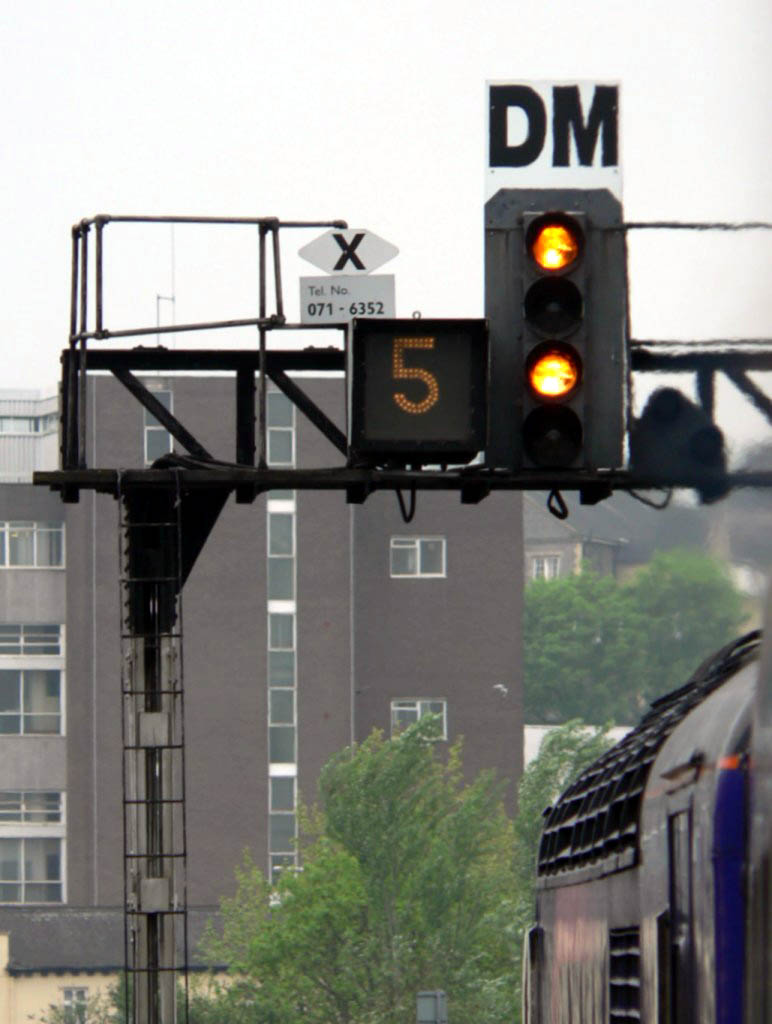 signal-route5.jpg (85025 bytes)
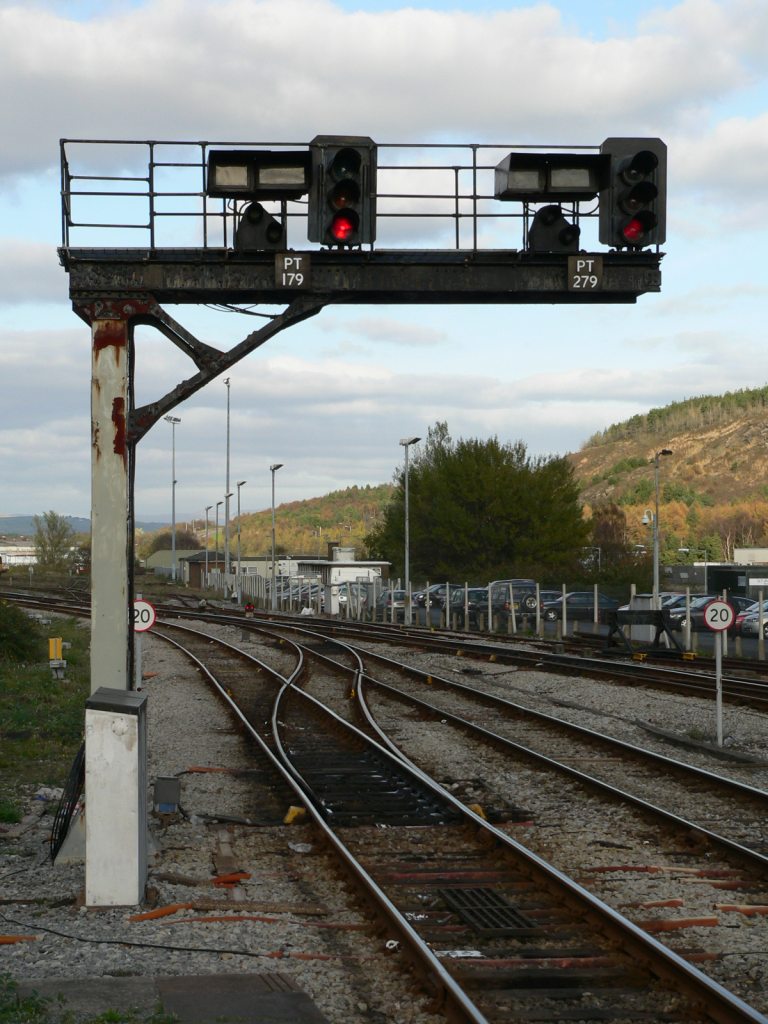 signalsPT179+PT279-01.jpg (160010 bytes)
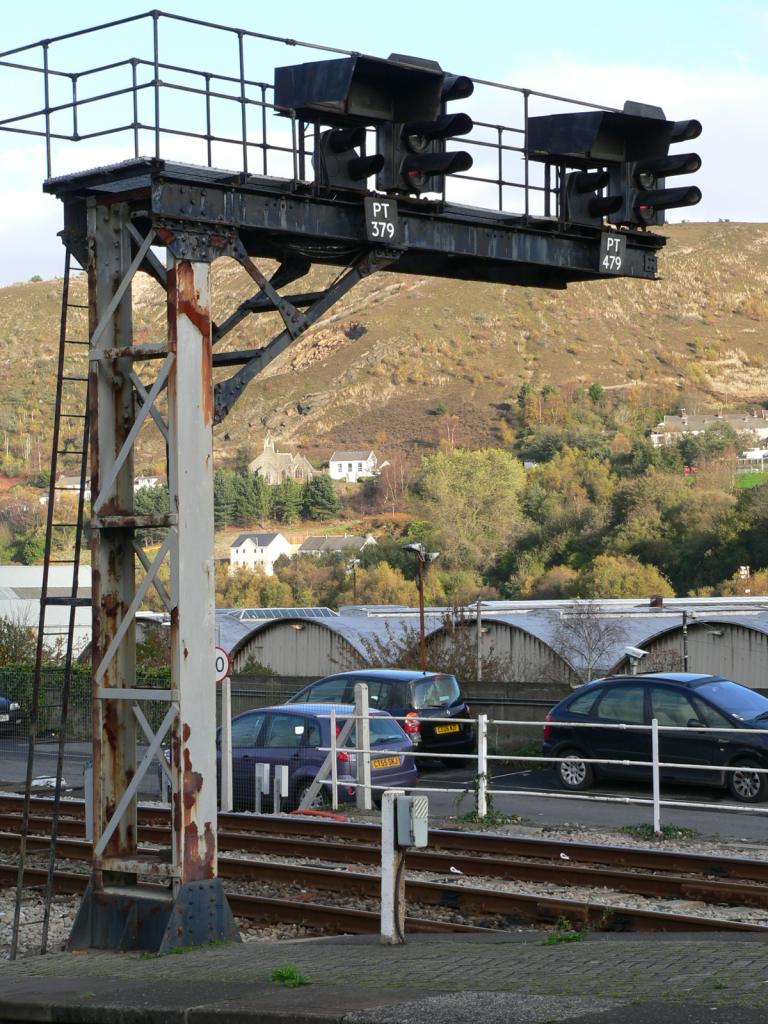 signalsPT379+PT479-01.jpg (164060 bytes)