 Deal_19oct02.jpg (142423 bytes)
|
The Railfaneurope.net Picture Gallery
Directory: /pix/gb/signalling/mechanical
Last update: Fri Oct 6 14:49:51 CEST 2017
|
|
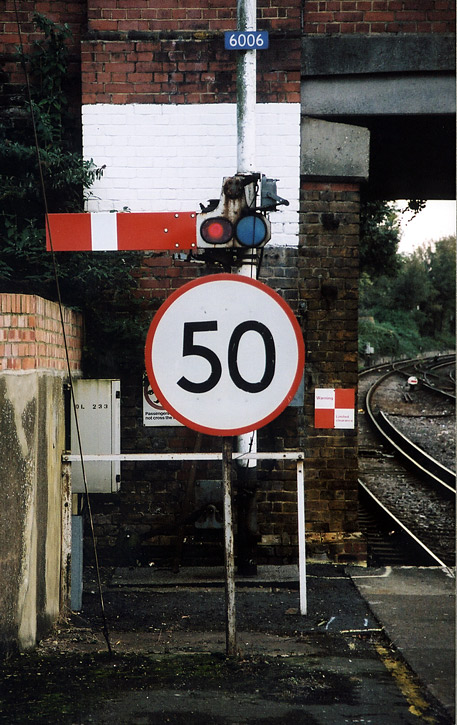
Semaphore signal situated at Deal (Dover bound platform). 19 October 2002.
Photo and copyright Wayland Smith (wa231_2000@yahoo.co.uk) |
|
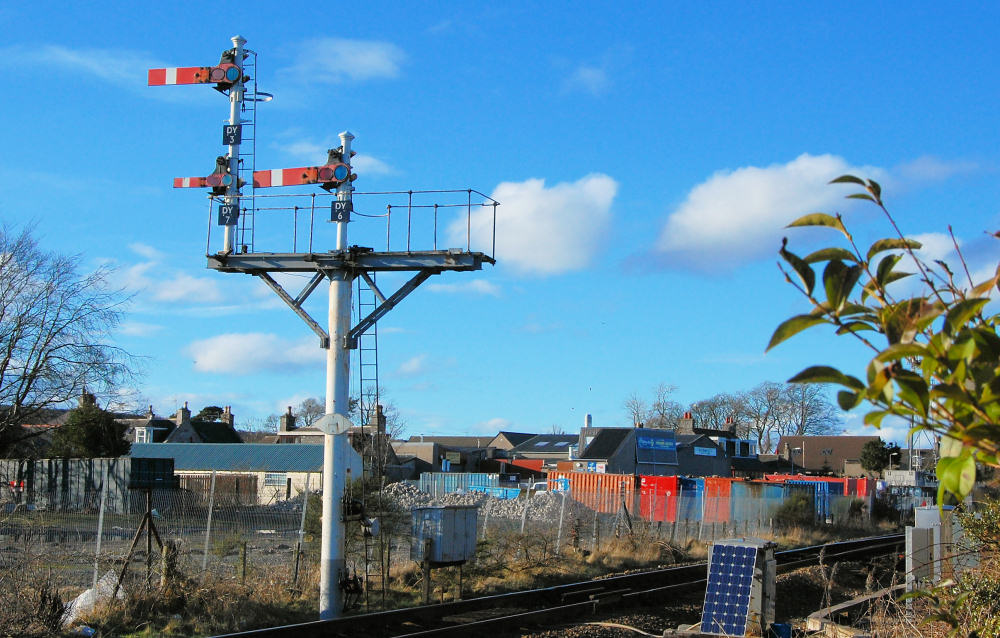
Scottish wire-and-chain semaphore signals for the 21st Century...
A splendid junction signal at Dyce, about 10 km north-east of Aberdeen (Scotland).
The taller left-hand arm controls the main (highest speed) route, and the
lower arm on the central post controls a diverging route to the right.
There was once another arm to
control a second diverging route on the right-hand side. Below the main arm
on the left-hand post is a minature "calling on" arm for controlling shunting
or low speed manoeuvres. I do not believe it has been used for quite a few years...
The white diamond shape half way down the main post indicates that track circuits
are in operation and the driver does not need to leave the train to inform the
signalman of the train's presence.
These fine signals will hopefully be around for many years to come, as the signal box
was recently refurbished. Note the south-facing solar panels on the right-hand
side of the track to power the signal lights.
For a fantastic web site on British signalling, visit http://www.signalbox.org
Photo by Bill Harrison (bill.harrison@dsl.pipex.com) 3 March 2007 |
|
Scottish wire-and-chain semaphore signals for the 21st Century...
A close up of the junction signal at Dyce, about 10 km north-east of
Aberdeen (Scotland). Note the individual signal numbers. DY3 controls
the main (highest speed) route, and DY6 a diverging route to the right.
DY7 is a "calling on" arm for shunting manoeuvres. These signals
were installed around 1970 and are stil going strong; the signal box that
controls them was built in 1880!
Photo by Bill Harrison (bill.harrison@dsl.pipex.com) 3 March 2007 |
|
Spot the signal! The downside of semaphore signals is shown here,
in this view down the track towards Dyce station from the north.
Lineside clutter in urban areas makes semaphore arms hard to see. At night,
the feeble illumination of traditional signals makes their observation
a real challenge...
Photo by Bill Harrison (bill.harrison@dsl.pipex.com) 3 March 2007 |
|
The signal giving access to the platforms for eastbound Swanage Railway trains at Harmans Cross sation.
Photo by Chris McKenna 05/08/2006. |
|
The starting signal at the the western end of the eastbound platform at Harmans Cross station on the Swanage Railway.
Photo by Chris McKenna 05/08/2006. |
| Par_(2)_Down_Bracket_Signals_30.7.2017: just outside Par station, on the Down approach (i.e. from the east), this bracket signal controls access to the main station platform and the Newquay Branch platform; there is also a disc shunting signal. roger.griffiths@hotmail.com |
| Par_(3)_Up_Home_Signals_from_Newquay_Branch_30.7.2017: this signal controls access to the branch platform at Par from the Newquay Branch; there are also arm and disc shunting signals. roger.griffiths@hotmail.com |
| Par_(4)_Down_Outer_Home_Signal_to_Newquay_Branch_30.7.2017: this signal controls access from the branch platform at Par to the next signal box, at St.Blazey, on the Newquay Branch. roger.griffiths@hotmail.com |
| St.Blazey_(2)_Station_starter_Signals_30.7.2017: the platforms of the closed St.Blazey station are seen, in the direction toward Newquay; though no longer used for passengers, each platform has a starter signal. Note the netted tablet catcher at right, for capturing the single line token from trains coming from Newquay; the single track terminates just beyond the distant platform ends. roger.griffiths@hotmail.com |
|
The Down starter signal (GWR designed) which allows trains to leave
Abergavenny Station southbound to Newport, 12 June 1990. View from
footbridge. Photo and scan copyright Pat & David Othen, Dartmouth NS Canada (dothen@ra.isisnet.com) |
|
A semaphore signal viewed from the rear of Coach B on a GNER Intercity 125 on a service along the Tyne Valley Line between Newcastle and Carlisle.
Photo by Chris McKenna 08/10/2005. |
|
A semaphore signal viewed from the rear of Coach B on a GNER Intercity 125 on a service along the Tyne Valley Line between Newcastle and Carlisle. This signal is protecting a level crossing adjacent to Wilton signal box.
Photo by Chris McKenna 08/10/2005. |
|
A rather strange picture of a GNER class 43 HST and a semaphore signal taken at speed - unfortunately I completely failed to keep the camera still for the duration of the exposure!
Photo by Chris McKenna 08/10/2005. |
|
Fort William in western Scotland is one of the locations on the rail network where semaphore signaling is still very much the norm. This photo shows signal FW6, the sign reads "End Of Radio Token Working"
Photo by Chris McKenna 16/06/2005. |
|
Fort William in western Scotland is one of the locations on the rail network where semaphore signaling is still very much the norm. This photo shows signal FW6, the sign reads "End Of Radio Token Working"
Photo by Chris McKenna 16/06/2005. |
|
Fort William in western Scotland is one of the locations on the rail network where semaphore signaling is still very much the norm.
Photo by Chris McKenna 16/06/2005. |
|
Lostwithiel in Cornwall, ex-GWR junction signal. The left signal is for the Fowey branch and the right is for the mainline to Penzance. Photographed on Thursday, May 8th, 2008.
Photo by Michael Taylor, Binbrook, Ontario, Canada. (michael@einbahn.org) Website www.EinBahn.org |
|
Lostwithiel in Cornwall. ex-GWR starting signal for trains heading towards Plymouth and London. Photographed on Thursday, May 8th, 2008.
Photo by Michael Taylor, Binbrook, Ontario, Canada. (michael@einbahn.org) Website www.EinBahn.org |
|
A semaphore signal at the eastern end of the Great Eastern Railway Museum platform at North Woolwich railway station in east London.
Photo by Chris McKenna 09/12/2006. |
|
West end of the CTRL Medway Viaduct seen from Platform 1 at Cuxton Station, on the Strood-Maidstone West-Paddock Wood line
Two worlds apart... CTRL Domestic services may extend from Gravesend to Maidstone West, using this line, but that will probably require some investment... 16th September 2003. P.L.Guillemin (plguillemin@yahoo.fr) |
|
Platform starting signals and signalbox, Great Yarmouth, Norfolk. The line diverges beyond the overbridge to head towards Norwich via Acle or Reedham, hence the route indicators below the semaphore arms. These are a relatively modern addition; originally there was a separate junction signalbox, and route indication would have been given by that box's signals. Saturday 17/08/2007. Photo by Colin Scott-Morton (colin.scottmorton@btinternet.com) |
 GB_Dyce_signal.jpg (146184 bytes)
 GB_Dyce_signal_close-up.jpg (135607 bytes)
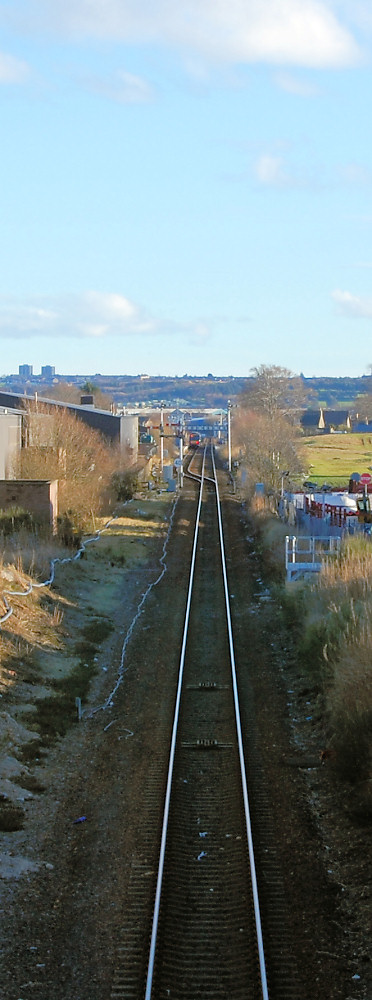 GB_Dyce_spot_signal.jpg (114898 bytes)
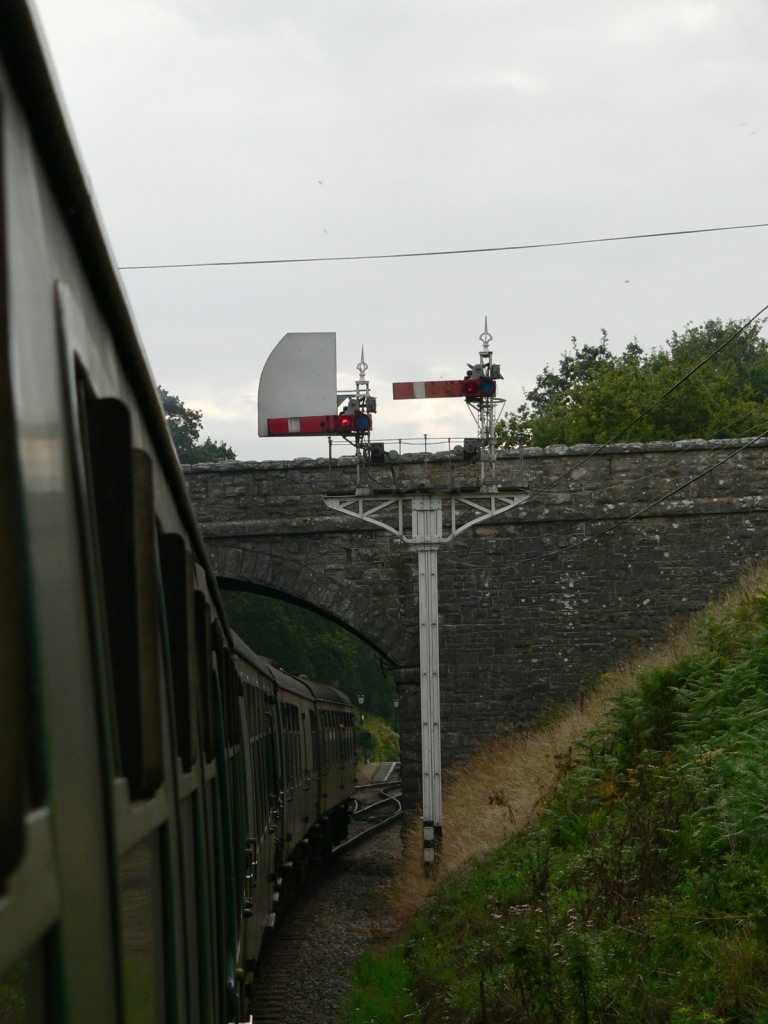 HarmansCross-eastboundentrysignal-01.jpg (160647 bytes)
 HarmansCross-eastboundsignal-01.jpg (162045 bytes)
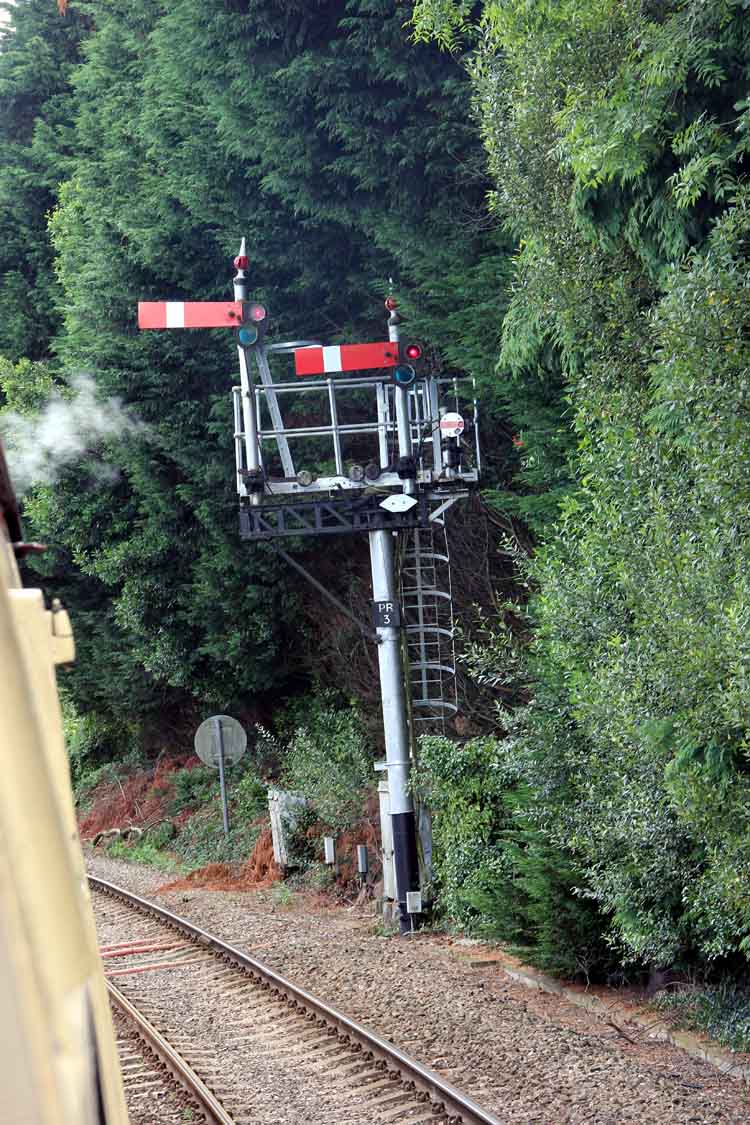 Par__2__Down_Bracket_Signals_30_7_2017.jpg (156519 bytes)
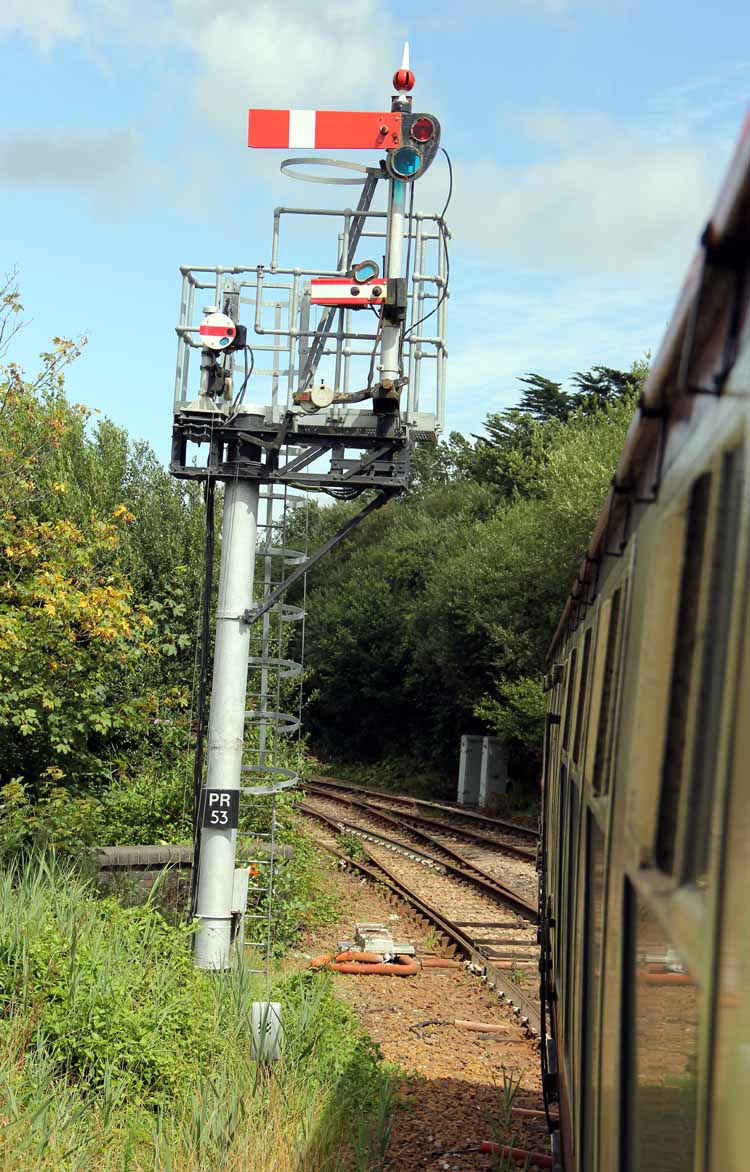 Par__3__Up_home_signal_from_Newquay_Branch_30_7_2017.jpg (159330 bytes)
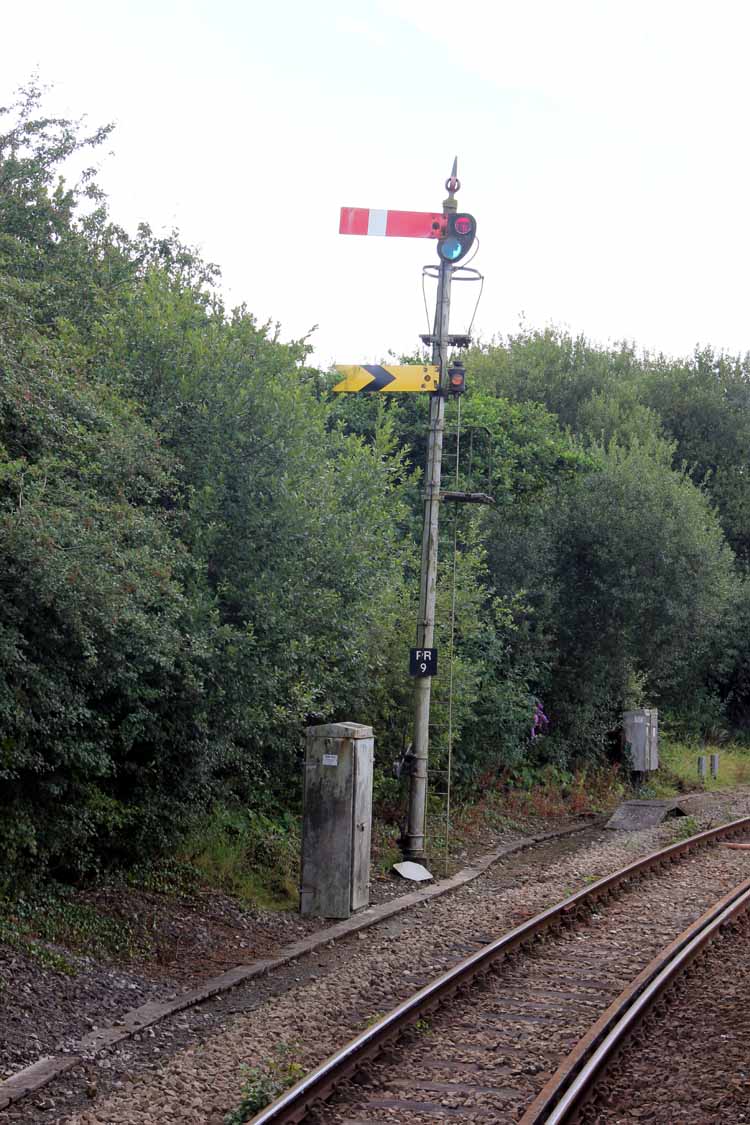 Par__4__Down_outer_home_signal_to-Newquay_Branch_30_7_2017.jpg (144721 bytes)
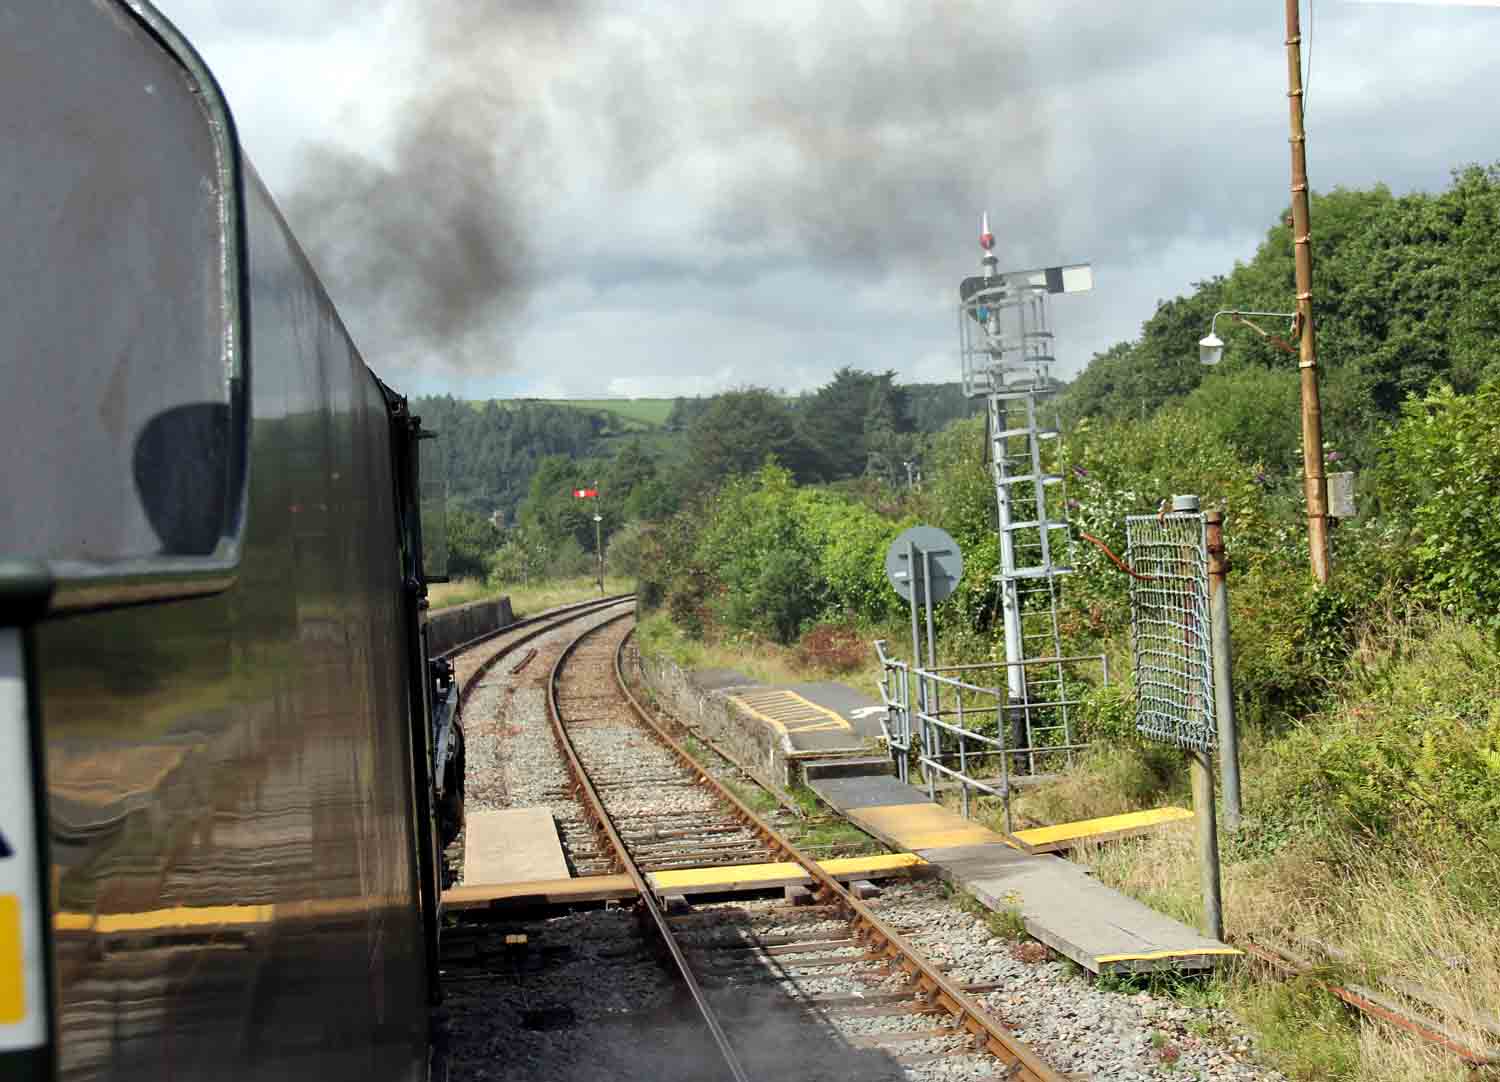 St_Blazey__2__Station_starter_signals_30_7_2017.jpg (122246 bytes)
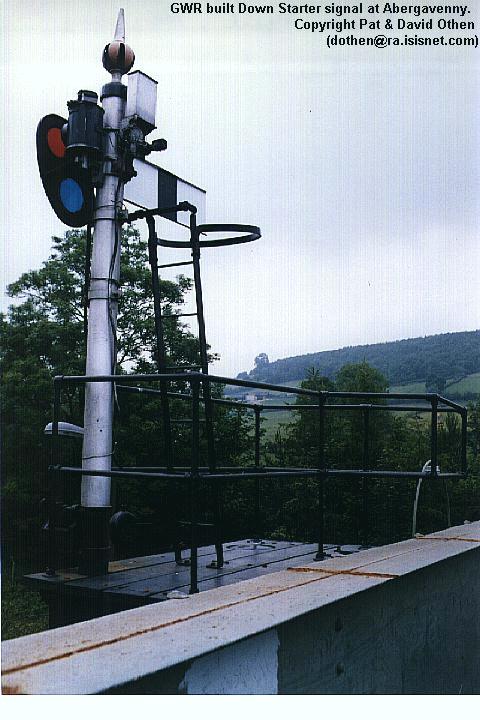 abdssig.jpg (65900 bytes)
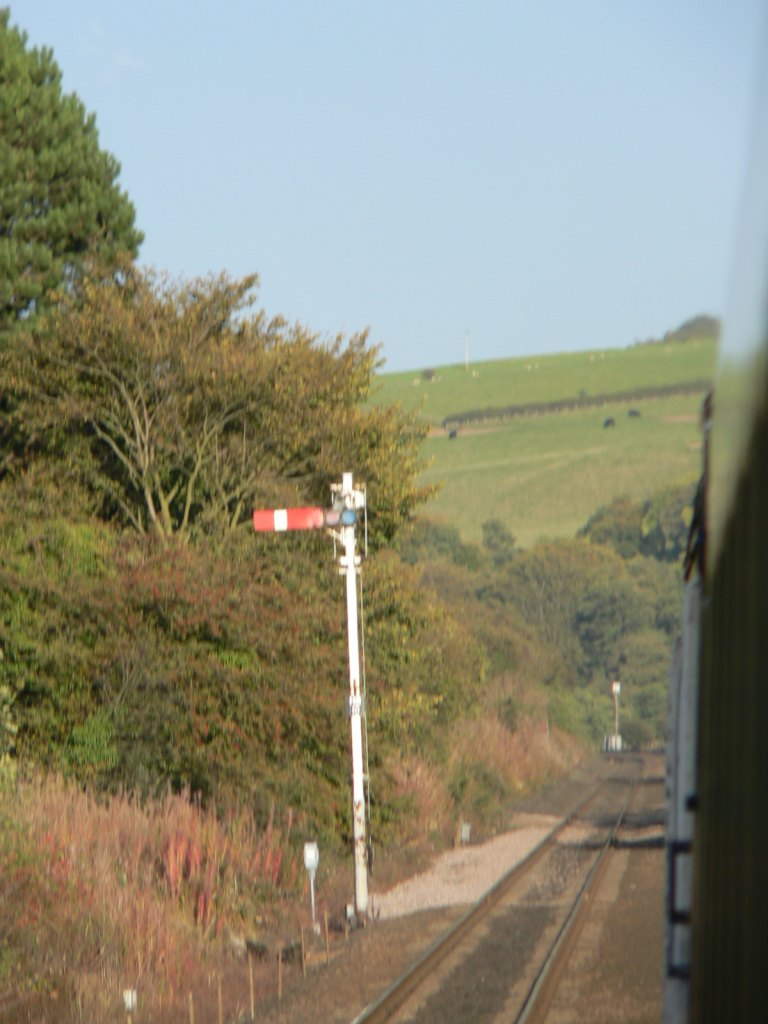 gb-TyneValleyLine-21-semaphore-signal.jpg (123455 bytes)
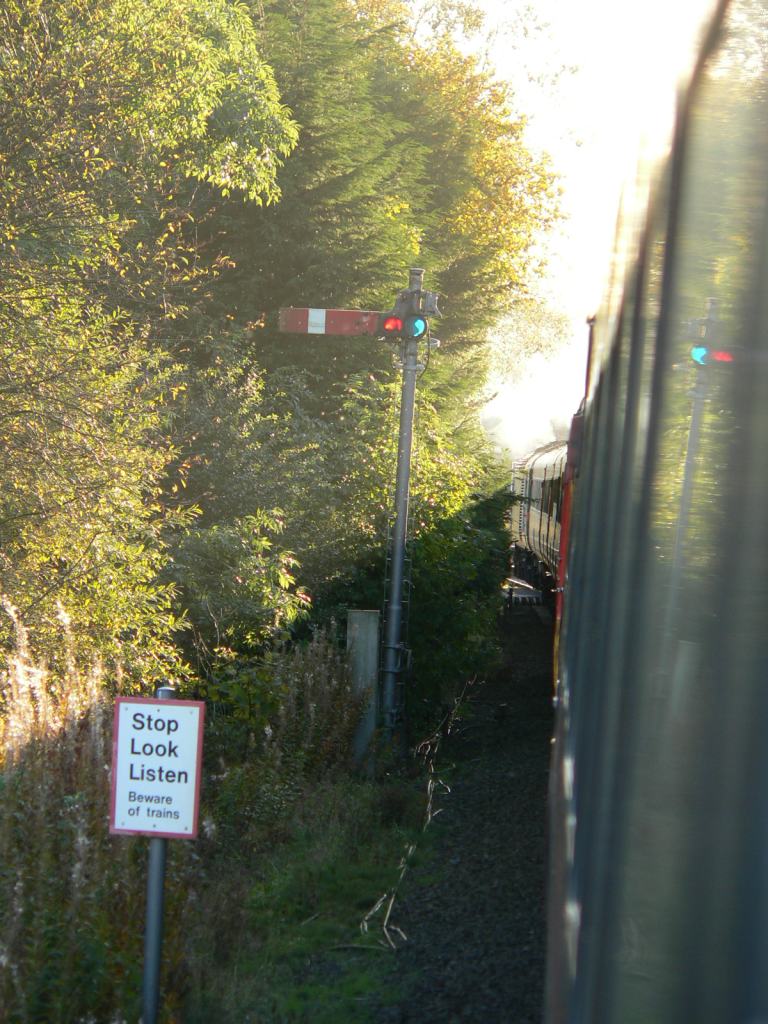 gb-TyneValleyLine-23-semaphore-signal.jpg (162994 bytes)
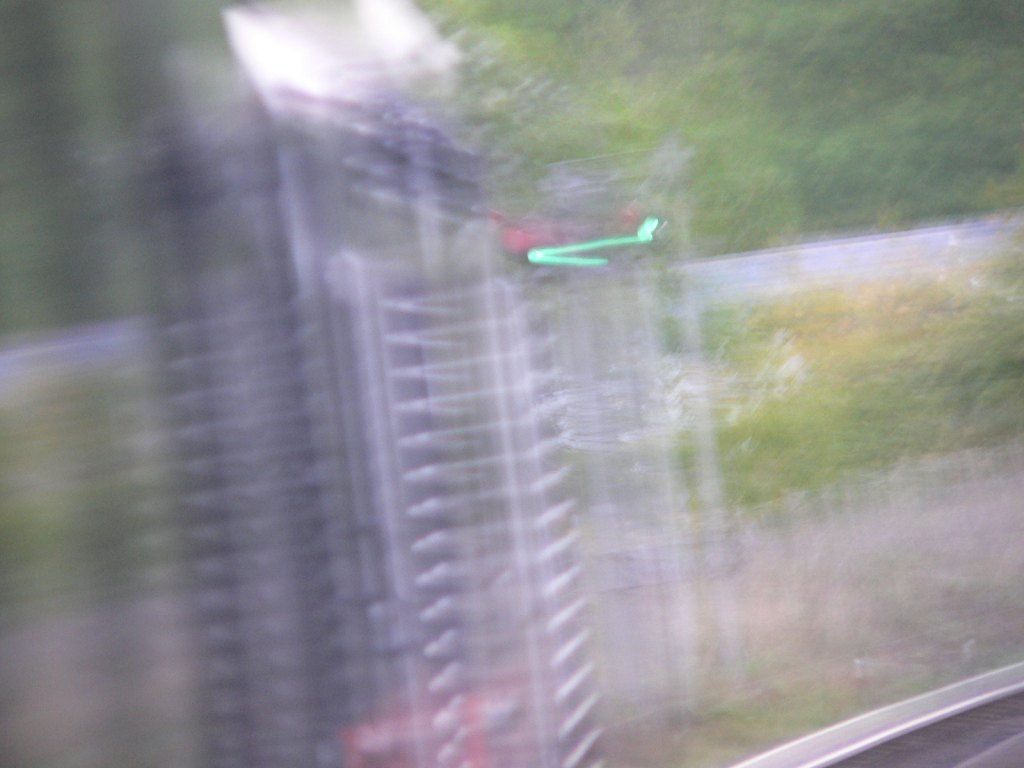 gb-semaphore-signal-with-camera-shake.jpg (91896 bytes)
 gb-signals-fw_semaphore-01.jpg (159732 bytes)
 gb-signals-fw_semaphore-02.jpg (123078 bytes)
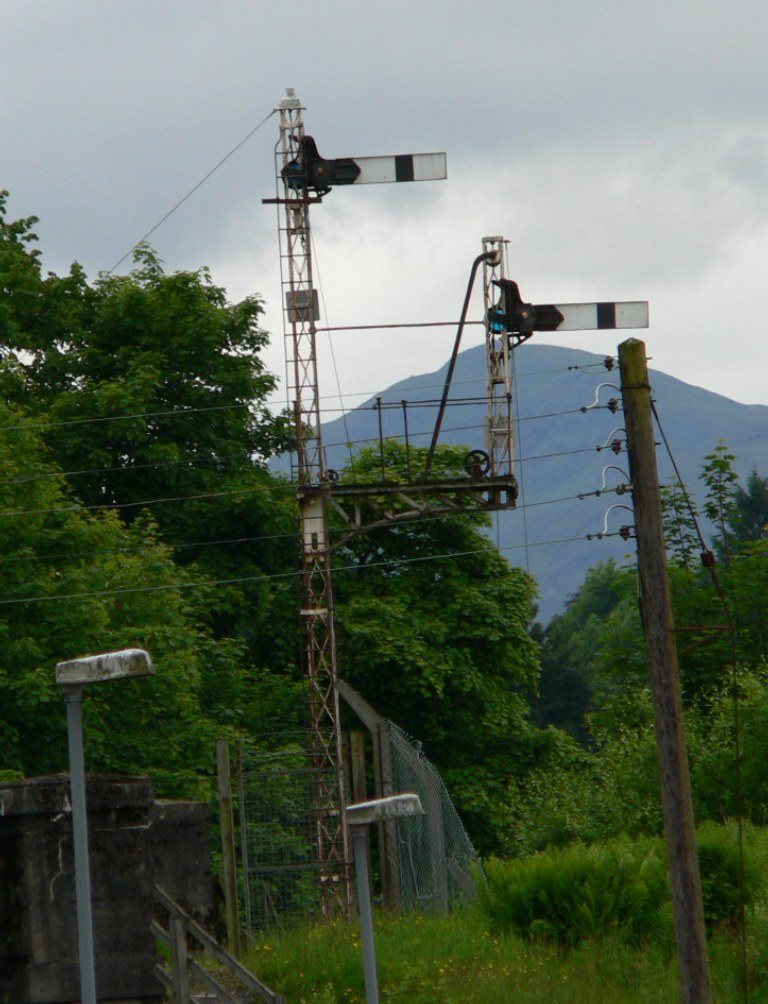 gb-signals-fw_semaphore-03.jpg (160079 bytes)
 lostwithiel-down-mt.jpg (95315 bytes)
 lostwithiel-starter-mt.jpg (108000 bytes)
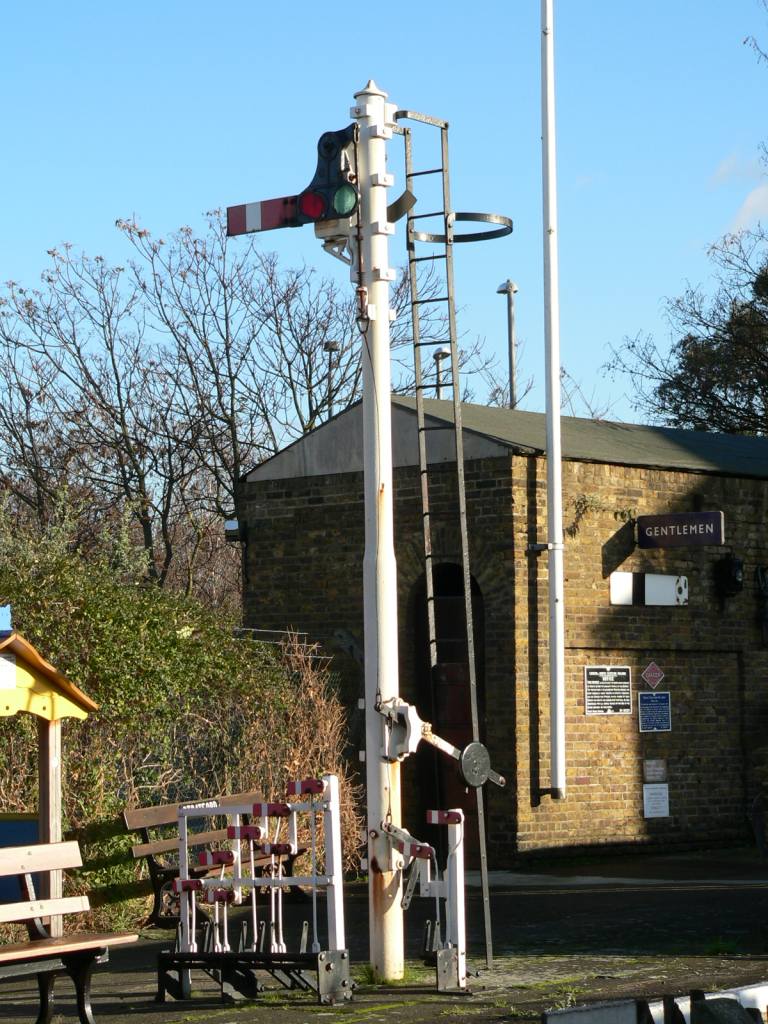 semaphore-01.jpg (162171 bytes)
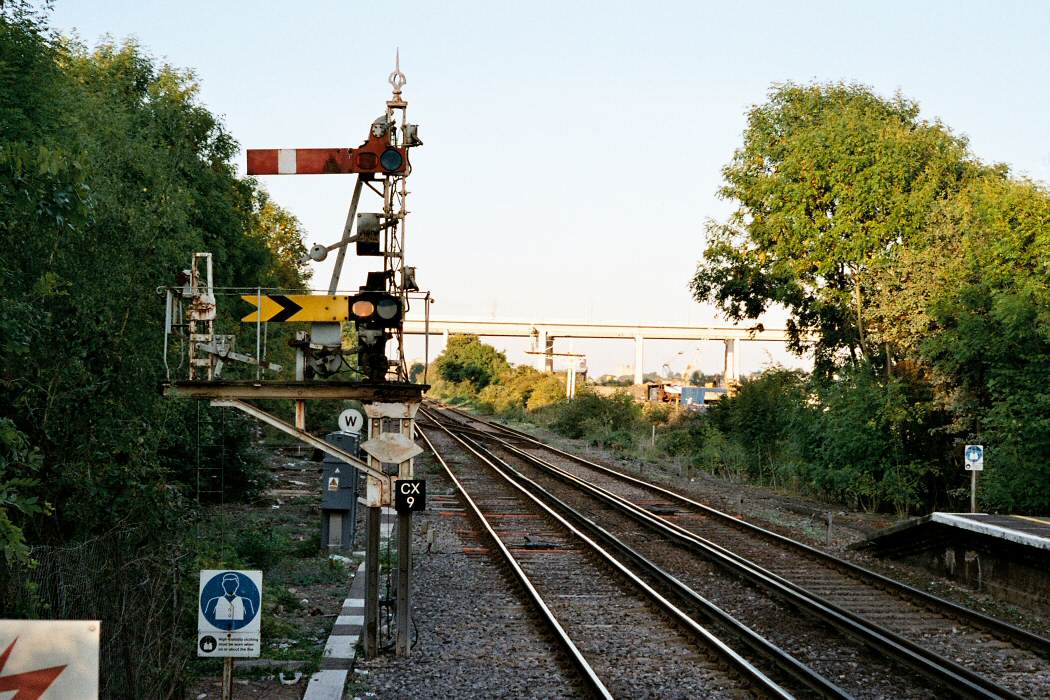 ukmiscCTRL_Medway11.jpg (146614 bytes)
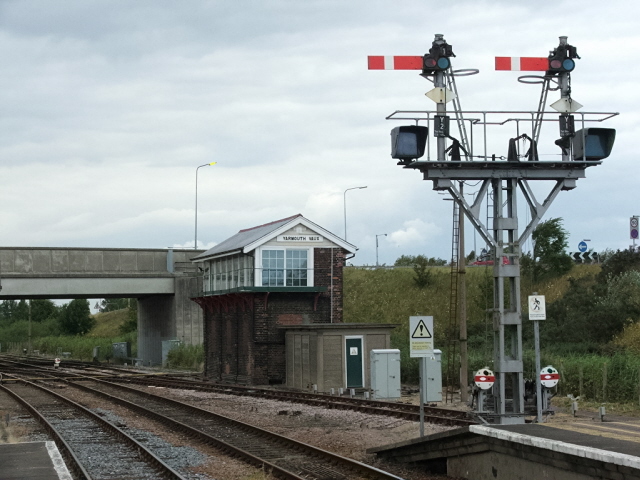 yarmouthsig1.jpg (152944 bytes)