 143+HornbyHST43087+NMT43062+Voyager-01.jpg (162788 bytes)
|
The Railfaneurope.net Picture Gallery
Directory: /pix/gb/station/Bristol/Temple_Meads
Last update: Sat Nov 15 20:21:00 CET 2014
|
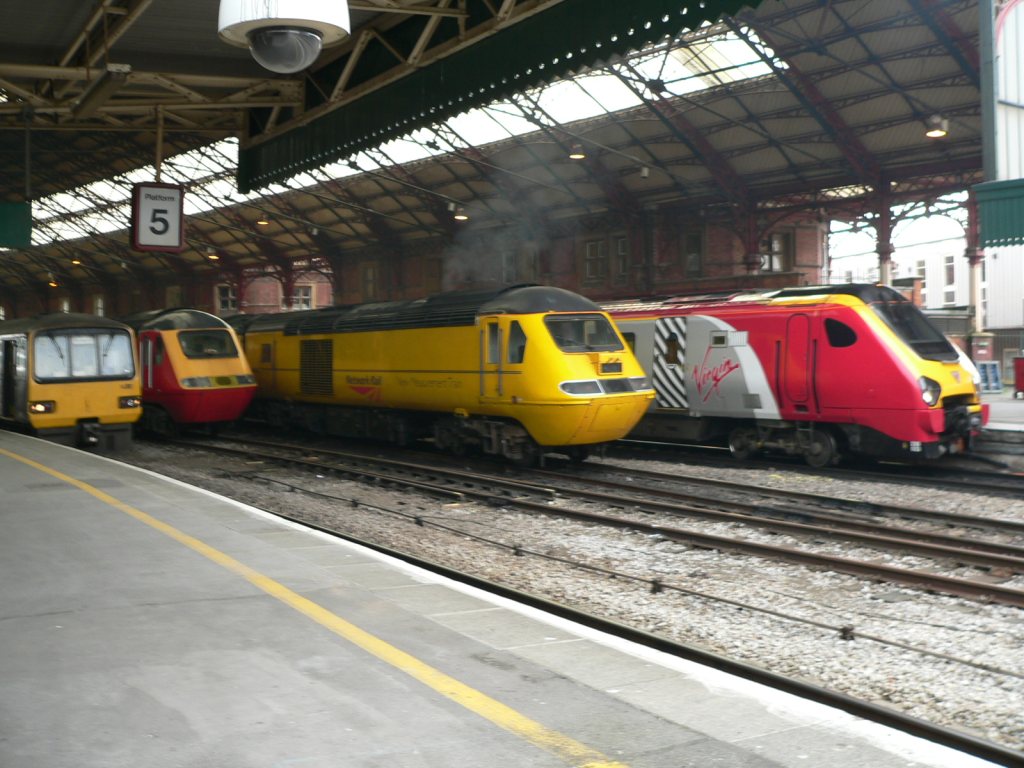
An unusual and varied lineup at Bristol Temple Meads, from left to right:
Photo by Chris McKenna 14/08/2006. |
|
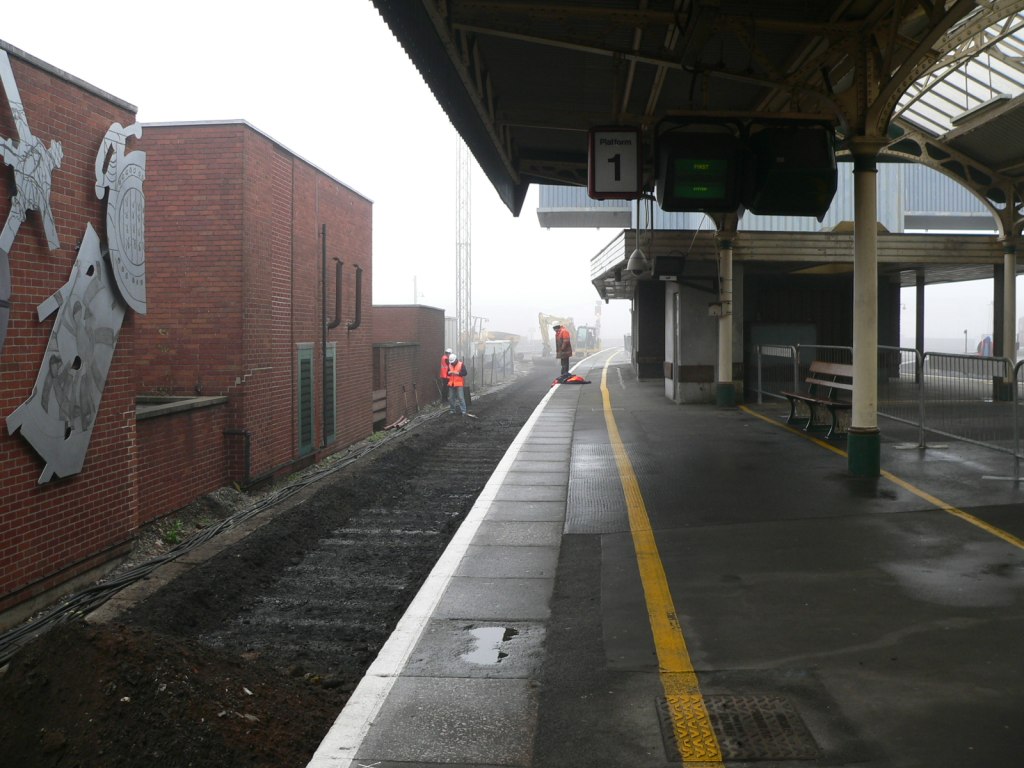
The track and trackbed at Platform 1 of Bristol Temple Meads station, a north-facing bay platform, is being completely relayed over a two-week period. This photograph was taken at the end of the first week.
Photo by Chris McKenna 7/11/2006. |
|
The track and trackbed at Platform 1 of Bristol Temple Meads station, a north-facing bay platform, is being completely relayed over a two-week period. This photograph was taken at the end of the first week.
Photo by Chris McKenna 7/11/2006. |
|
A view of Bristol Temple Meads station from the extreme southern end of platform 4. Visible in this photograph from left to right is EWS Class 66 diesel locomotive 66181, an unidentifed Wessex Trains Class 158 DMU and two First Great Western Class 43 HST power cars, the right hand one of which is 43003.
Photo by Chris McKenna23/01/2006. |
|
The southern end of Bristol Temple Meads railway station, viewed from the leading carriage on the southbound First Great Western HST seen on the right of the photograph.
Photo by Chris McKenna 10/05/2006. |
|
A collection of diesels and operators at Bristol Temple Meads station. From left to right Wessex Trains Class 143 DMU 143619; EWS Class 66 locomotive 66049; A class 158 DMU operated either by Wessex Trains or Arriva Trains Wales; and an unidentified First Great Western Class 43 HST powercar. This photograph is also a good indication of just how significant the curve the station is built on is - the Class 143 and 158 DMUs are standing at the same platform as I took this photo from.
Photo by Chris McKenna 11/07/2005. |
|
The next train indiator on platform 7 at Bristol Temple Meads displays the dramatic-sounding message "PLEASE STAND CLEAR the next train is not scheduled to call at this station". Often this message indcates that an express will come thundering through, or a freight train will crawl past. On this occasion however all that happened was the Class 153 and Class 158 that had been sat for what seemsed like hours at platform 7 finally left the station empty.
Photo by Chris McKenna 05/01/2005. Photo by Chris McKenna If you wish to use this, or any other of my photographs, under a different license see my relicensing policy. Feedback on my pictures is always welcome. |
|
An iron plaque located on the wall of Platform 3 at Bristol Temple Meads. An adjacent plaque records that it was moved here from its original location - the eastern portal of the Patchway Tunnel - in 1986.
Photo by Chris McKenna 09/06/2005. |
|
Platforms 5 and 3 at Bristol Temple Meads station, a Wessex Trains Class 158 DMU is standing at the latter platform with a northbound service.
Photo by Chris McKenna 07/12/2005. |
|
Platforms 6-8, 10 and 12 at Bristol Temple Meads station. The photograph was taken from platfom 7, the Wessex Trains Class 153 DMU is at platform 8 and platform 6 is on the right of the train. On the opposite side to of the tracks to platform 8 is platform 10, and platform 12 is on the other side of the island again.
Photo by Chris McKenna 07/12/2005. |
|
Platforms 7 and 9 at Bristol Temple Meads. The train is Wessex Trains Class 153 DMY 153302 headed for platfom 8.
Photo by Chris McKenna 07/12/2005. |
|
An unusual view of Bristol Temple Meads station, showing a number of different phases of building and styles of architecture. Platform 7 is in the foreground, with platform 5 the nearer of the two under the roof and platform 3 in the background.
Photo by Chris McKenna 09/06/2005. |
|
Hand operated points at Bristol Temple Meads station. I presume they control which of the two centre lines, which you can see start to diverge on the extreme let of the picutre, a train uses.
Photo by Chris McKenna 09/06/2005. |
|
A view of the approach lines to the northern end of Bristol Temple Meads station.
Photo by Chris McKenna 09/06/2005. |
|
A view of the approach lines to the northern end of Bristol Temple Meads station.
Photo by Chris McKenna 09/06/2005. |
|
Two plaques on the wall of Platform 3 at Bristol Temple Meads station. The lower one refers to a large iron plaque that is adjacent to it that can be seen in this photograph
Photo by Chris McKenna 09/06/2005. |
|
Platform 1 at Bristol Temple Meads. This dreary looking platform is on the line of the route into Brunel's original station that is now used partly as a car park and partly to house the British Empire and Commonwealth Musuem.
Photo by Chris McKenna 09/06/2005. |
|
Platform 1 at Bristol Temple Meads. The roof that can be seen in the distance behind the ugly modern building is Brunel's original station, now used as a car park. The rest of the current station, original built as a join station between the Great Western and Bristol and Exeter railways, is to the left.
Photo by Chris McKenna 09/06/2005. |
|
Platform 2 and the adjacent, un-numbered, former parcels platform at Bristol Temple Meads station can be seen in the distance on the right of this photo. Platform 4 is on the extreme right of shot, while on the left it appears that new sidings are being built. Becuase of the curve that Bristol Temple Meads station is built on, these platforms are almost at right angles to platform 1.
Photo by Chris McKenna 09/06/2005. |
|
A view of the caf� area on platform 3 at Bristol Temple Meads station, photographed from platform 5.
Photo by Chris McKenna 09/06/2005. |
|
Platform 5 at Bristol Temple Meads station. Platform 3 is to the right.
Photo by Chris McKenna 09/06/2005. |
|
Platform 7 at Bristol Temple Meads station, photogaphed from platform 9.
Photo by Chris McKenna 09/06/2005. |
|
Platforms 11 and 12 at Bristol Temple Meads station are on this side of the tracks, with platform 13 visible opposite. Platform 9 is just visable on the extreme right.
Photo by Chris McKenna 09/06/2005. |
|
Platforms 2 and 4 at Bristol Temple Meads station, with the unnumbered former parcels platform to the left. The DMU in the distance is at platform 3 and the Virgin Voyager opposite is at platform 5. Platform 6 is on the extreme right of shot.
Photo by Chris McKenna 09/06/2005. |
|
The subway at Bristol Temple Meads station. This shot is taken from by the lift to platform 15 at the far end from the main entrance at platform 3.
Photo by Chris McKenna 09/06/2005. |
|
Northbound Class 221 Virgin Voyager DEMU 221140 stands at platform 3 of Bristol Temple Meads, beneath the magnificent roof of the main trainshed.
Photo by Chris McKenna 07/12/2005. |
|
The western end of Bristol Temple Meads station. This shot is taken from the end of platform 4.
Photo by Chris McKenna 09/06/2005. |
|
A demonstation next train system for first great western showing a windows error, this is located at the far northern end of platform 5 at Bristol Temple Meads station.
Photo by Chris McKenna 09/06/2005. |
|
I spotted this on a the frame of a door that gives access to the now disused Royal Mail lift on Platform 7 of Bristol Temple Meads. I presume they are various destinations that are sorted in North London, but I am not certain.
Photo by Chris McKenna 09/06/2005. |
|
The now disused parcel depot at Bristol Temple Meads. Recently vacated by the Royal Mail the engraving on the lintel shows the stations origins as the Great Western (GW) and London, Midland and Scotish (LMS) joint station.
Photographed by Chris McKenna 2004-08-02 |
|
The doorway to the booking offices at Bristol Temple Meads from Burnel's original station, now used as the long stay car park.
Photographed by Chris McKenna 2004-08-02 |
|
The perils of using Microsoft Software! Seen on a monitor demonstrating a Train Information System for First Great Western that resembles the one that Wales & West (and their successor TOCs) have used for several years. Seen on Platform 5 at Bristol Temple Meads 2nd August 2004.
Photographed by Chris McKenna |
|
The grand facade of Bristol Temple Meads railway station - the principal city station for Bristol. The building on the left with the low canopy is Brunels original terminal station, the current station, originally built as a Great Western and LMS joint station, is on the right of the picture, follows a curving alingment.
Photographed by Chris McKenna 2004-08-01 |
|
The impressive booking hall at Bristol Temple Meads station. The main entrance is to the right just beyond the first arch. This picture is taken from the entrance from the long stay car park in Brunel's original terminal station.
Photographed by Chris McKenna 02-08-2004 |
|
Brunel's original terminal station for Bristol is now in use as the Long Stay car park for the adjacent Bristol Temple Meads through station that replaced it in the days of the big four.
Photographed by Chris McKenna 2004-08-03 |
|
A view of Platform 3 at Bristol Temple Meads station taken from platform 5. Platform 3 is the one adjacent to the main entrance and so contains the majority of the facilities for the station.
Photographed by Chris McKenna 2004-08-03 |
|
Platform 4 at Bristol Temple Meads, the principal station for Bristol, looking towards the trainshed.
Photographed by Chris McKenna 2004-08-03 |
|
Platform 4 at Bristol Temple Meads station, looking towards the trainshed. The train ahead, an unidentified Virgin Cross Country class 220 or 221 Voyager, is standing at platofrm 3. Opposite it is an unidentifed class 156 service at platform 5.
Photographed by Chris McKenna 2004-08-03 |
|
A merged view of Platform 5 at Bristol Temple Meads station, taken from platform 3. The station is built on quite a pronounced curve, but it is exagerated slightly in this picture.
Photographed by Chris McKenna 2004-08-03 |
|
The north-bound end of platform 5 at Bristol Temple Meads station viewed from platform 3.
Photographed by Chris McKenna 2004-08-03 |
|
The next train display employed by First Great Western at all the stations it manages, this is taken at Bristol Temple Meads. The first line shows the due time and destination of the next train to arrive at the platform, and the time it is expected - A cross-country service such as this one is not always on time! The second line lists the stations the first train will be calling at en-route to its destination, and then any other information about the train - e.g. if it is traveling in reverse formation or which carriages are designated as 'quiet carriages'. The third line shows the same information as the first line, but alternates between the second and third trains due at the platform. Finally at the bottom the current time is displayed.
Photographed by Chris McKenna 2004-08-03 |
|
Platforms 13 and 15 at Bristol Temple Meads (there is no platform 14, but I'm not certain why), were closed for many years. During this time all the station signage was replaced by the standard BR type, but these platforms escaped. When the platforms were reopened a couple of years ago, they decided to retain this historic sign for the subway - rightly in my opinion. Platforms 1 and 2 do exist, but are bay platforms accessed from platform 3. Platform 2 is currently not used for passenger services, whether this was also true of platform 1 when the sign was made I don't know.
Photographed by Chris McKenna 2004-08-03 |
 BTM-platform1-trackrelaying-01.jpg (156539 bytes)
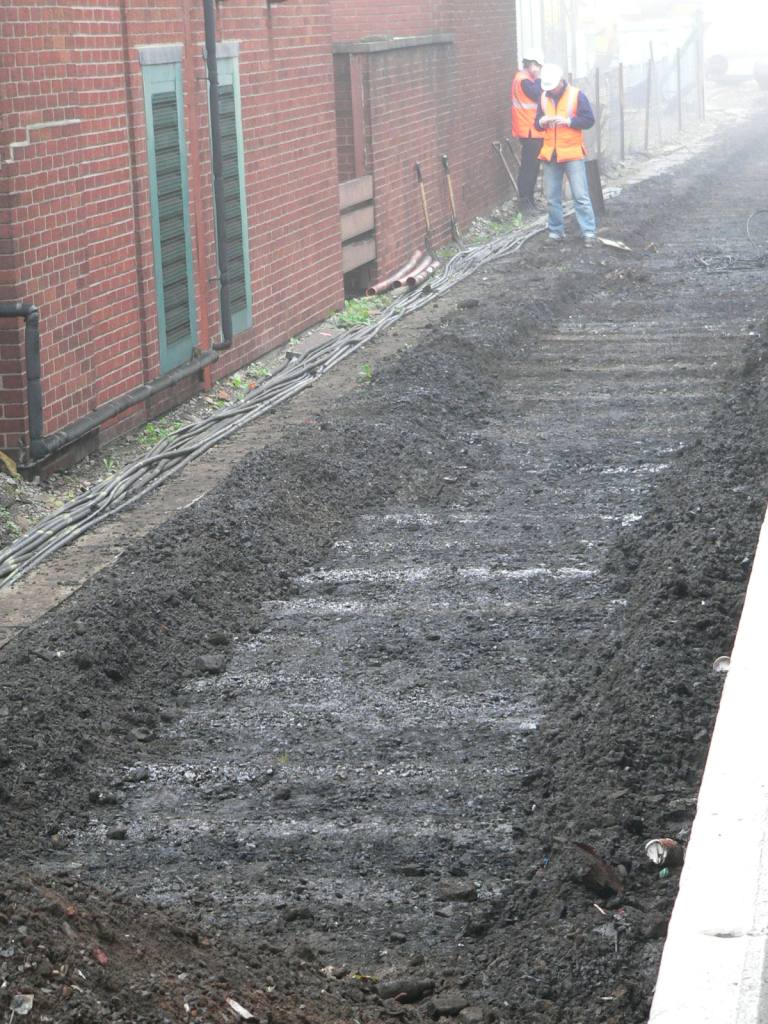 BTM-platform1-trackrelaying-02.jpg (164460 bytes)
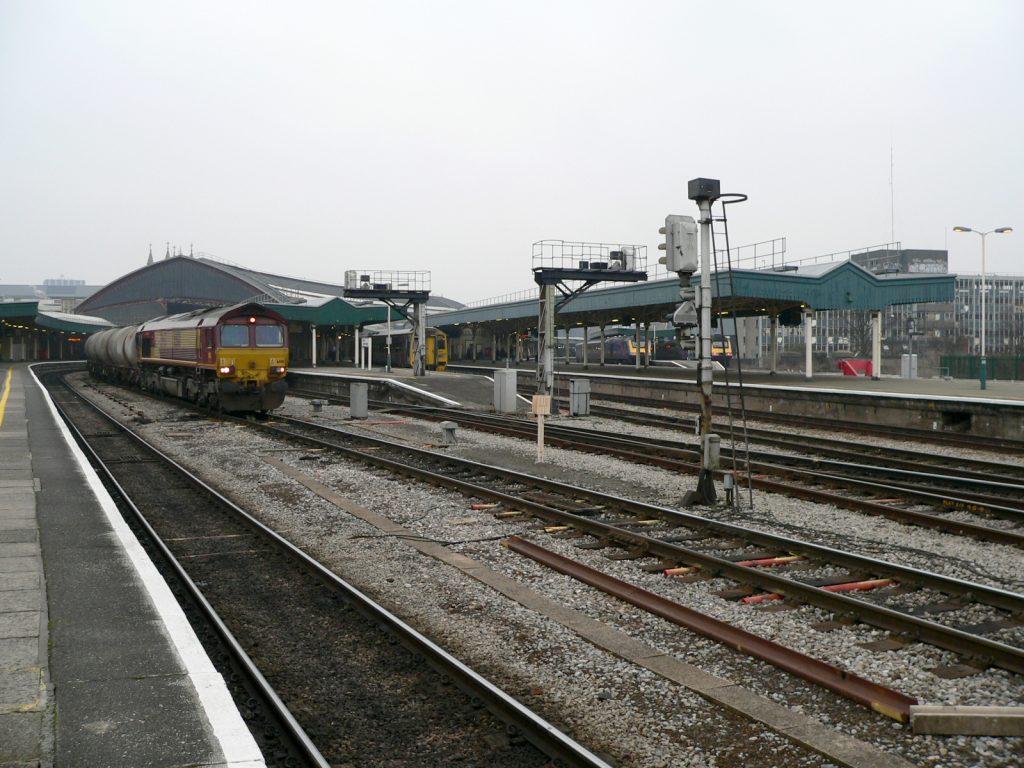 BTM-stationfromsouthend.jpg (163139 bytes)
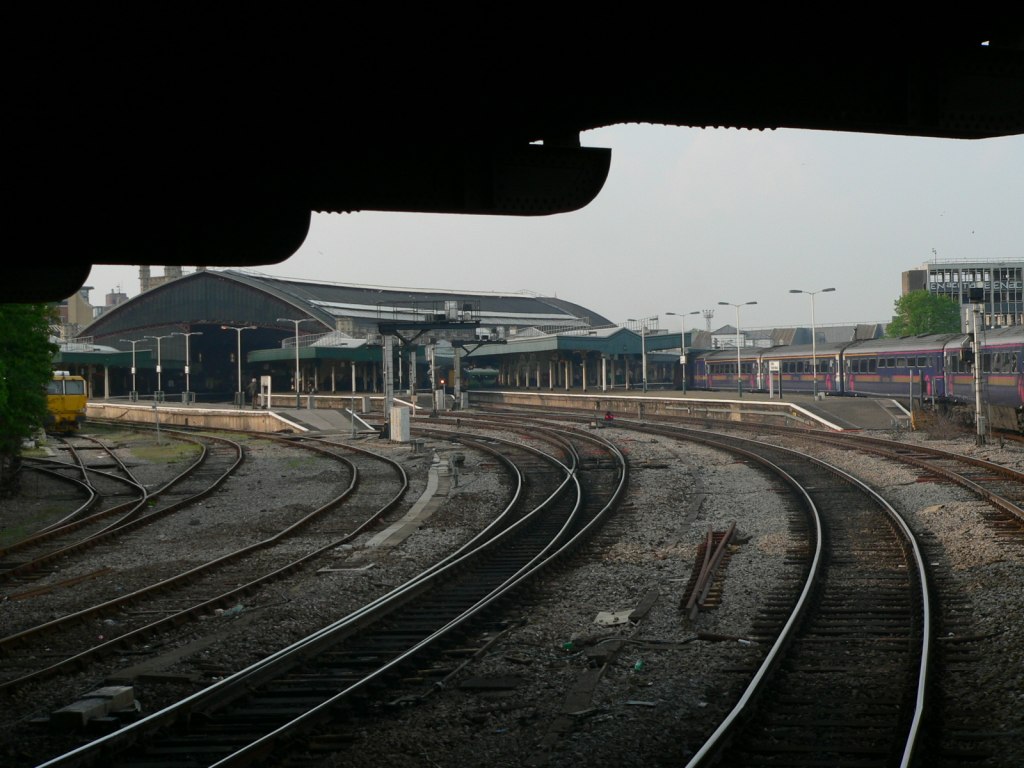 BristolTempleMeads-viewfromsouth-01.jpg (157107 bytes)
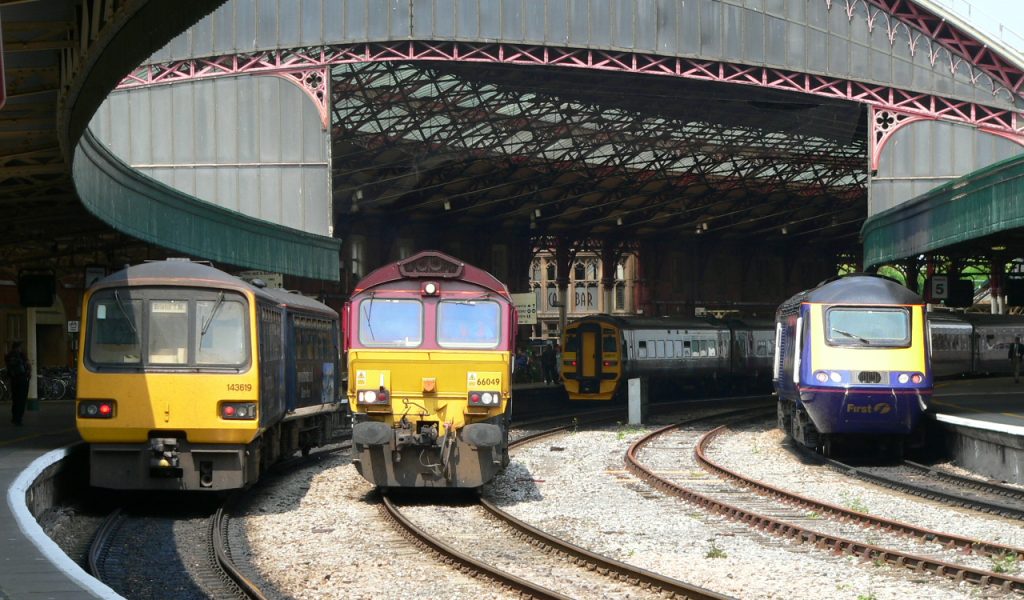 gb-143+66+158+43.jpg (158489 bytes)
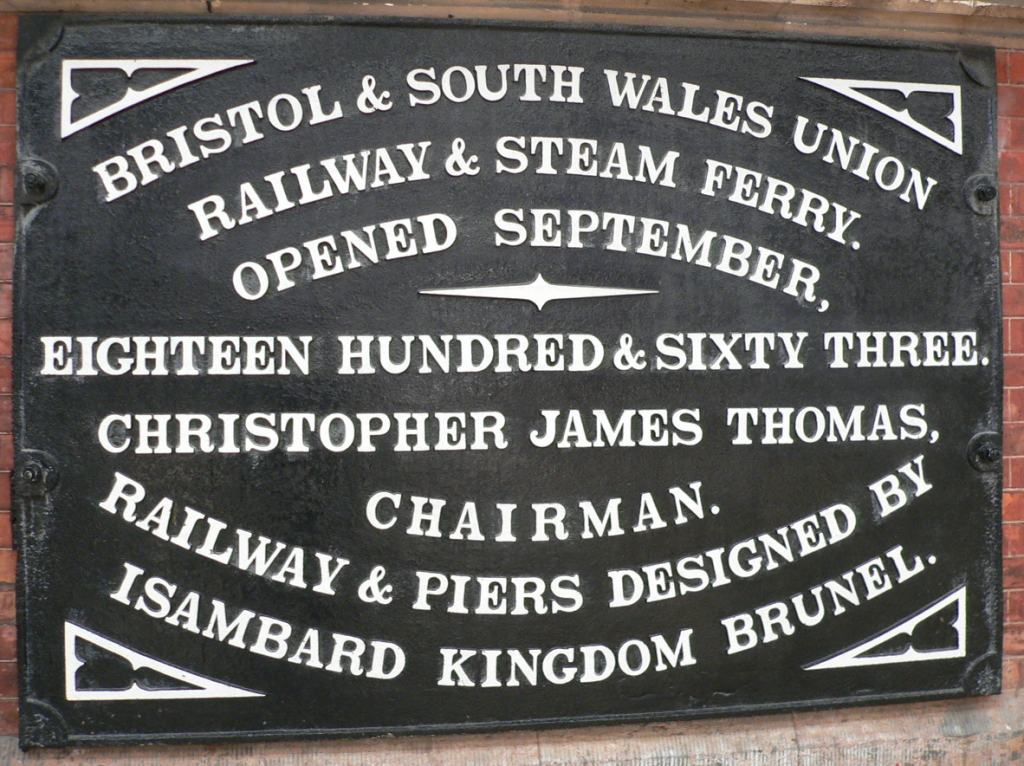 gb-BristolTempleMeads-Bristol+SouthWalesUnionRailway-plaque.jpg (163532 bytes)
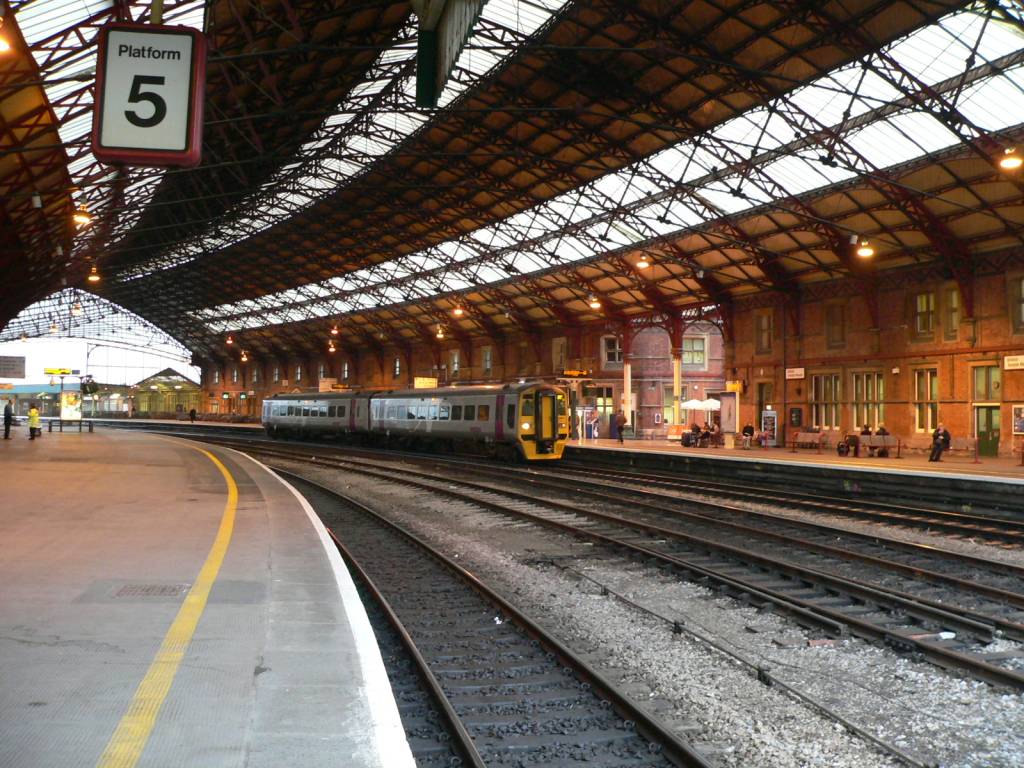 gb-BristolTempleMeads-Platforms3+5.jpg (164023 bytes)
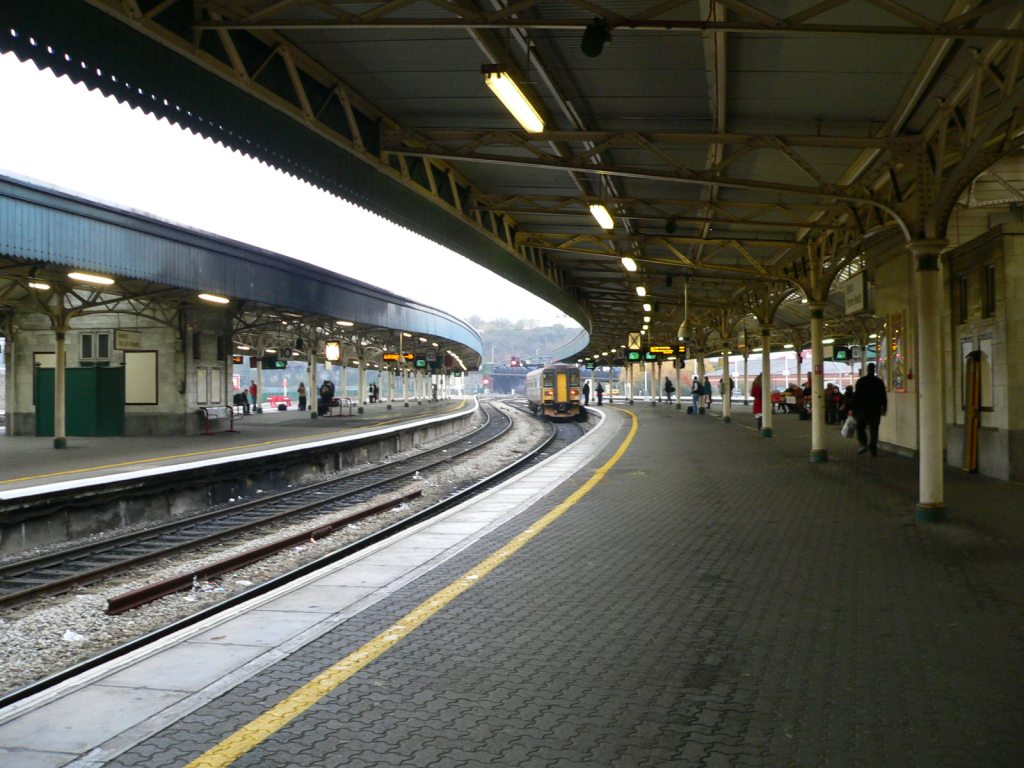 gb-BristolTempleMeads-Platforms6-8+10+12.jpg (163145 bytes)
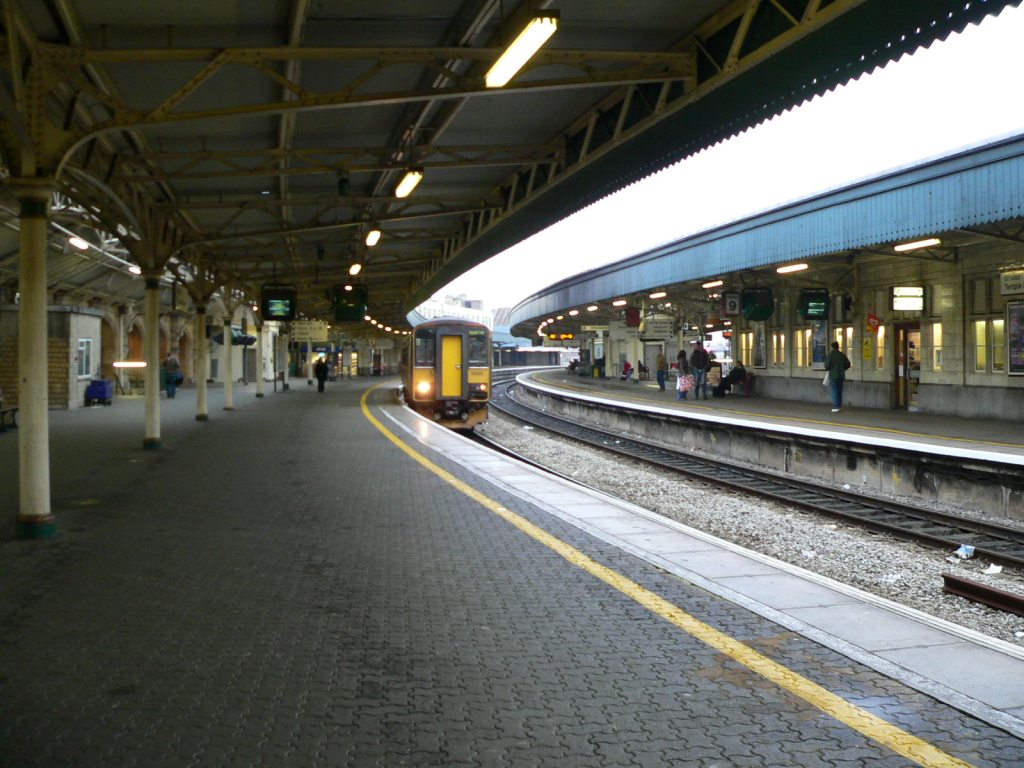 gb-BristolTempleMeads-Platforms7+9+153.jpg (160710 bytes)
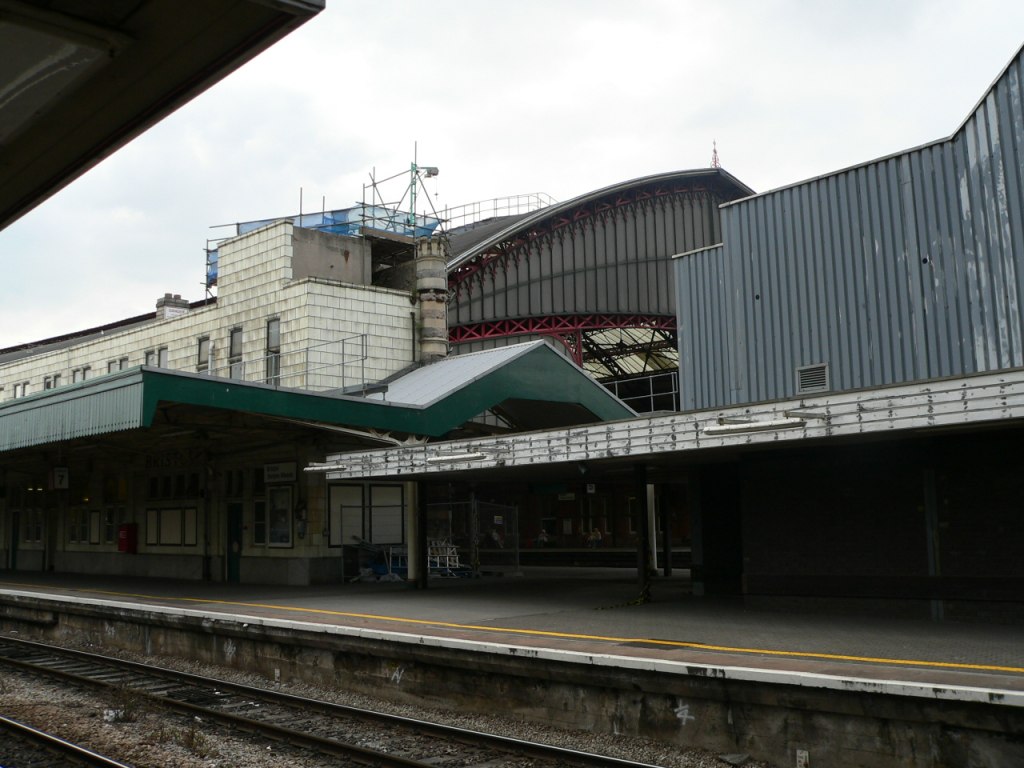 gb-BristolTempleMeads-architecure.jpg (149068 bytes)
 gb-BristolTempleMeads-centreline-points.jpg (163788 bytes)
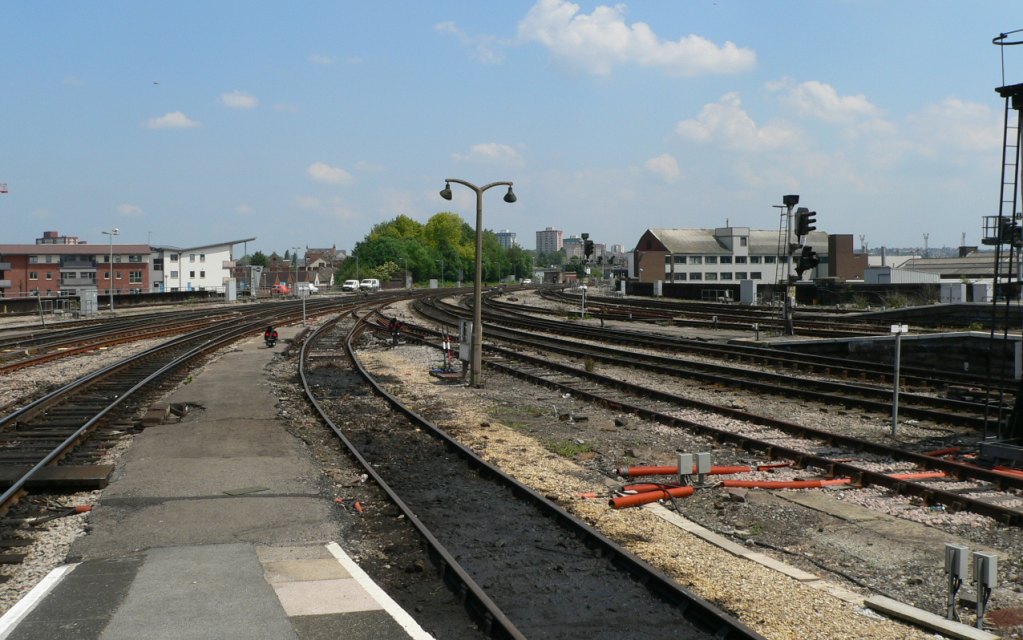 gb-BristolTempleMeads-northapproach-01.jpg (161117 bytes)
 gb-BristolTempleMeads-northapproach-02.jpg (163348 bytes)
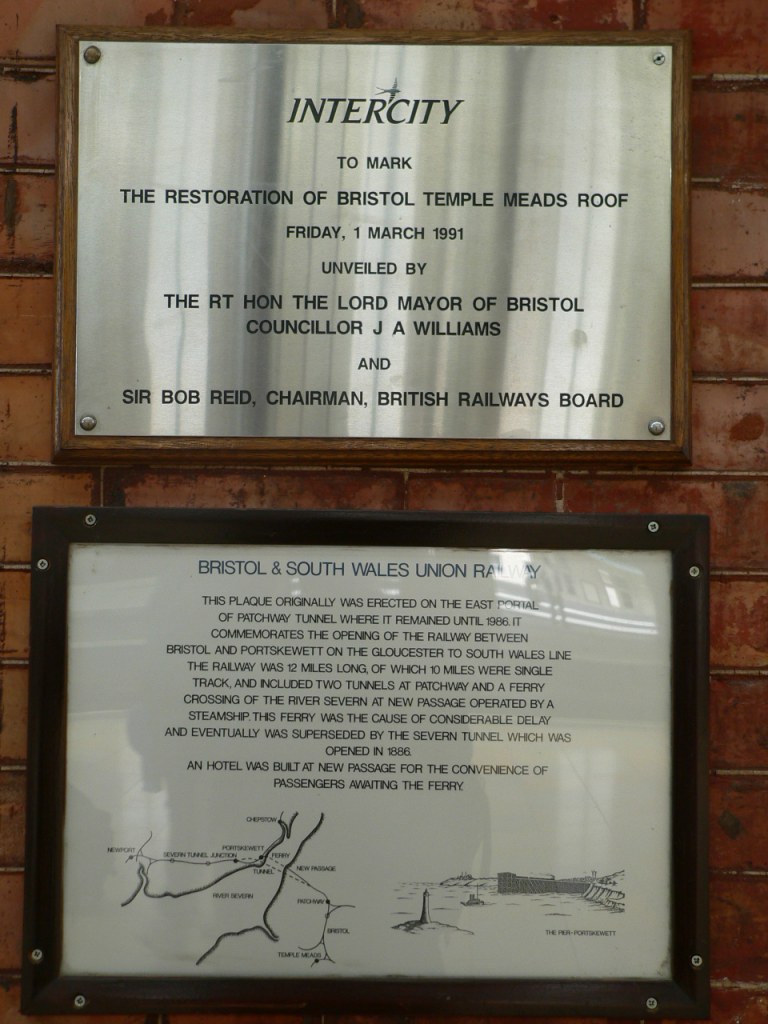 gb-BristolTempleMeads-plaques.jpg (159320 bytes)
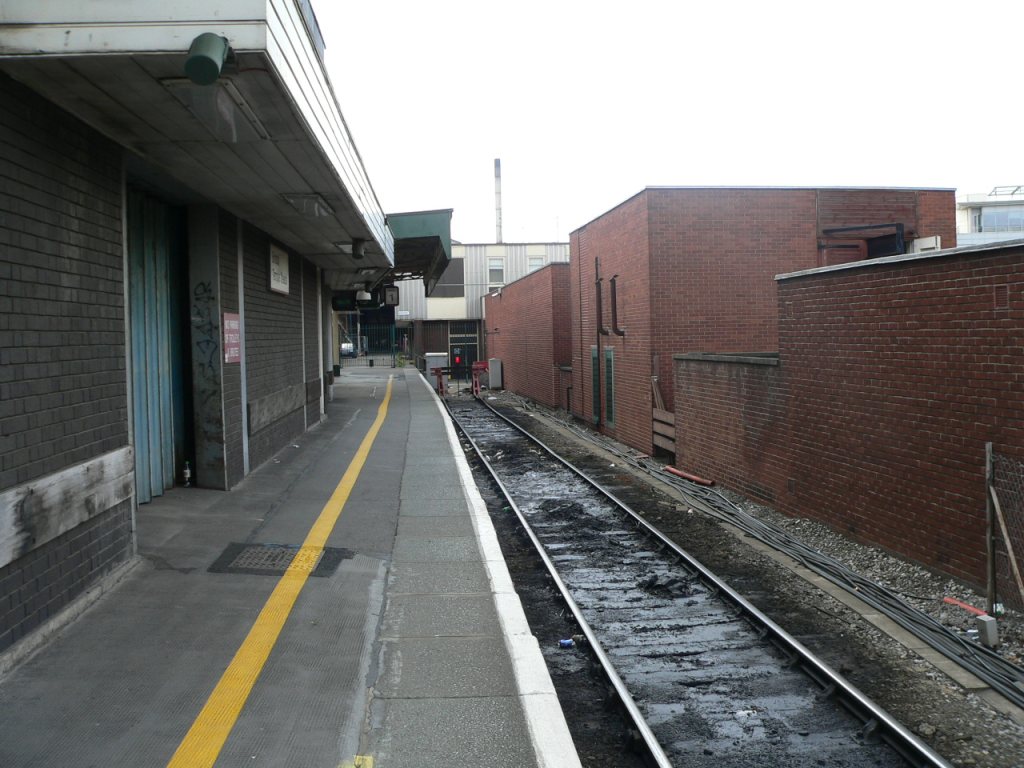 gb-BristolTempleMeads-platform1-01.jpg (155420 bytes)
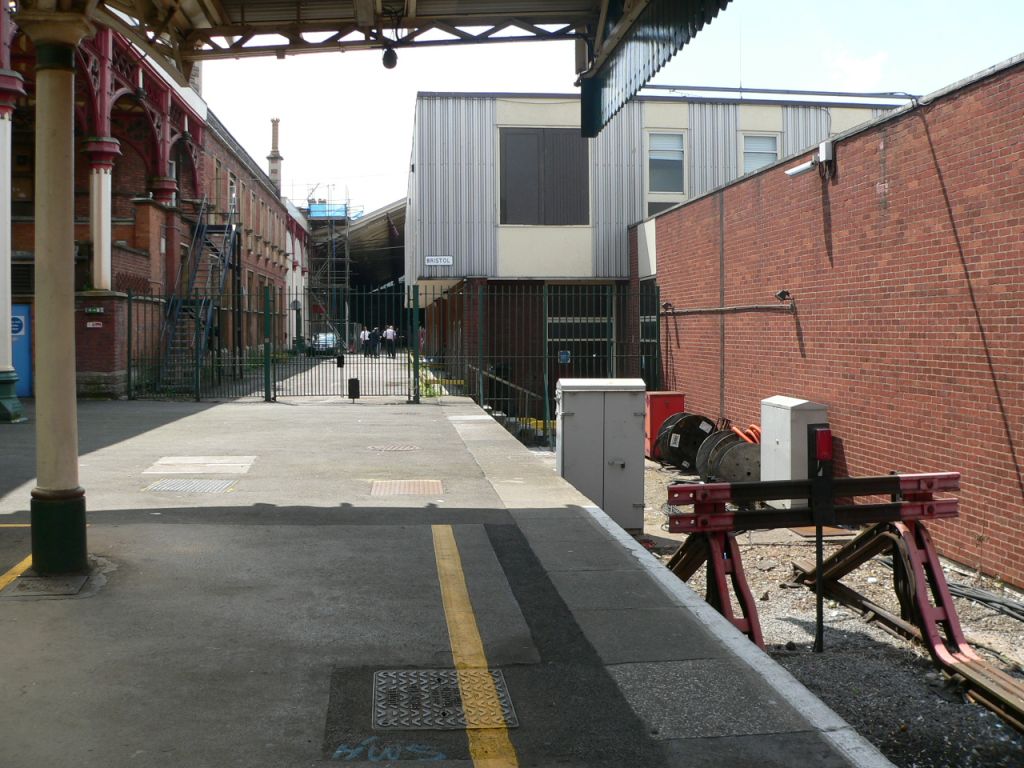 gb-BristolTempleMeads-platform1-02.jpg (160505 bytes)
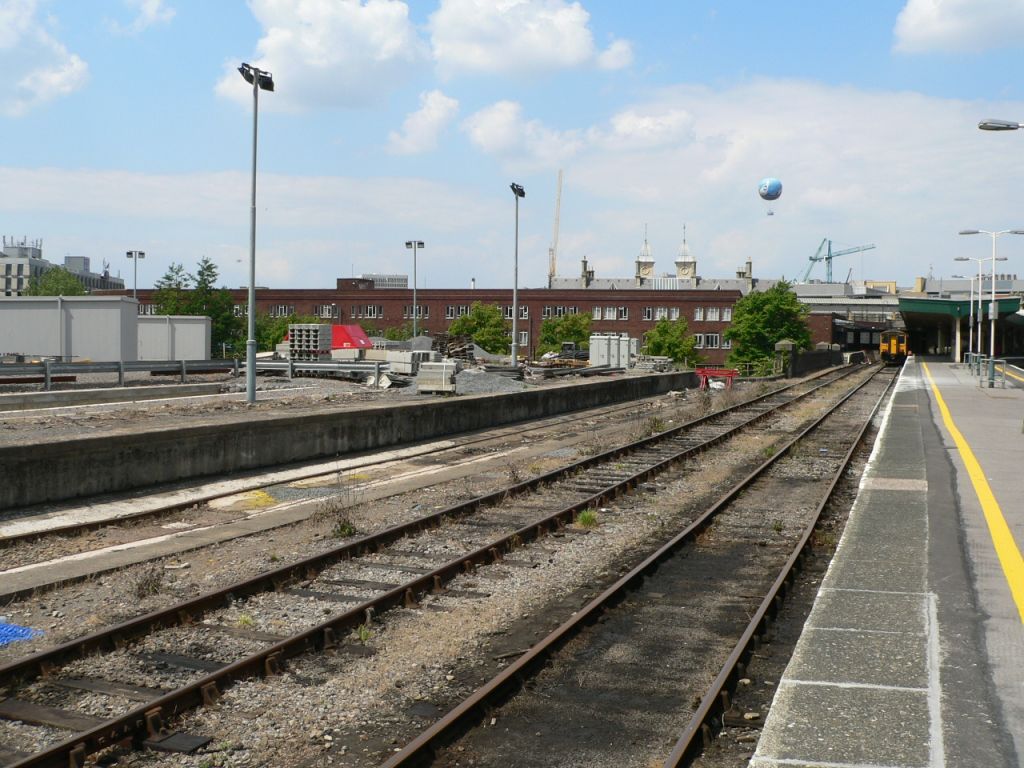 gb-BristolTempleMeads-platform2-01.jpg (161981 bytes)
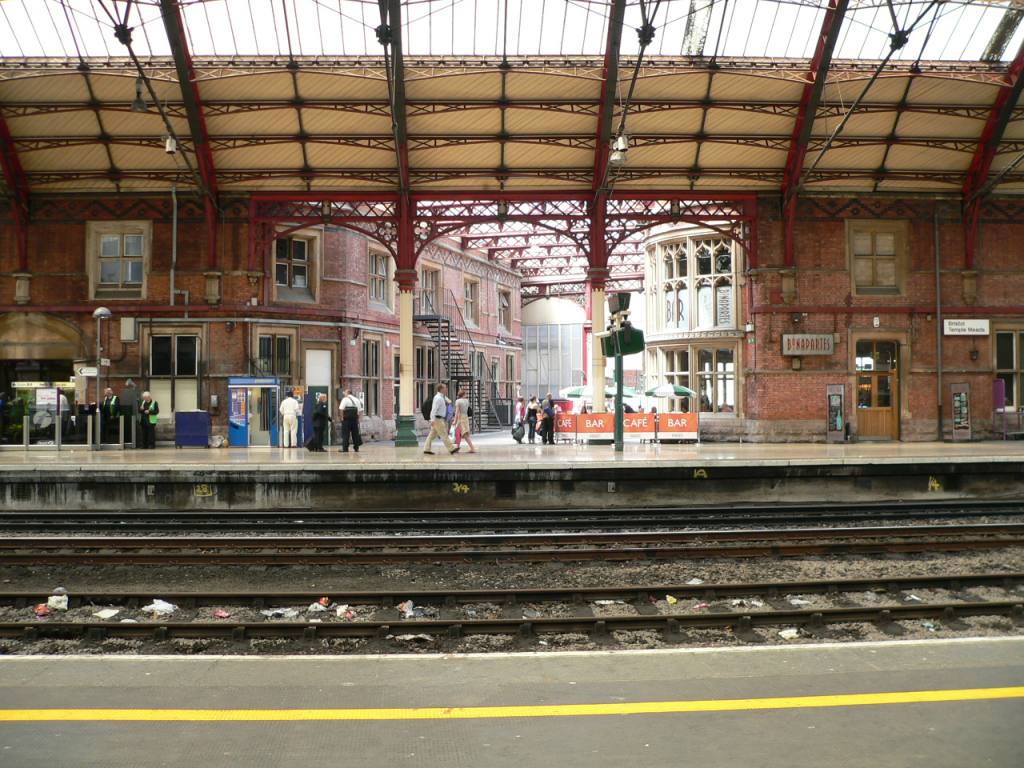 gb-BristolTempleMeads-platform3-01.jpg (161781 bytes)
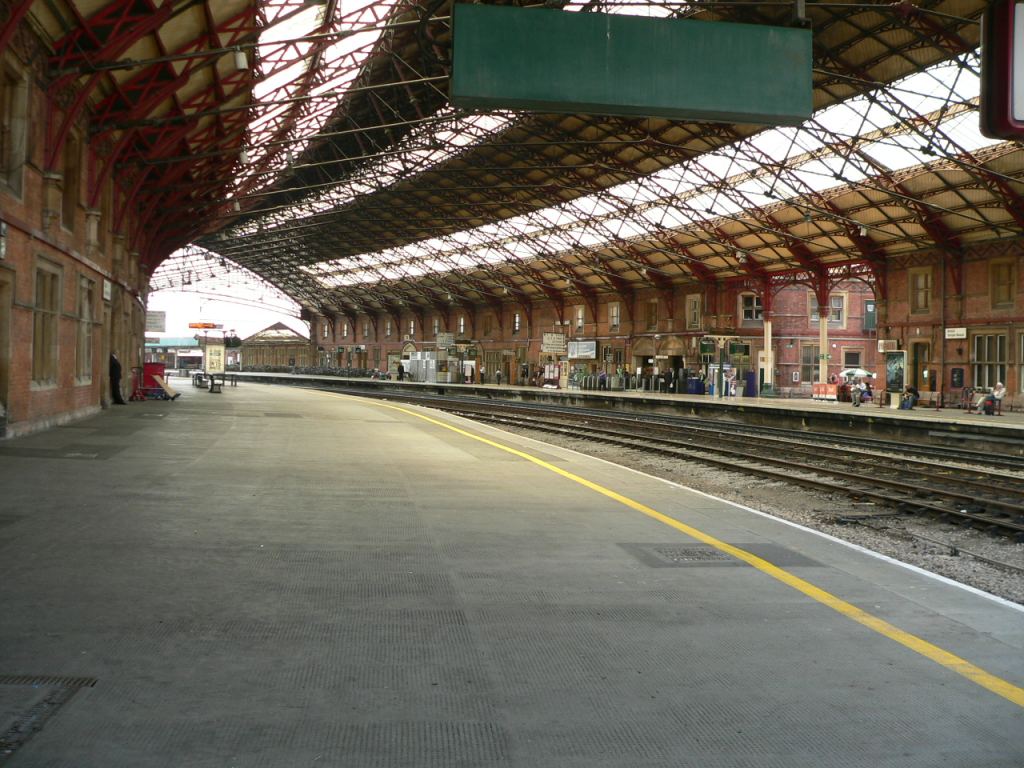 gb-BristolTempleMeads-platform5-01.jpg (163082 bytes)
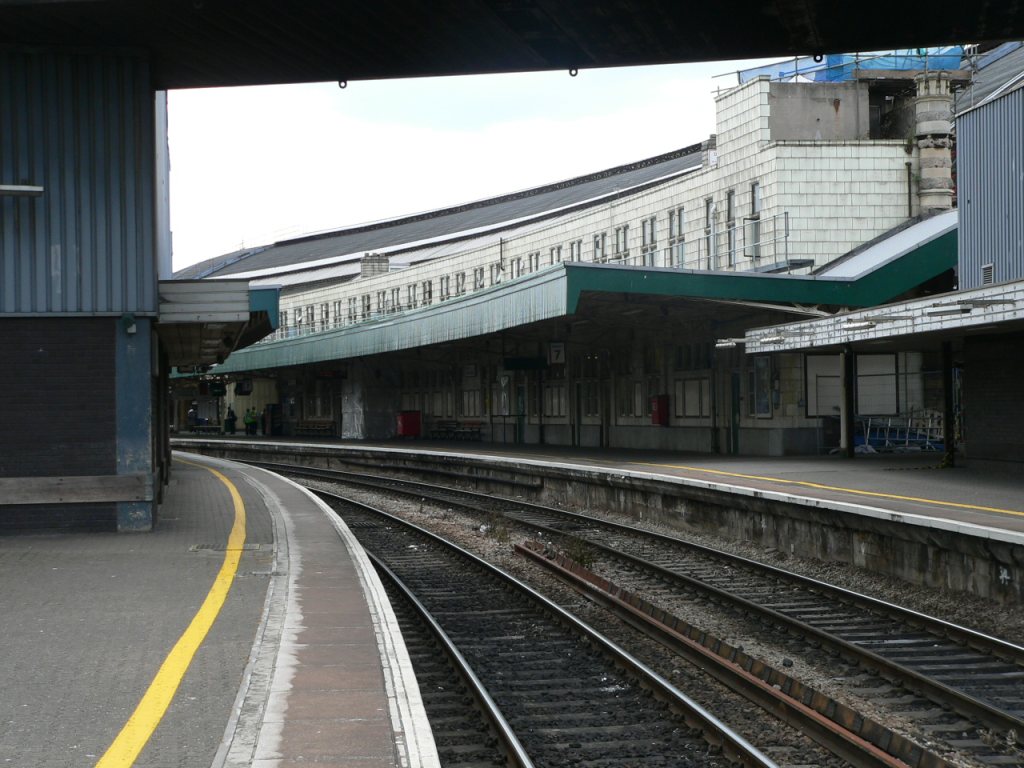 gb-BristolTempleMeads-platform7.jpg (160527 bytes)
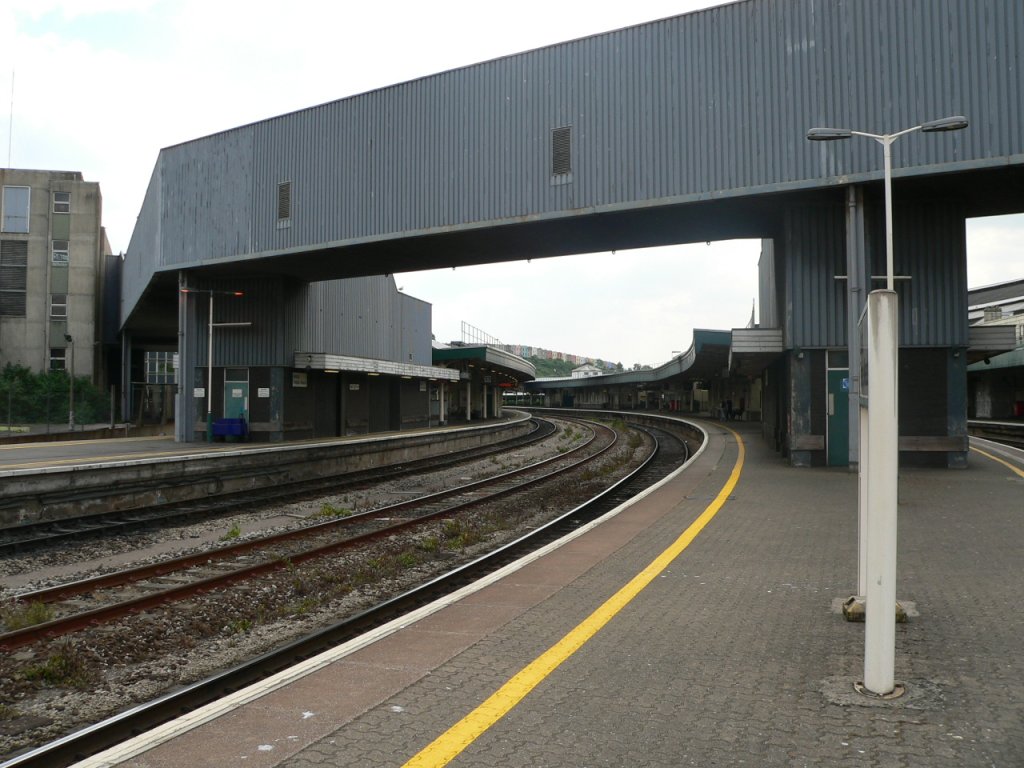 gb-BristolTempleMeads-platforms11-13.jpg (157909 bytes)
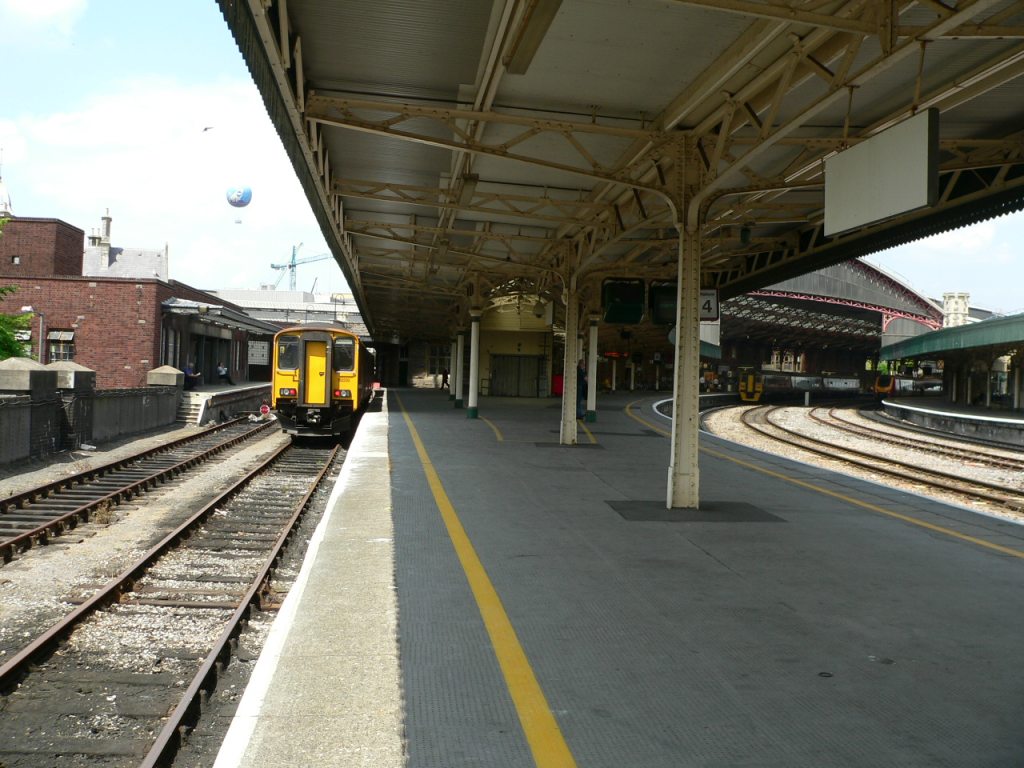 gb-BristolTempleMeads-platforms2+4.jpg (161017 bytes)
 gb-BristolTempleMeads-subway.jpg (144149 bytes)
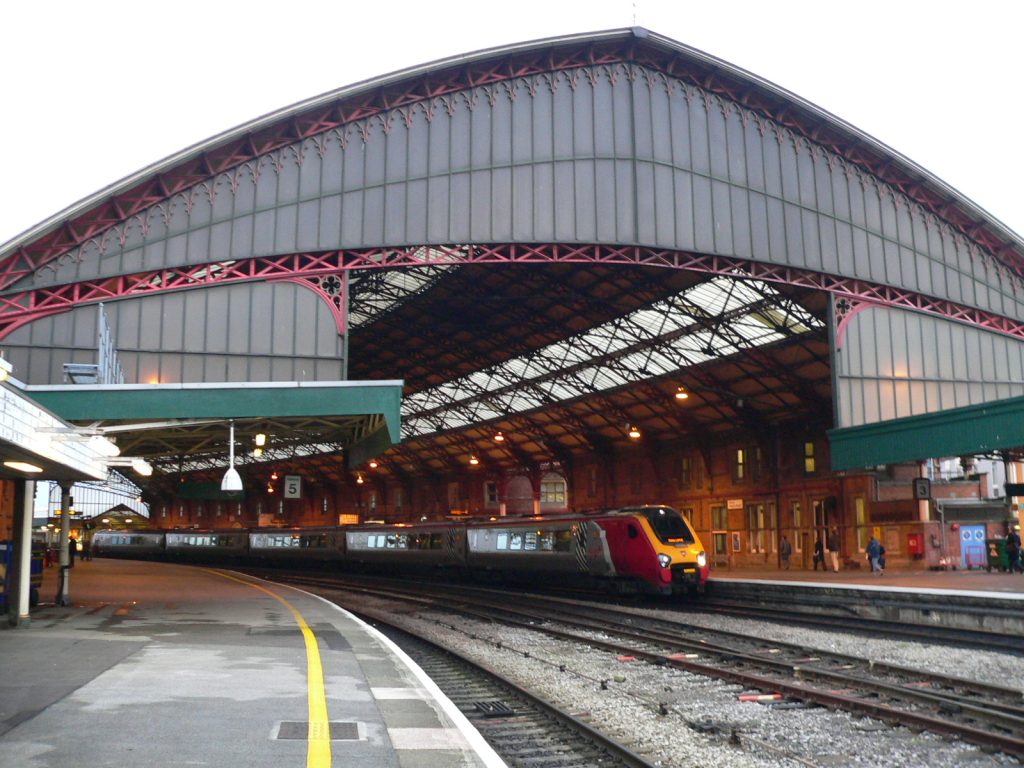 gb-BristolTempleMeads-trainshed+221140-01.jpg (163307 bytes)
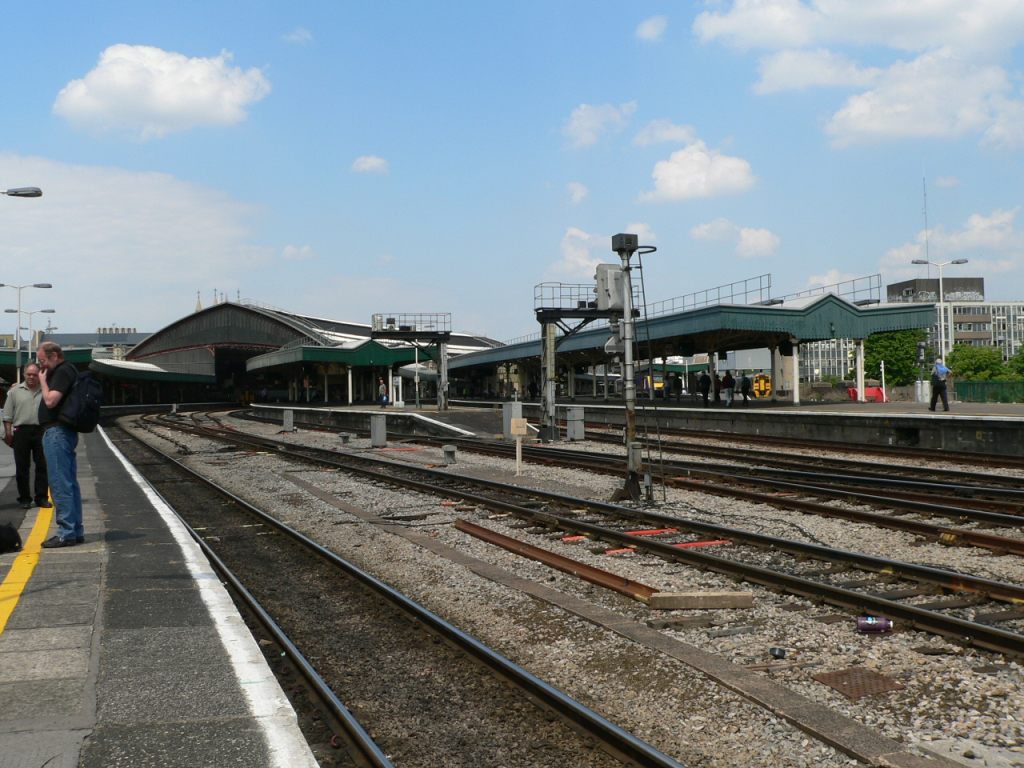 gb-BristolTempleMeads-westernend-01.jpg (159952 bytes)
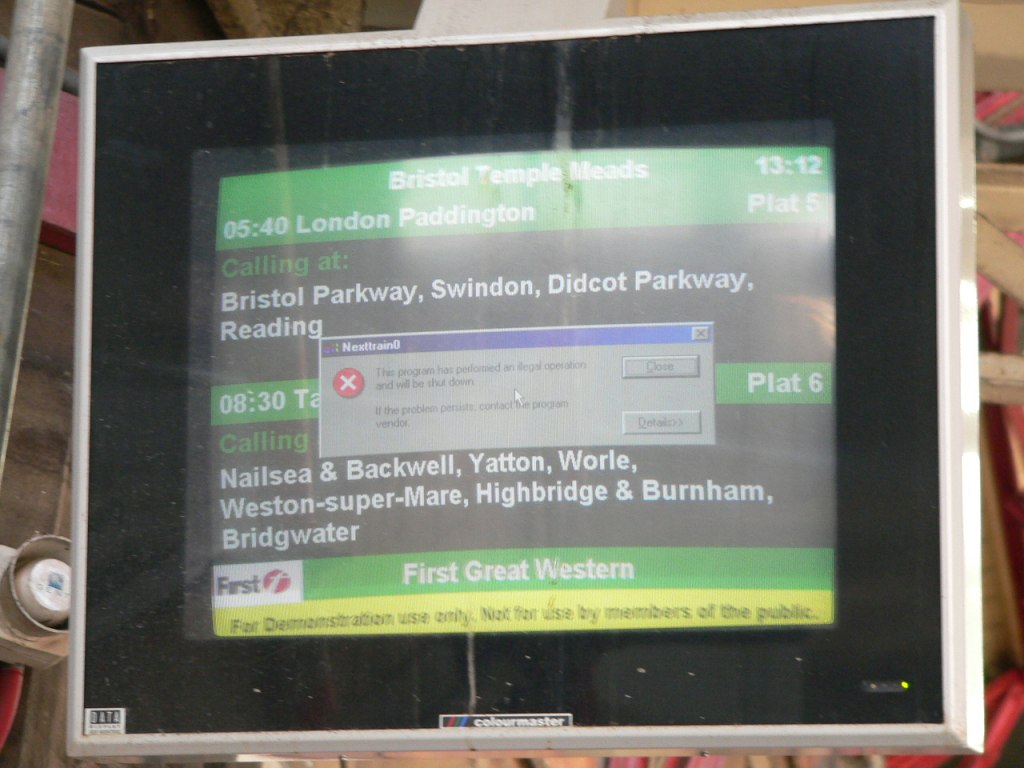 gb-Windowserror.jpg (132489 bytes)
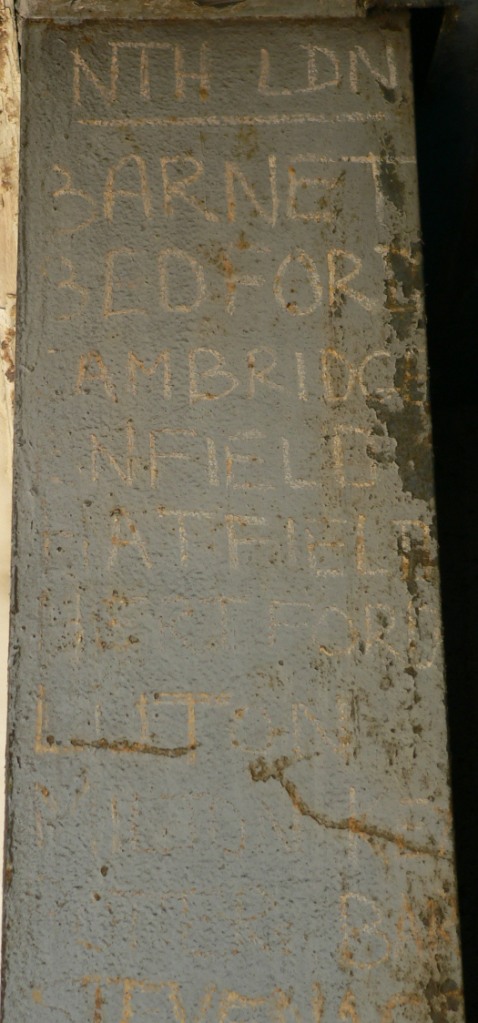 gb-parceldestinations.jpg (131778 bytes)
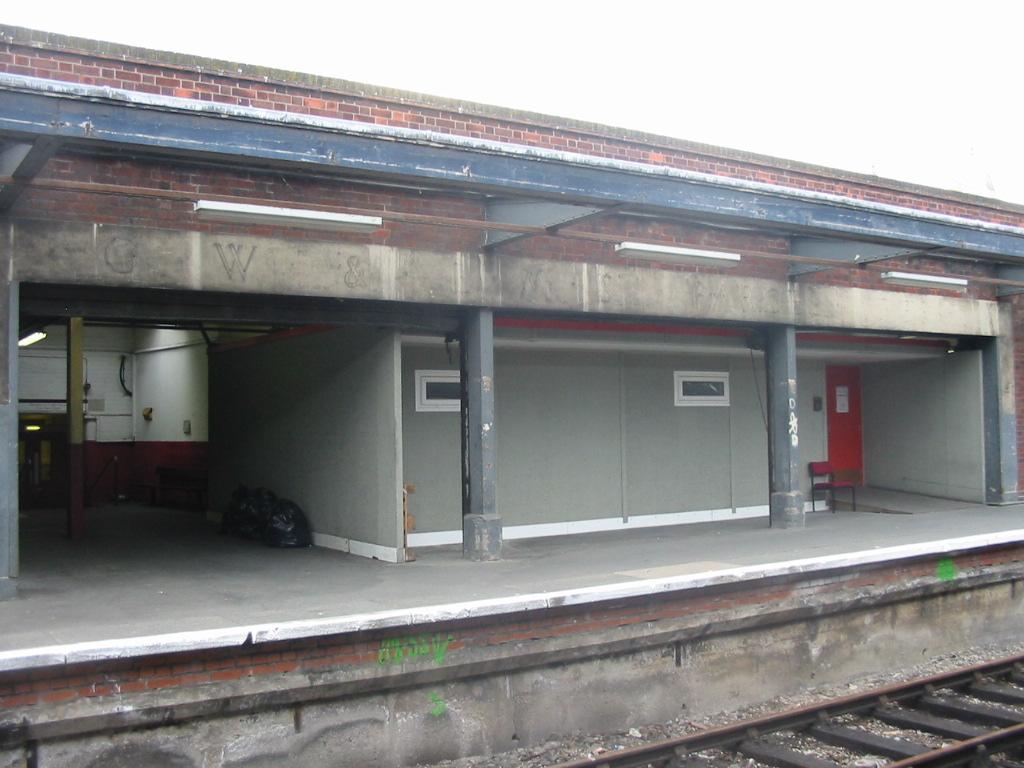 gb-station-bristoltm-GW+LMSparcels.jpg (91528 bytes)
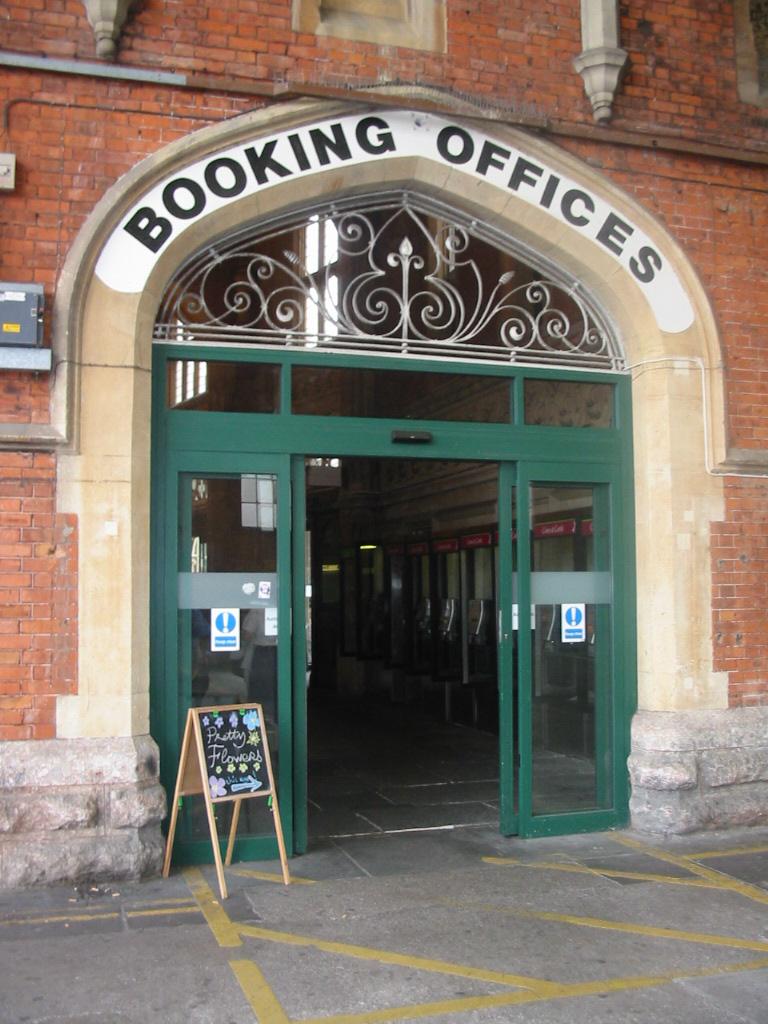 gb-station-bristoltm-bookingoffices.jpg (112103 bytes)
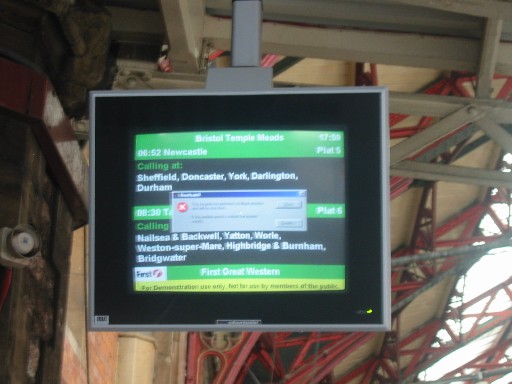 gb-station-bristoltm-error.jpg (47745 bytes)
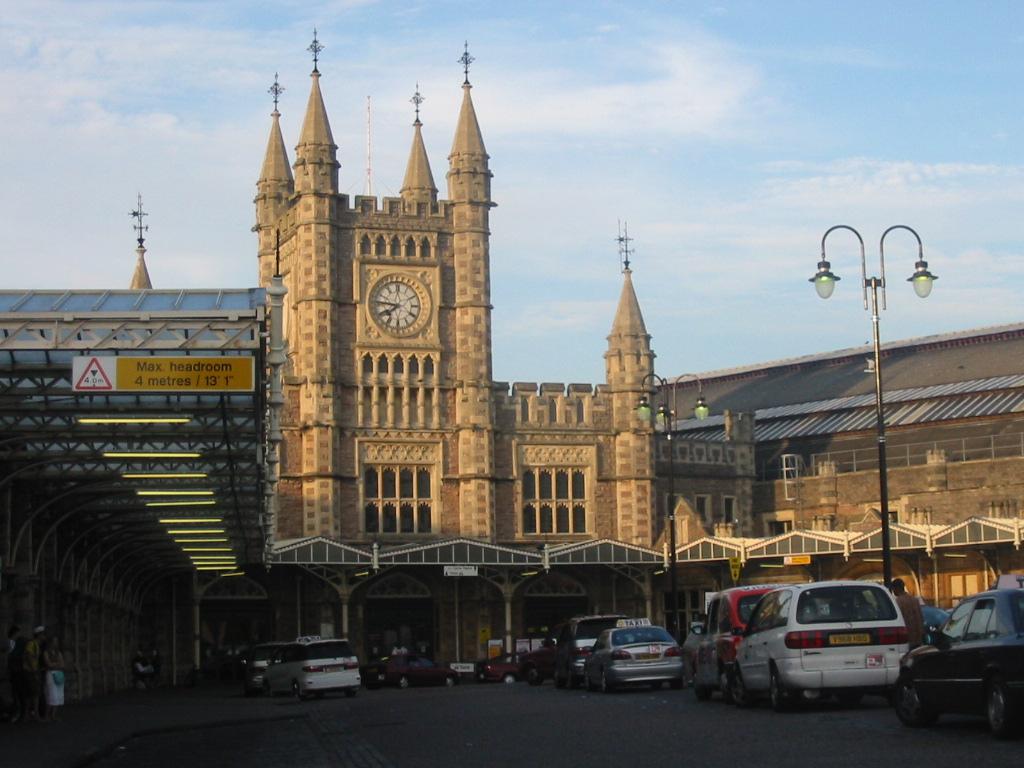 gb-station-bristoltm-facade.jpg (94497 bytes)
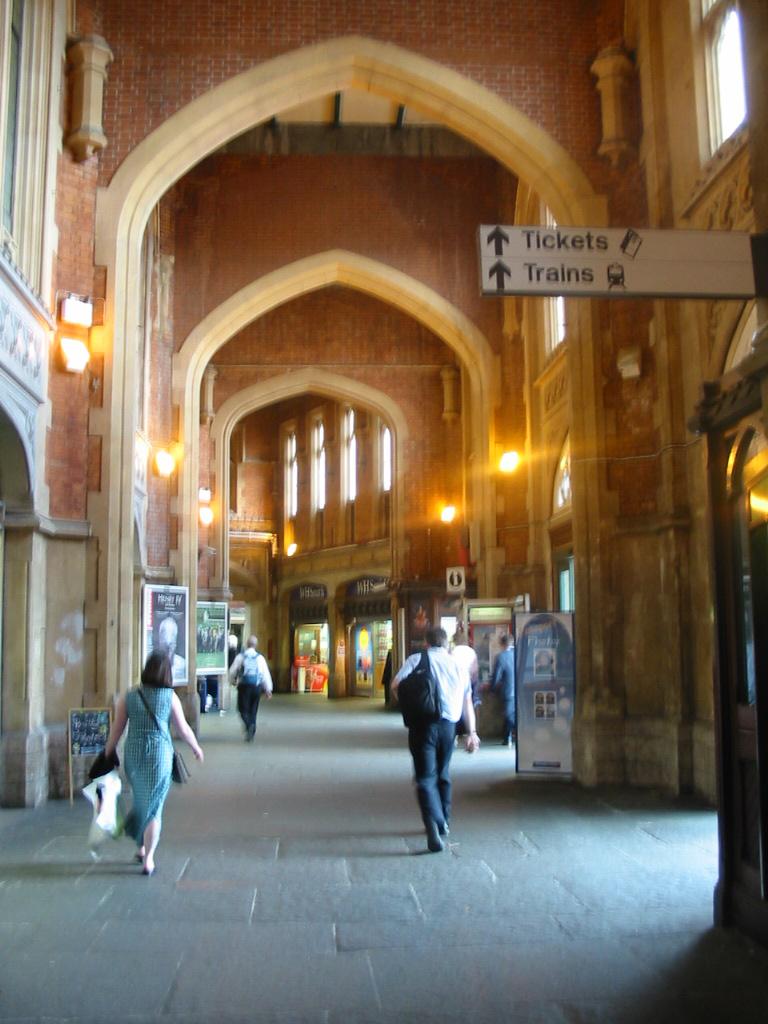 gb-station-bristoltm-hall01.jpg (94824 bytes)
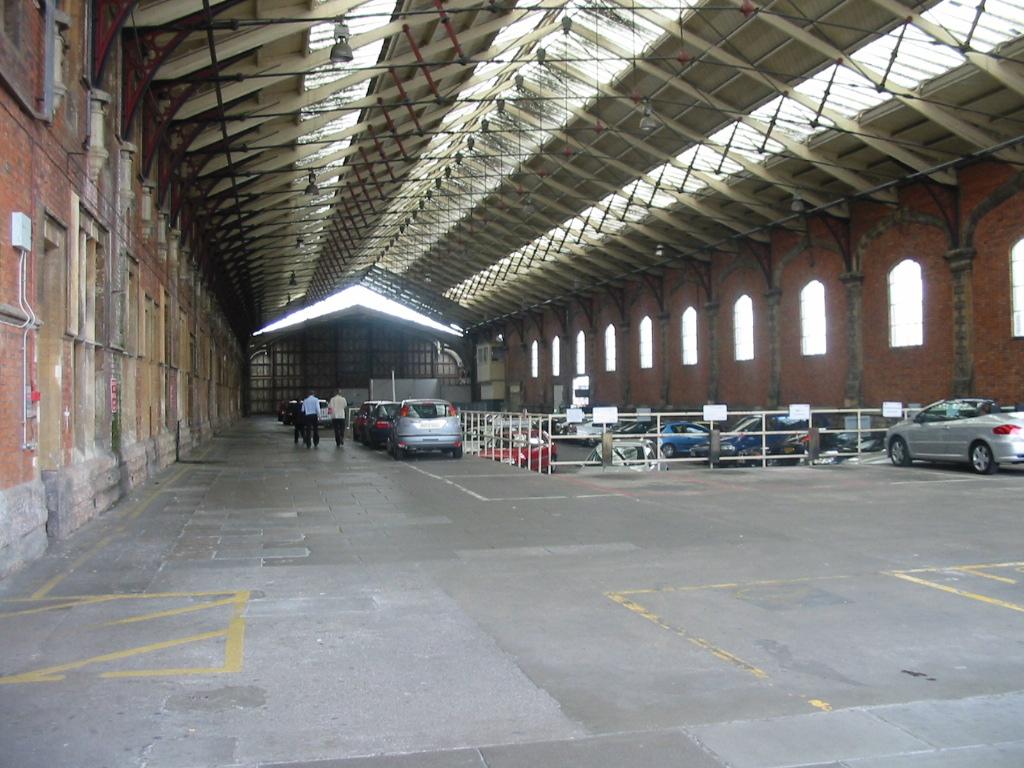 gb-station-bristoltm-oldstation.jpg (120085 bytes)
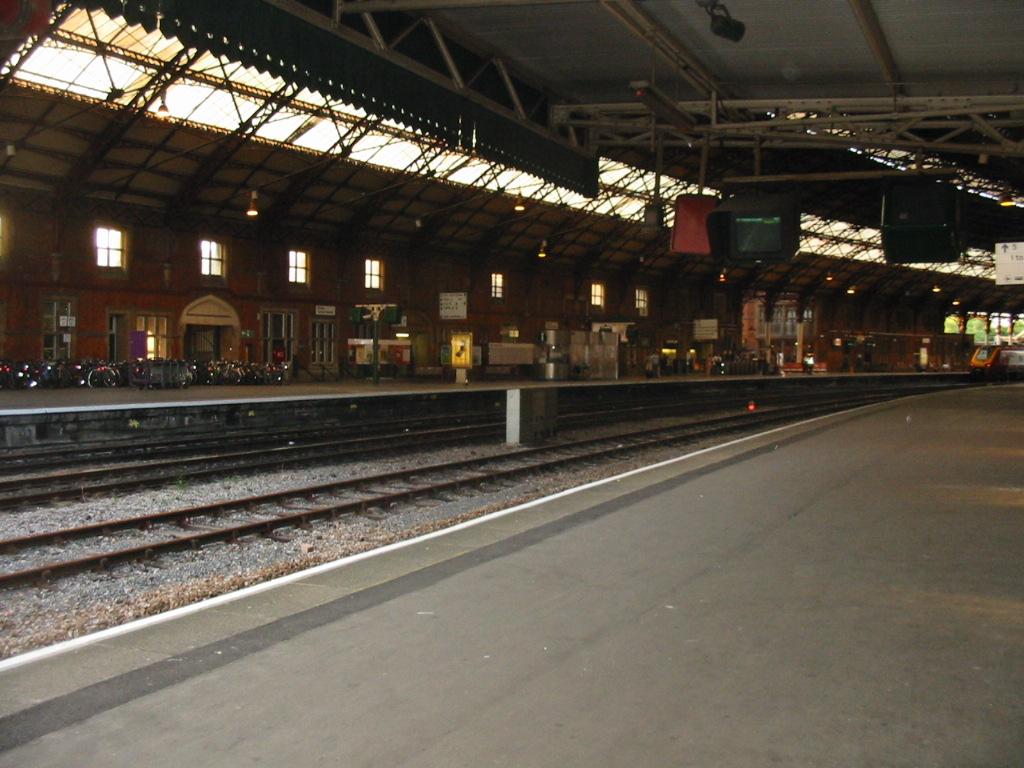 gb-station-bristoltm-platform3-01.jpg (105579 bytes)
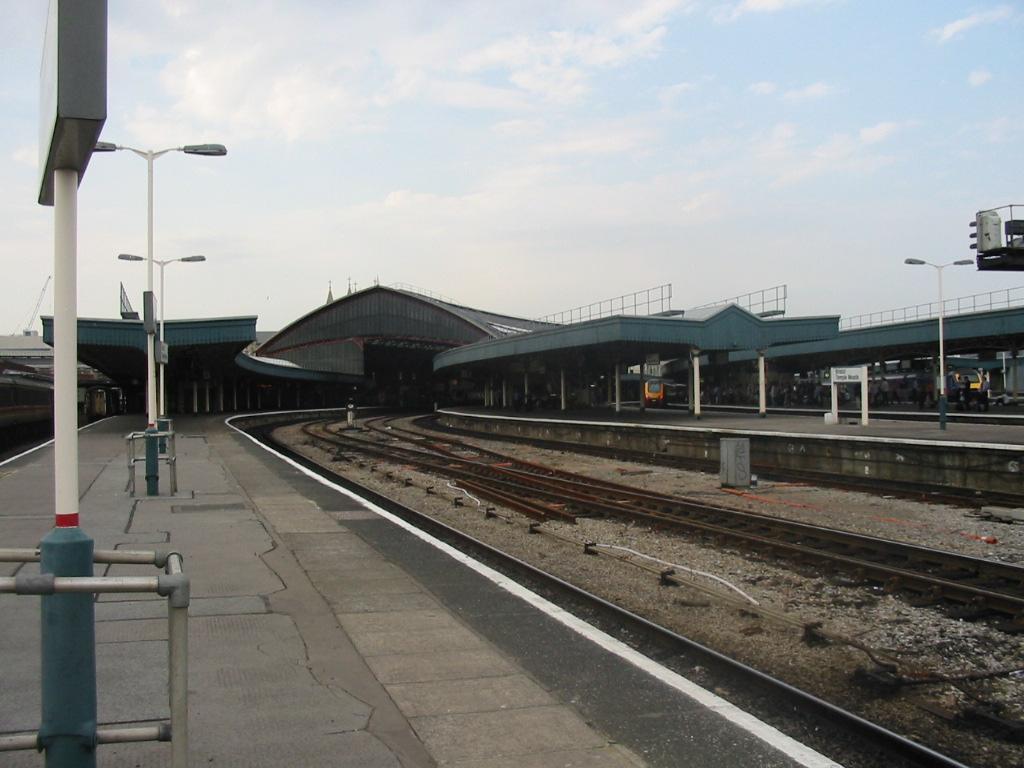 gb-station-bristoltm-platform4-01.jpg (86667 bytes)
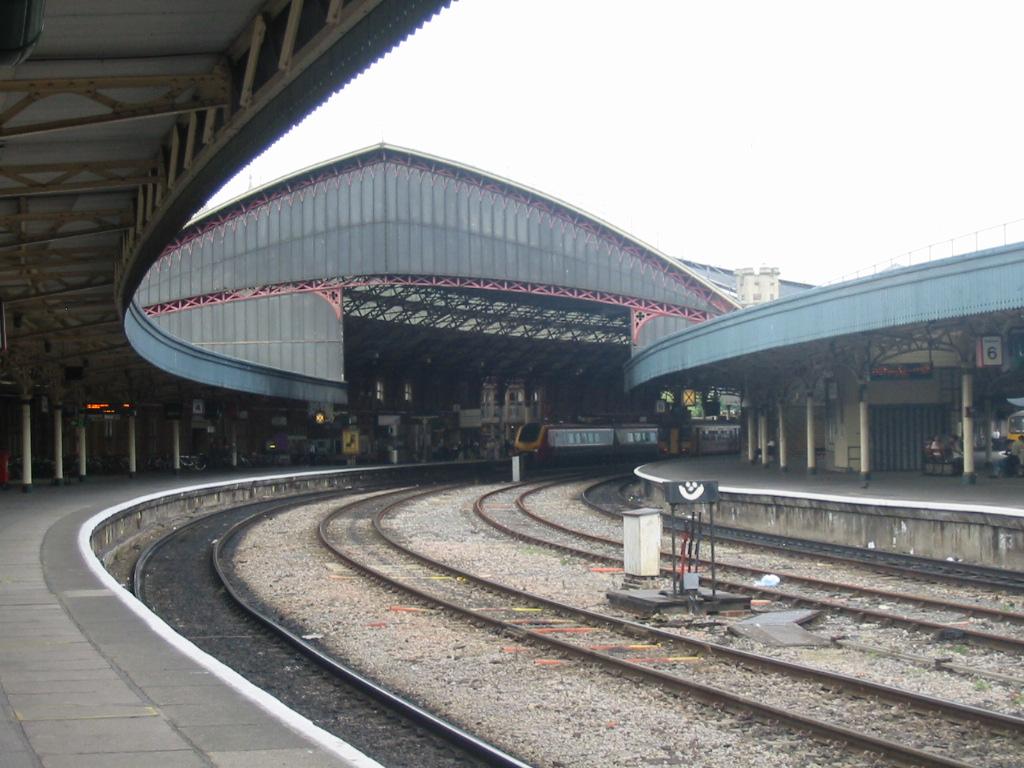 gb-station-bristoltm-platform4-02.jpg (106570 bytes)
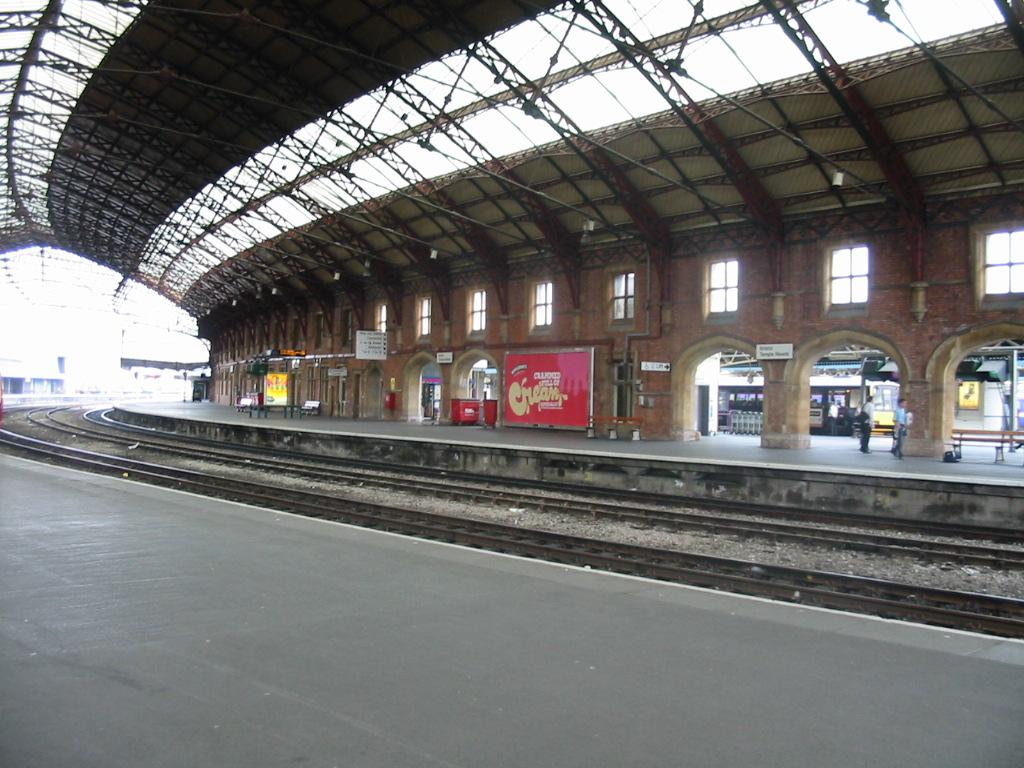 gb-station-bristoltm-platform5-02.jpg (121508 bytes)
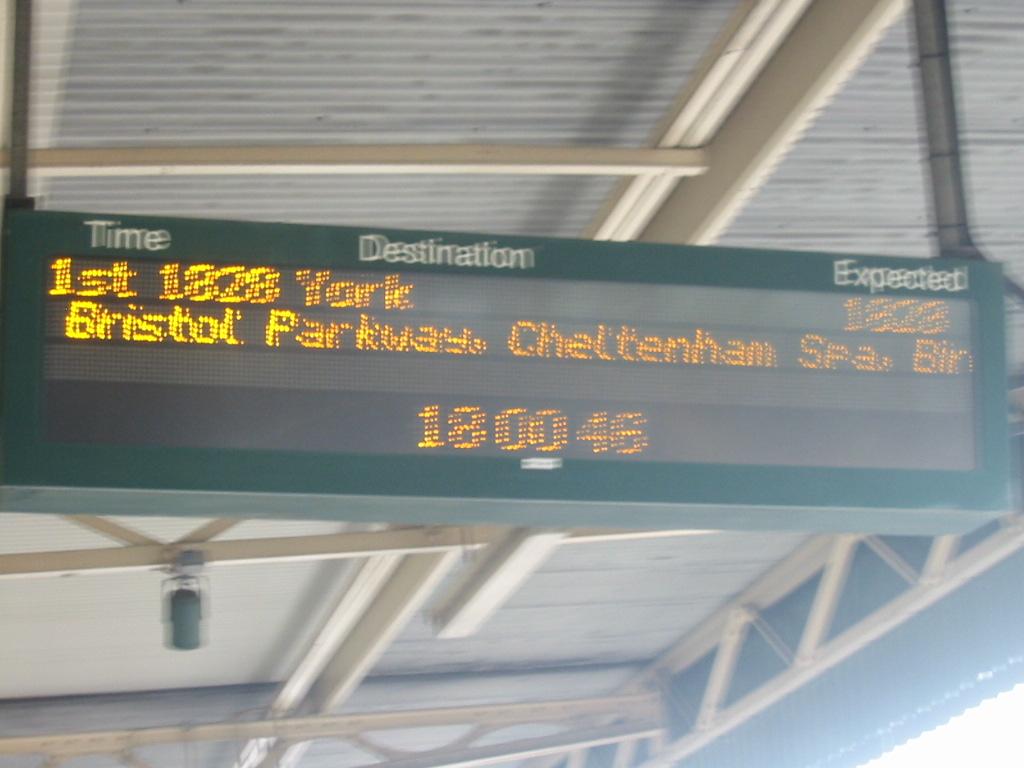 gb-station-templemeads-nexttrain01.jpg (69006 bytes)
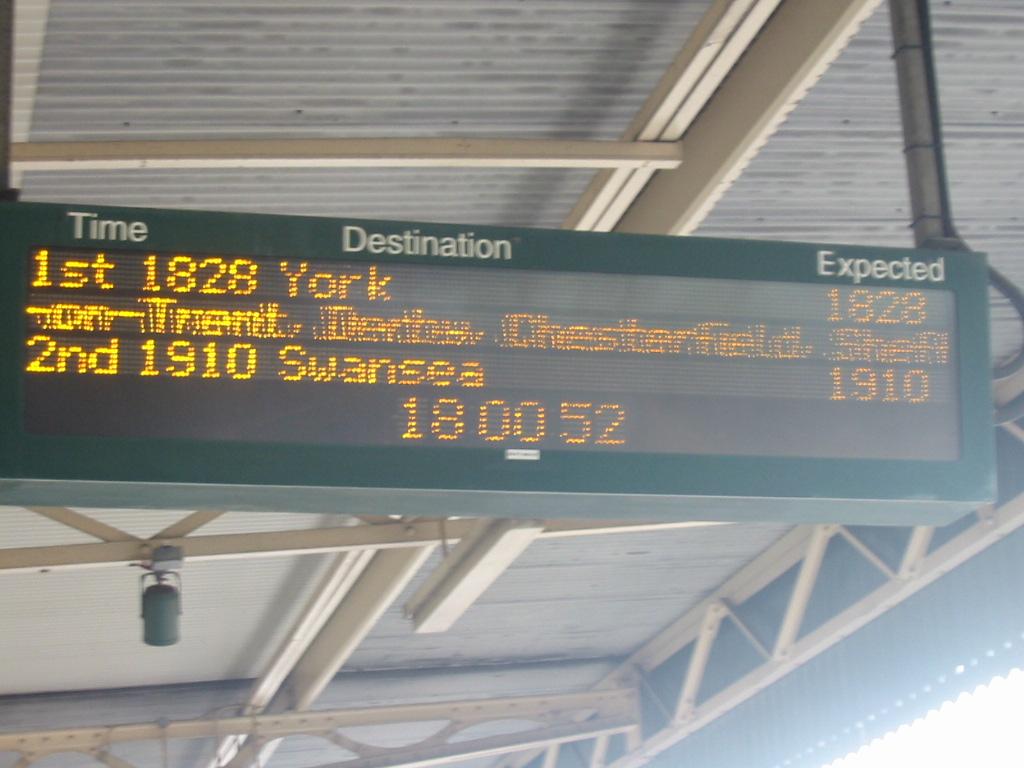 gb-station-templemeads-nexttrain02.jpg (80028 bytes)
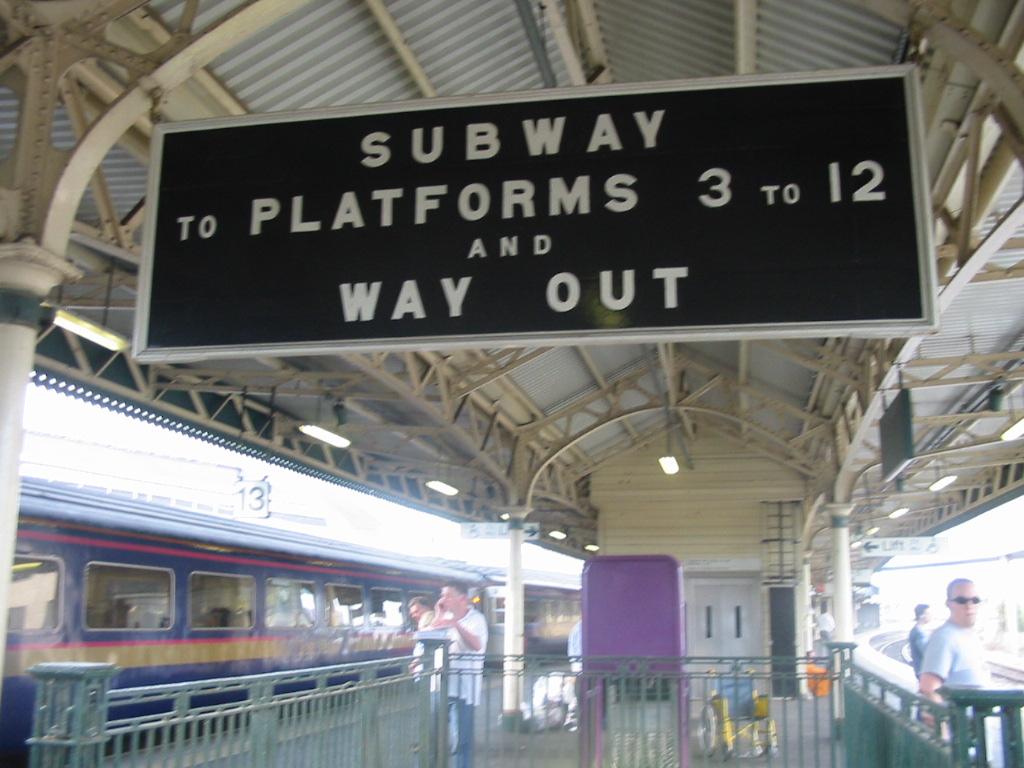 gb-station-templemeads-subway.jpg (96098 bytes)