 WQ-001N-01.jpg (162901 bytes)
|
The Railfaneurope.net Picture Gallery
Directory: /pix/gb/misc/Weymouth_Quay/001-019
Last update: Sat Nov 15 20:07:05 CET 2014
|
|
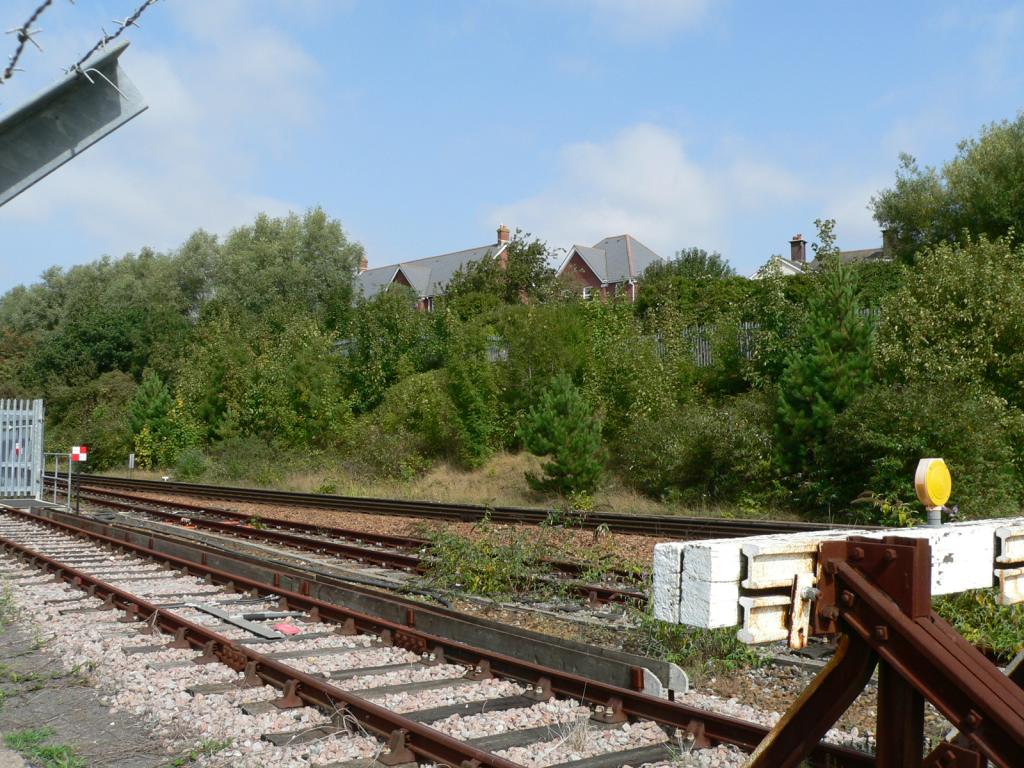
Looking north from point 1 on the map - the branch line diverges from the main line into Weymouth station just beyond the fence on the left.
Photo by Chris McKenna 06/09/2006. |
|
Looking south from point 1 on the map - the branch line runs between the siding in the foreground and the mainline into Weymouth station in the background.
Photo by Chris McKenna 06/09/2006. |
|
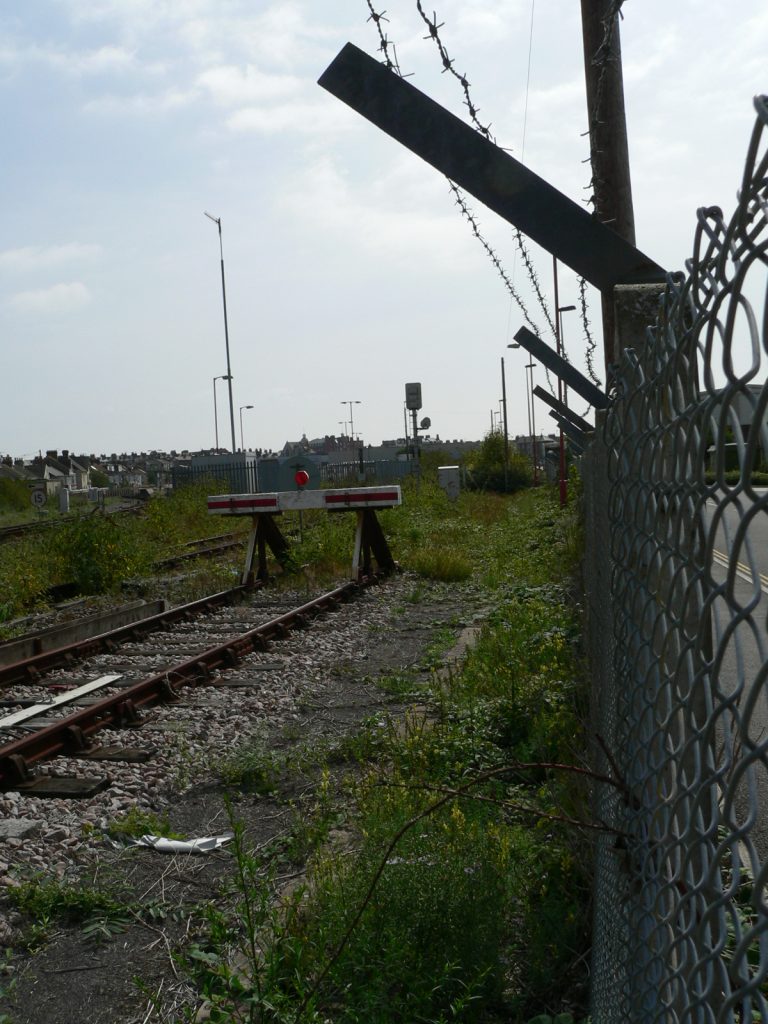
Looking south from point 1 on the map - the branch line here is on a reserved alignment, the signal controls access from the line onto the main line. The mainline runs into Weymouth station in the background.
Photo by Chris McKenna 06/09/2006. |
|
Looking north from point 2 on the map - Signal DR194 controls access from the branch line onto the mainline towards London Waterloo.
Photo by Chris McKenna 06/09/2006. |
|
Looking north from point 2 on the map - Signal DR194 controls access from the branch line onto the mainline towards London Waterloo.
Photo by Chris McKenna 06/09/2006. |
|
Looking east from point 3 on the map at the AWS ramp for signal DR194 which contorls access to the mainline for trains on the Weymouth Quay branch. Beyond the fence is the station car park which lies between the branch and the main line into Weymouth station.
Photo by Chris McKenna 06/09/2006. |
|
Looking north from point 3 on the map, just visible in the background is singal DR194 which controls access to the mainline from the branch. The lorry cab is parked in the railway station car park.
Photo by Chris McKenna 06/09/2006. |
|
Looking south from point 3 on the map, just visible in the background is singal DR205, the southern most signal on the branch, which protects a level crossing into the car parks for the station and DIY stores. It also marks the point where the line leaves the main part of railway land and becomes a tramway.
Photo by Chris McKenna 06/09/2006. |
|
Looking south from point 4 on the map, which is in the station car park. This shows just how overgrown this part of the line is.
Photo by Chris McKenna 06/09/2006. |
|
Looking south from point 4 on the map, which is in the station car park. Signal DR205 protects the level crossing entrance to the station and other carparks. It is also the point after which trains need the permission of shunters to proceed.
Photo by Chris McKenna 06/09/2006. |
|
Looking south from point 5 on the map. Signal DR205 in the distance protects the level crossing entrance to the station and other carparks. It is also the point after which trains need the permission of shunters to proceed. On the left is the station car park and beyond that the canopy of Weymouth station can be seen.
Photo by Chris McKenna 06/09/2006. |
|
Looking south from point 5 on the map. Signal DR205 in the distance protects the level crossing entrance to the station and other carparks. It is also the point after which trains need the permission of shunters to proceed. On the left is the station car park.
Photo by Chris McKenna 06/09/2006. |
|
Looking south from point 6 on the map. Signal DR205 in the distance protects the level crossing entrance to the station and other carparks. It is also the point after which trains need the permission of shunters to proceed. On the left is the station car park.
Photo by Chris McKenna 06/09/2006. |
|
Looking south from point 6 on the map. Signal DR205 in the distance protects the level crossing entrance to the station and other carparks. It is also the point after which trains need the permission of shunters to proceed.
Photo by Chris McKenna 06/09/2006. |
|
Looking south from point 6 on the map. Signal DR205 in the distance protects the level crossing entrance to the station and other carparks. It is also the point after which trains need the permission of shunters to proceed.
Photo by Chris McKenna 06/09/2006. |
|
Looking south from point 7 on the map. The gates protect the level crossing over the branch that leads to the station car park and the DIY stores - presumably built on a former goods yard.
Photo by Chris McKenna 06/09/2006. |
|
Looking south from point 8 on the map. This level crossing over the branch that leads to the station car park and the DIY stores - presumably built on a former goods yard.
Photo by Chris McKenna 06/09/2006. |
|
Looking north from point 9 on the map. Signal DR 196 is the first signal seen by northbound trains from the quay.
Photo by Chris McKenna 06/09/2006. |
|
Looking south from point 9 on the map. This level crossing over the branch leads to the station car park and the DIY stores on the left - presumably built on a former goods yard.
Photo by Chris McKenna 06/09/2006. |
|
Looking north from point 10 on the map. This level crossing over the branch leads to the station car park and the DIY stores on the right - presumably built on a former goods yard. Signal DR196 marks the start of railway signalling rather than on-street tramway style line of sight, and presumably also the end of the very strictly enforced walking pace speed limit.
Photo by Chris McKenna 06/09/2006. |
|
Looking south from point 10 on the map. This alley is the last section of reserved way on the branch, after this it is all on-street running.
Photo by Chris McKenna 06/09/2006. |
|
Looking at the rails at point 10 on the map, a level crossing. At this point the space for the wheel flange has become completely filled by stones and dirt, showing how long since a train passed.
Photo by Chris McKenna 06/09/2006. |
|
Looking at the rails at point 10 on the map, a level crossing. At this point the space for the wheel flange has become filled by stones and dirt, showing how long since a train passed.
Photo by Chris McKenna 06/09/2006. |
|
Looking north from point 11 on the map. The gates protect the level crossing to the railway station car park and DIY stores on the right. The signal beyond marks the end of tramway and start of railway.
Photo by Chris McKenna 06/09/2006. |
|
Looking south from point 11 on the map. This alley is the last section of reserved way on the branch, after this it is all on-street running.
Photo by Chris McKenna 06/09/2006. |
|
Looking south from point 12 on the map. This alley is the last section of reserved way on the branch, after this it is all on-street running. The first section of street after the junction has been bypassed as a through route by a new road to the right, and is now filled with parked cars blocking the way - it has been at least 10 years since the last train though.
Photo by Chris McKenna 06/09/2006. |
|
Looking north from point 13 on the map. This overgrown alley is the most northern section of reserved way.
Photo by Chris McKenna 06/09/2006. |
|
Looking south from point 13 on the map. In the foreground is a busy east-west road, the first section of street beyond has been bypassed as a through route by a new road to the right, and is now filled with parked cars blocking the way - it has been at least 10 years since the last train though.
Photo by Chris McKenna 06/09/2006. |
|
Looking east from point 14 on the map. This merged view shows the transition from reserved way on the left to on-street running on the right.
Photo by Chris McKenna 06/09/2006. |
|
Looking southeast from point 14 on the map. This is the first section of on-street running for southbound services, crossing a busy road and then running along the start of Commercial Road, which it follows most of the way to the quay.
Photo by Chris McKenna 06/09/2006. |
|
Looking north from point 15 on the map, the northern end of Commercial Road. Once northbound trains cross King Street they leave street running behind and are on reserved way.
Photo by Chris McKenna 06/09/2006. |
|
Looking south from point 15 on the map. This is the northern most part of Commercial Road, which the railway follows almost all the way to the quay, and the first section of on-street running for southbound trains. This part of the road has been bypassed and is now used as car parking - completely blocking the railway line, although as it has been 10 years since the last train ran. The rails here are also in a poor state, filled with mud and grass.
Photo by Chris McKenna 06/09/2006. |
|
Looking north from point 15 on the map. This photograph shows the state of the rails where they cross King Street.
Photo by Chris McKenna 06/09/2006. |
|
Looking north from point 16 on the map, the junction of Commercial Road and King Street. North of here the railway is on a reserved alginment.
Photo by Chris McKenna 06/09/2006. |
|
Looking north from point 16 on the map along the section of overgrown reserved railway alignment.
Photo by Chris McKenna 06/09/2006. |
|
Looking north from point 17 on the map along the northern section of commercial road. Bypassed by the main road for traffic, this area is used for car parking, blocking the railway line - although in the foreground the hatching keeps the route clear. Note how close the houses on the right are.
Photo by Chris McKenna 06/09/2006. |
|
Looking south from point 17 on the map along the northern section of commercial road. The bus shows the alginment of the new road, making this area quiet and used mainly for car parking. North of here the railway lines are blocked, but here they are kept clear by hatching - why the difference I don't know.
Photo by Chris McKenna 06/09/2006. |
|
The sign at point 17 on the map instructing drivers not to park in the path of trains - unfortunately it is completely ignored!
Photo by Chris McKenna 06/09/2006. |
|
Looking south from point 18 on the map along the busy Commercial Road.
Photo by Chris McKenna 06/09/2006. |
|
Looking northeast from point 19 on the map - the bus stop on the new stretch of main road, looking at the bypassed part of Commercial Road. Although the houses here are very close to the railway, there are buildings nearer the quay that are even closer!
Photo by Chris McKenna 06/09/2006. |
 WQ-001S-01.jpg (160315 bytes)
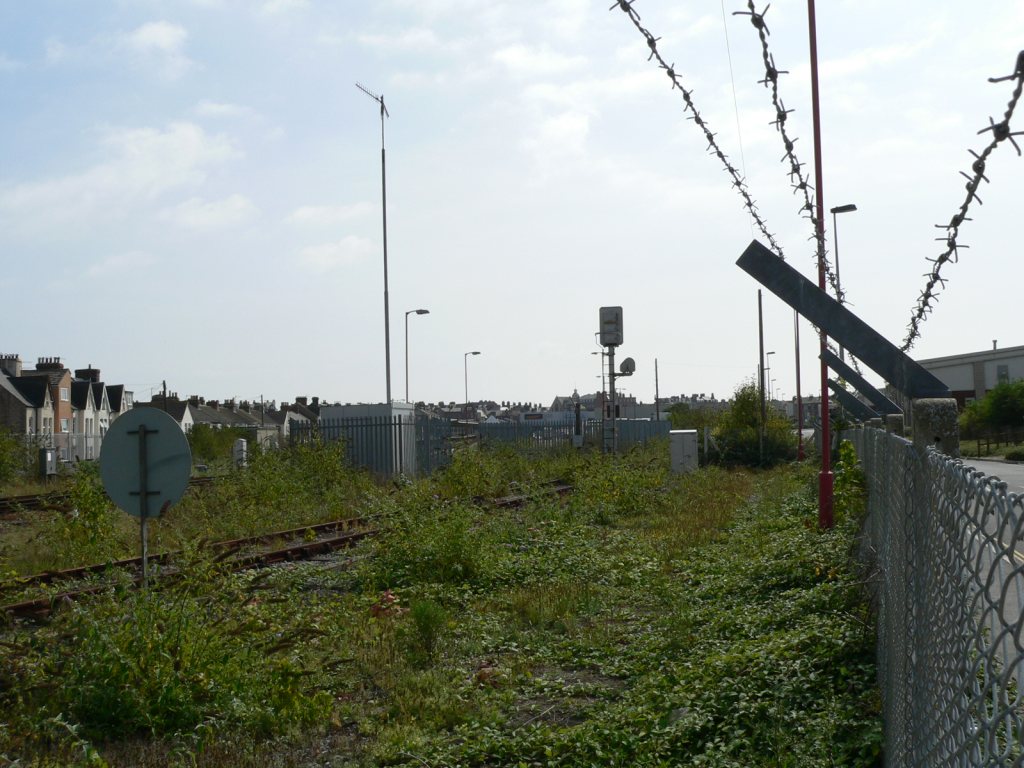 WQ-001S-02.jpg (161456 bytes)
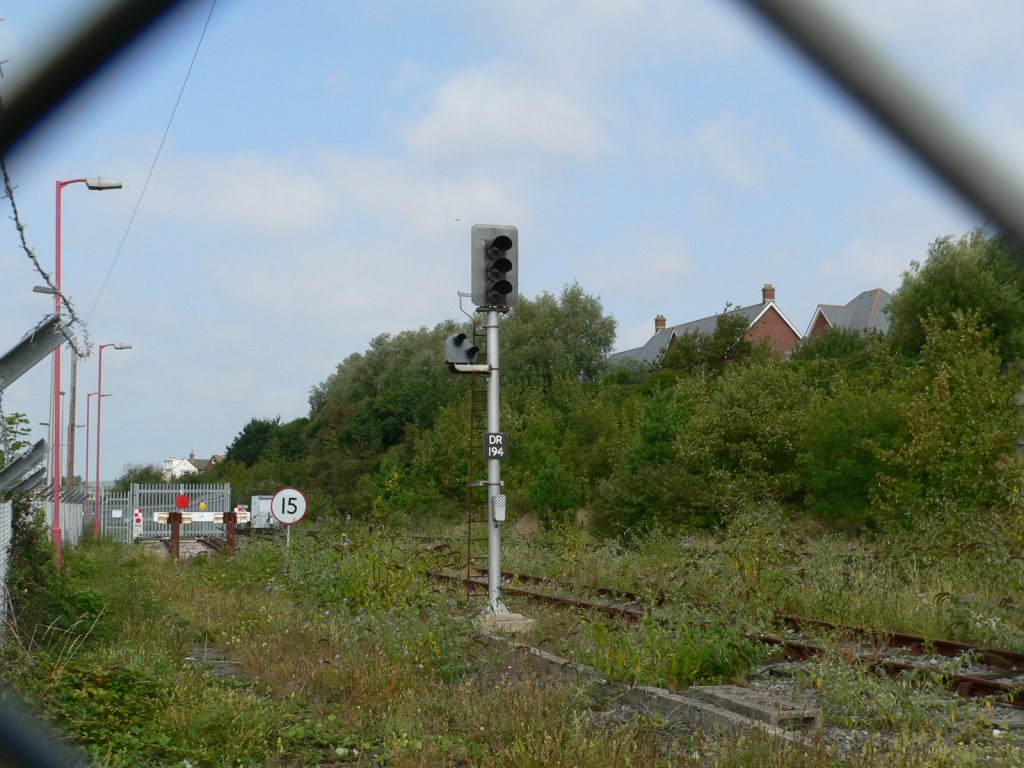 WQ-002N-01.jpg (163852 bytes)
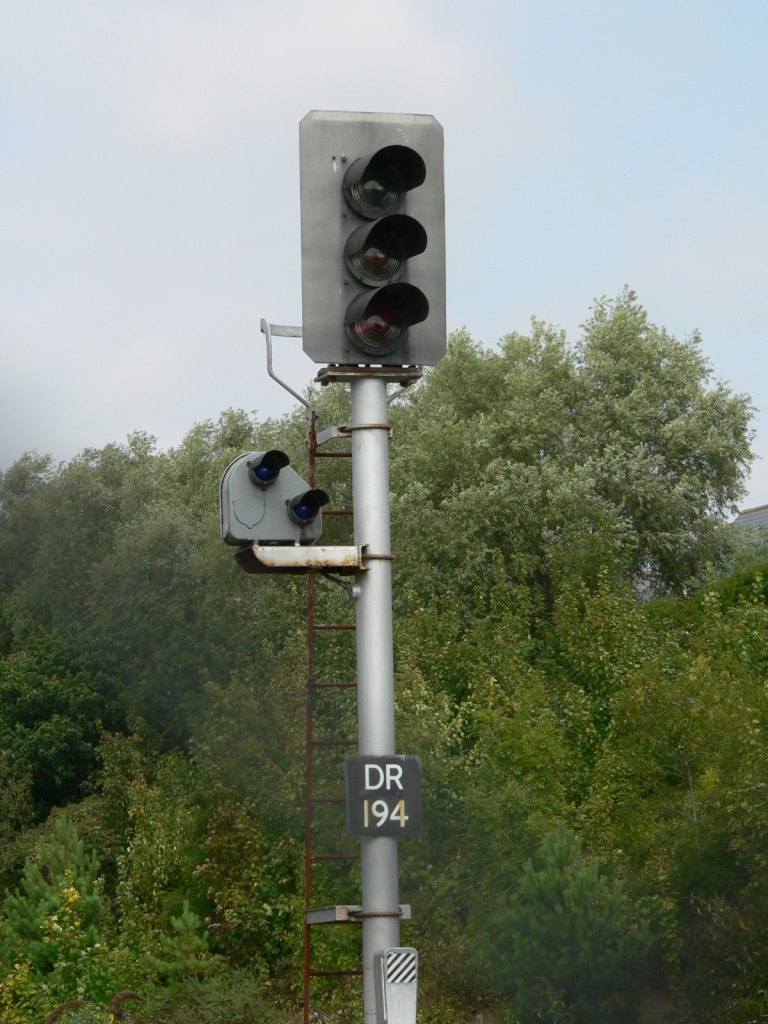 WQ-002N-02.jpg (163481 bytes)
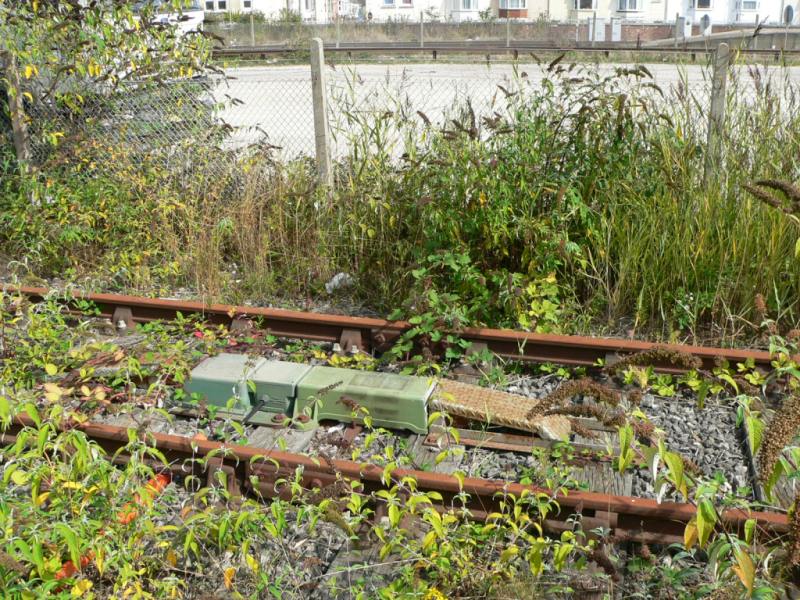 WQ-003E-01.jpg (160246 bytes)
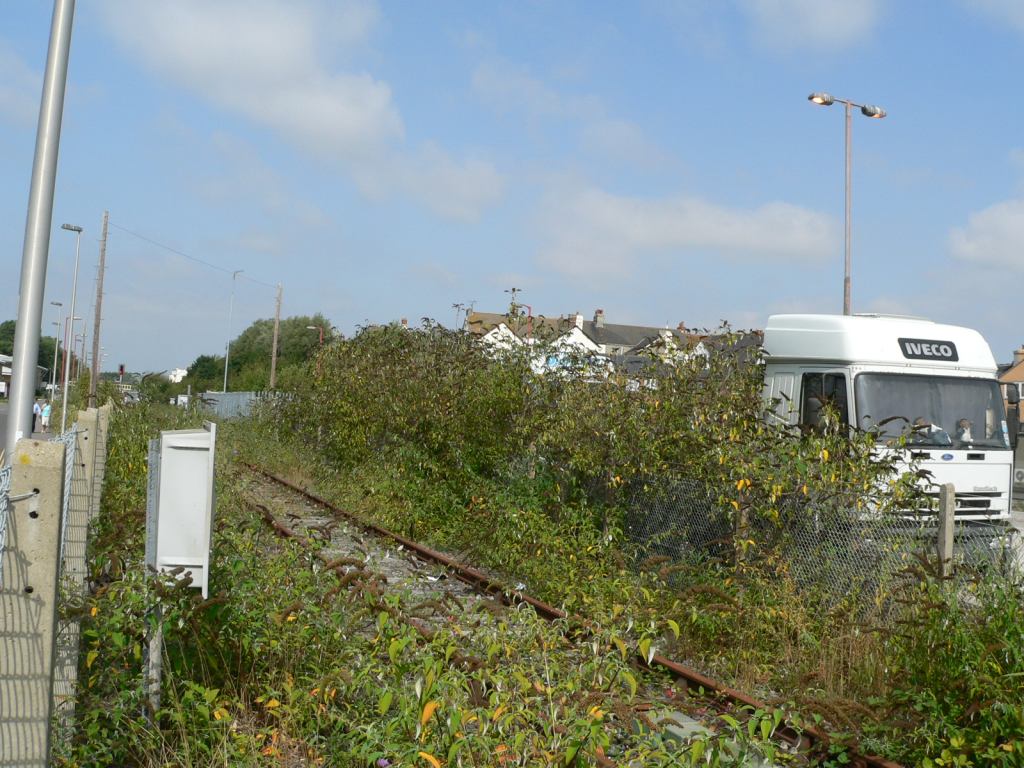 WQ-003N-01.jpg (163234 bytes)
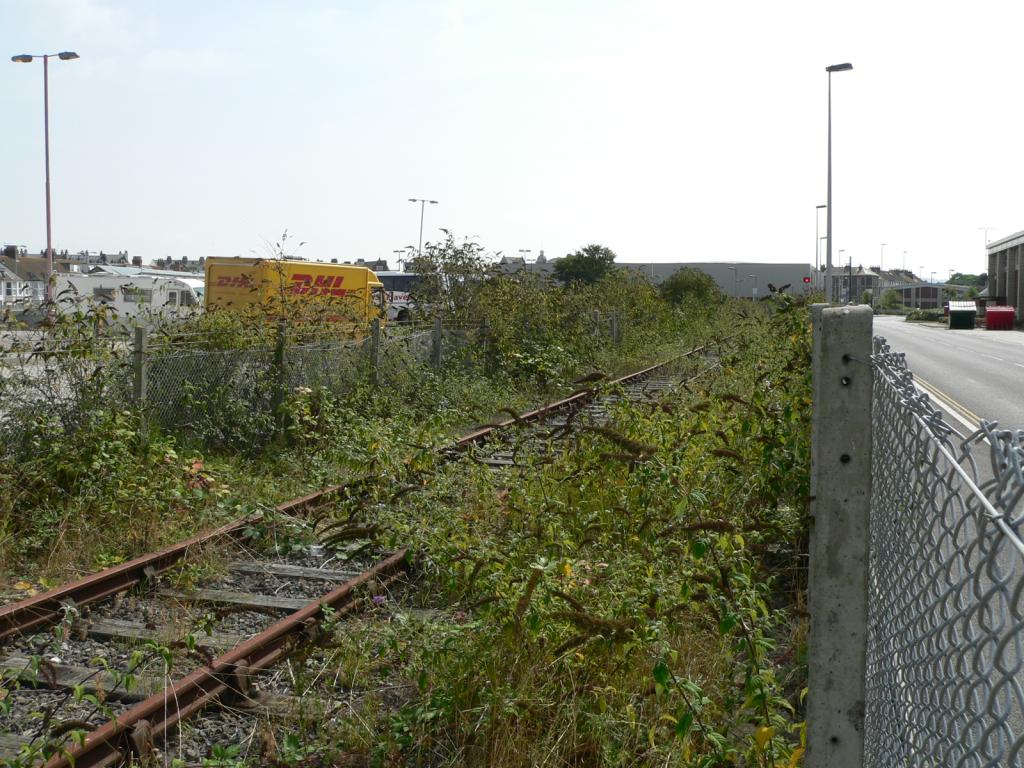 WQ-003S-01.jpg (163288 bytes)
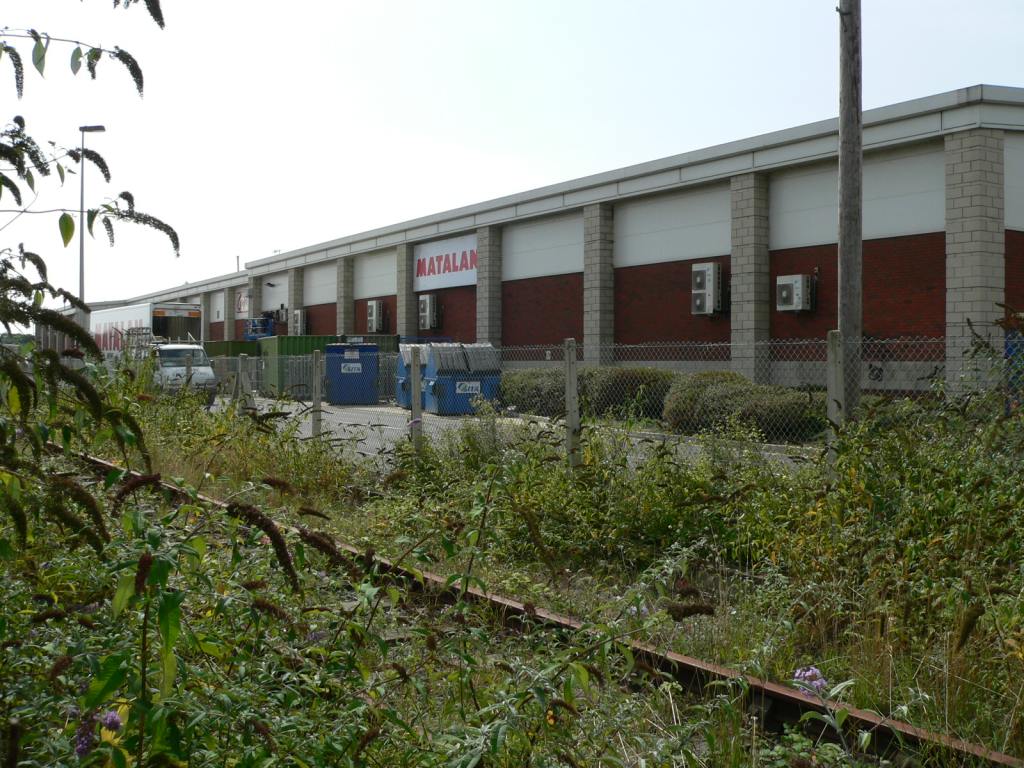 WQ-004S-01.jpg (159896 bytes)
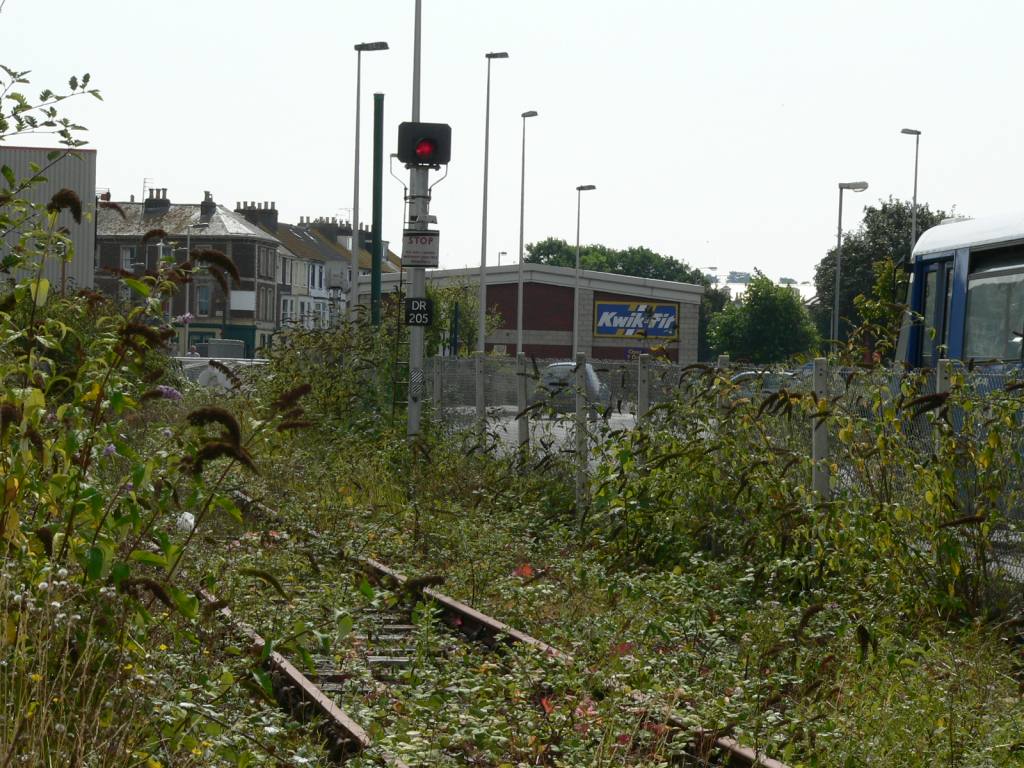 WQ-004S-02.jpg (161597 bytes)
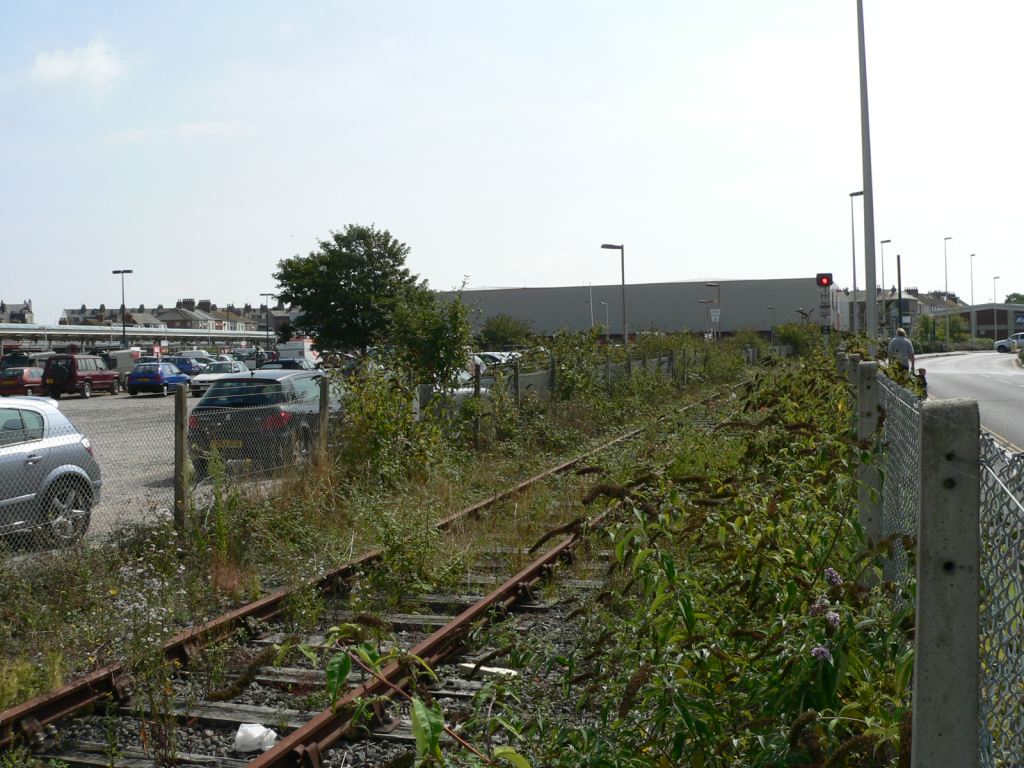 WQ-005S-01.jpg (161727 bytes)
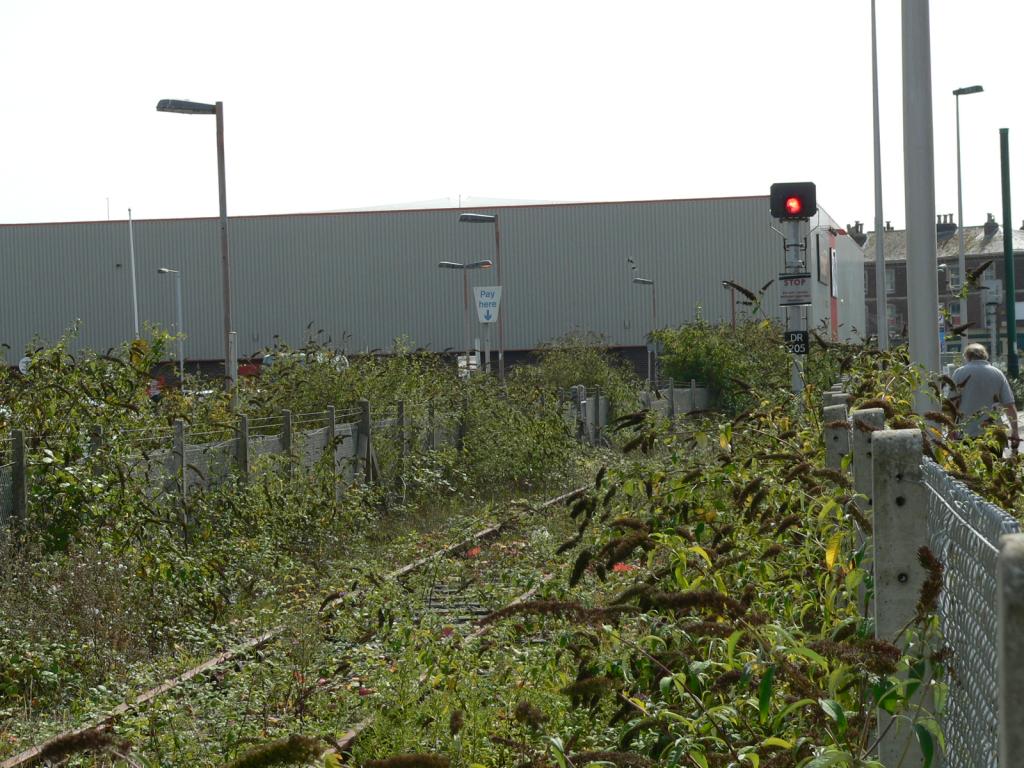 WQ-005S-02.jpg (161742 bytes)
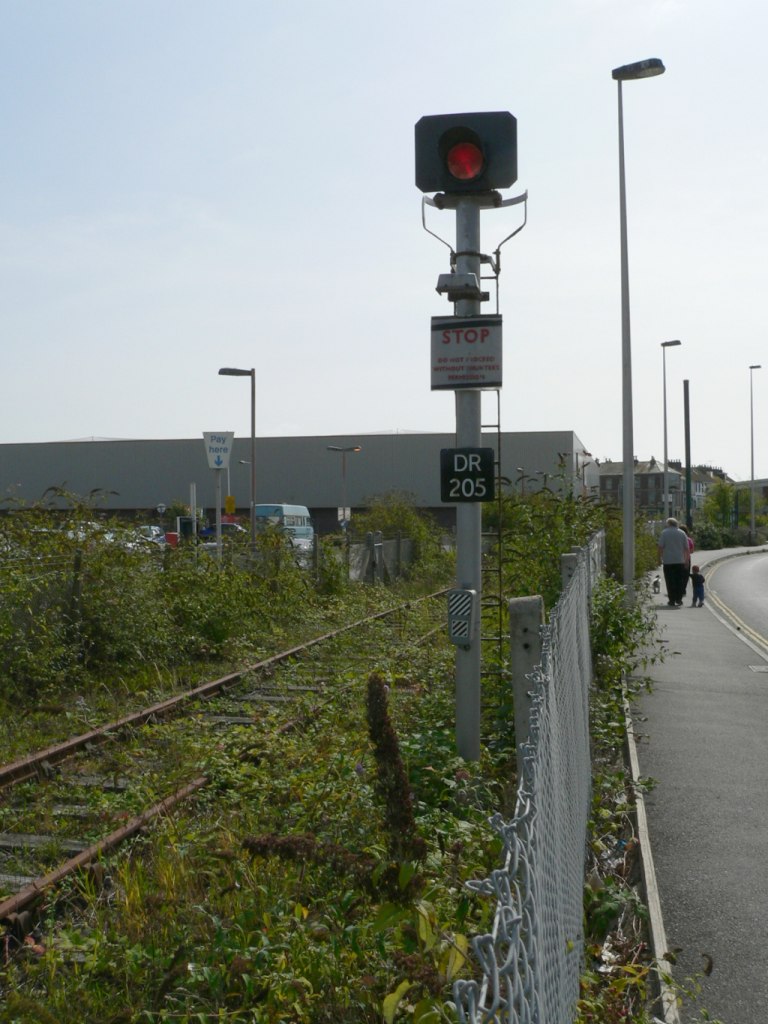 WQ-006S-01.jpg (158850 bytes)
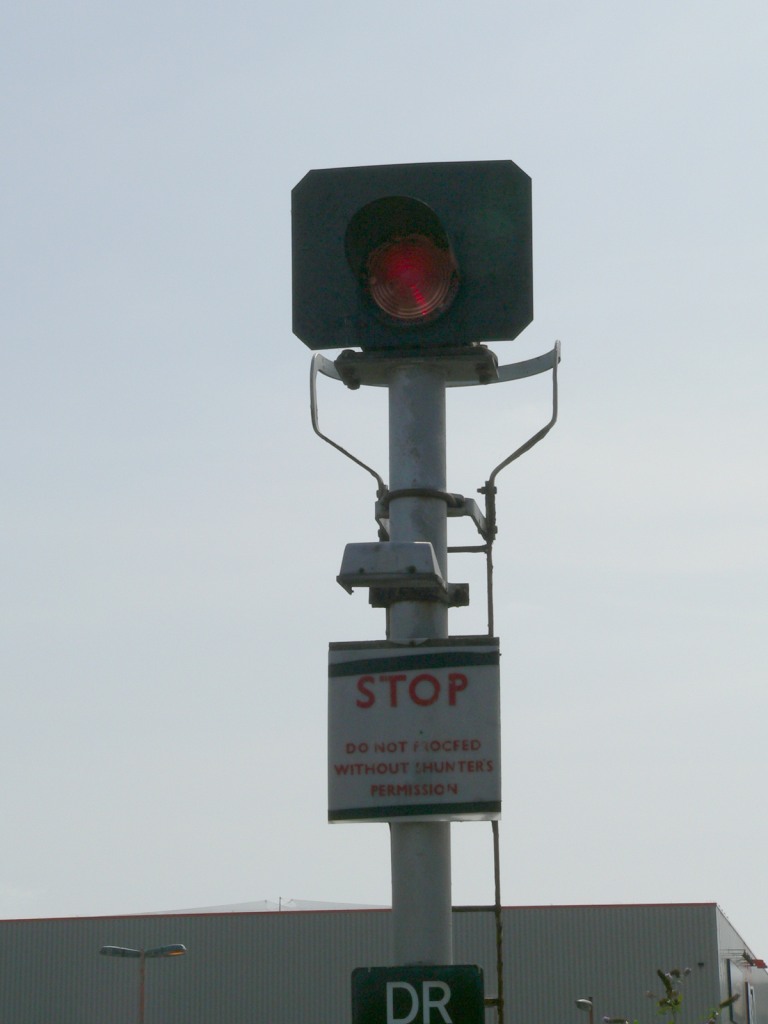 WQ-006S-02.jpg (76841 bytes)
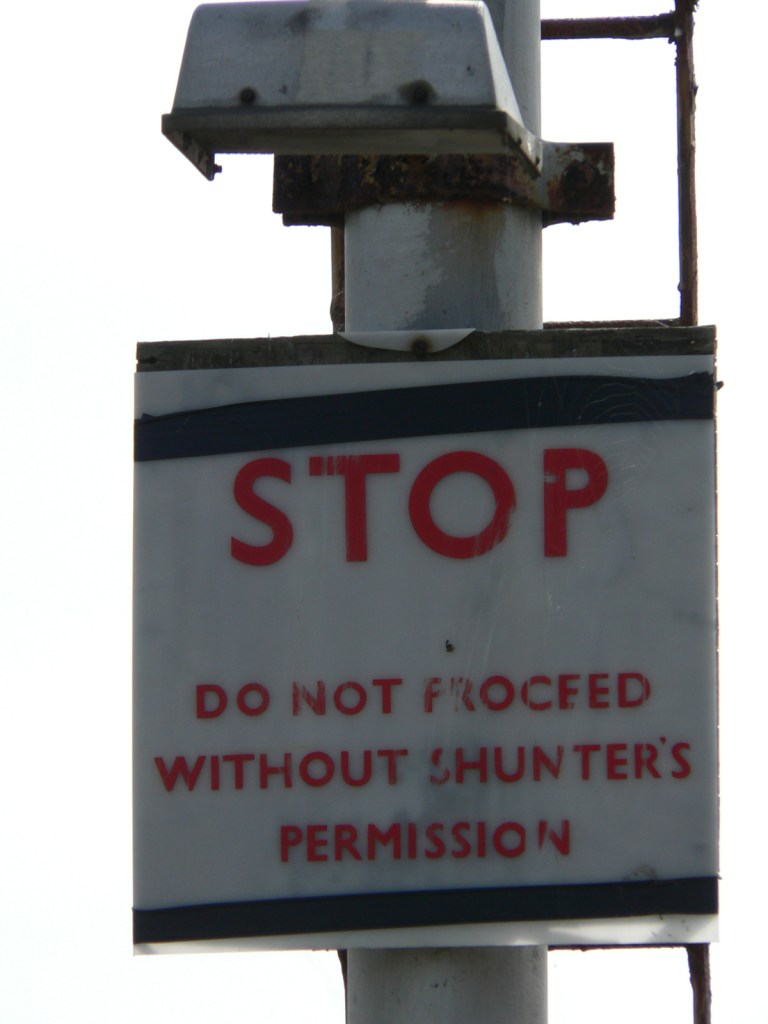 WQ-006S-03.jpg (86254 bytes)
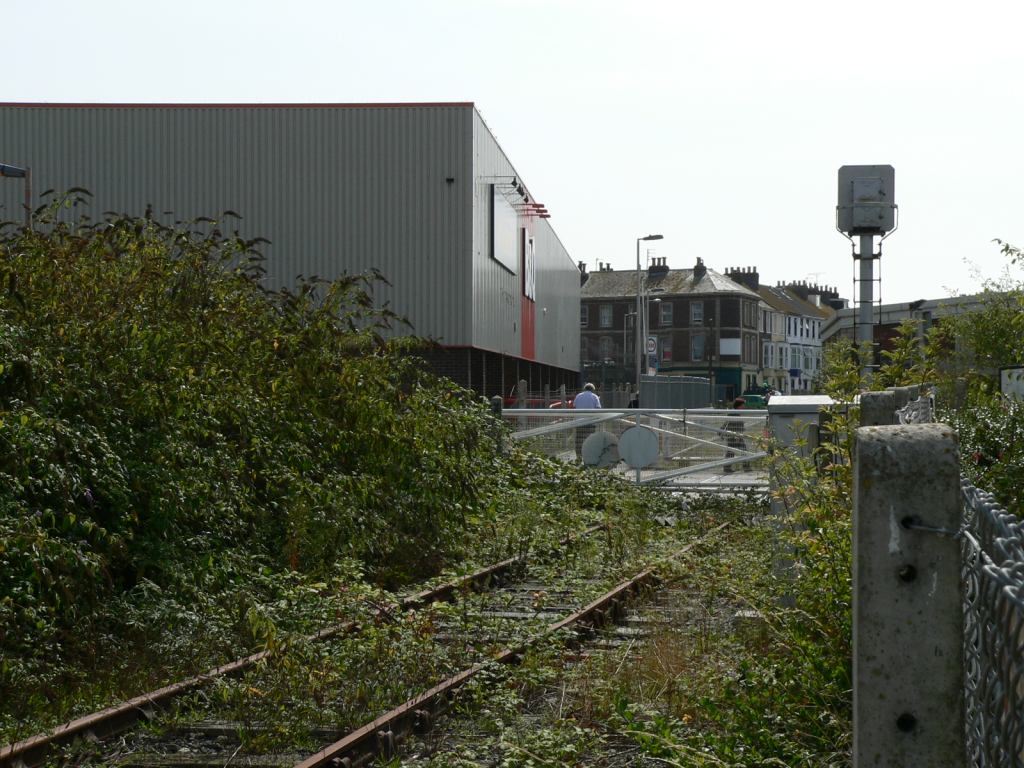 WQ-007S-01.jpg (163491 bytes)
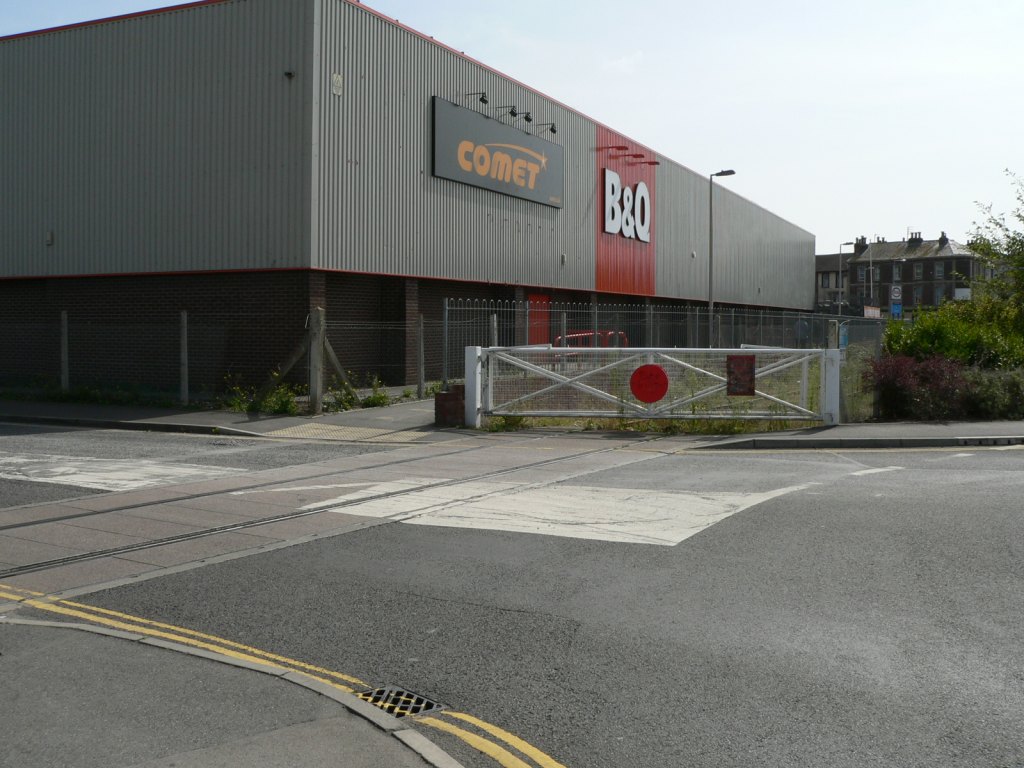 WQ-008S-01.jpg (161034 bytes)
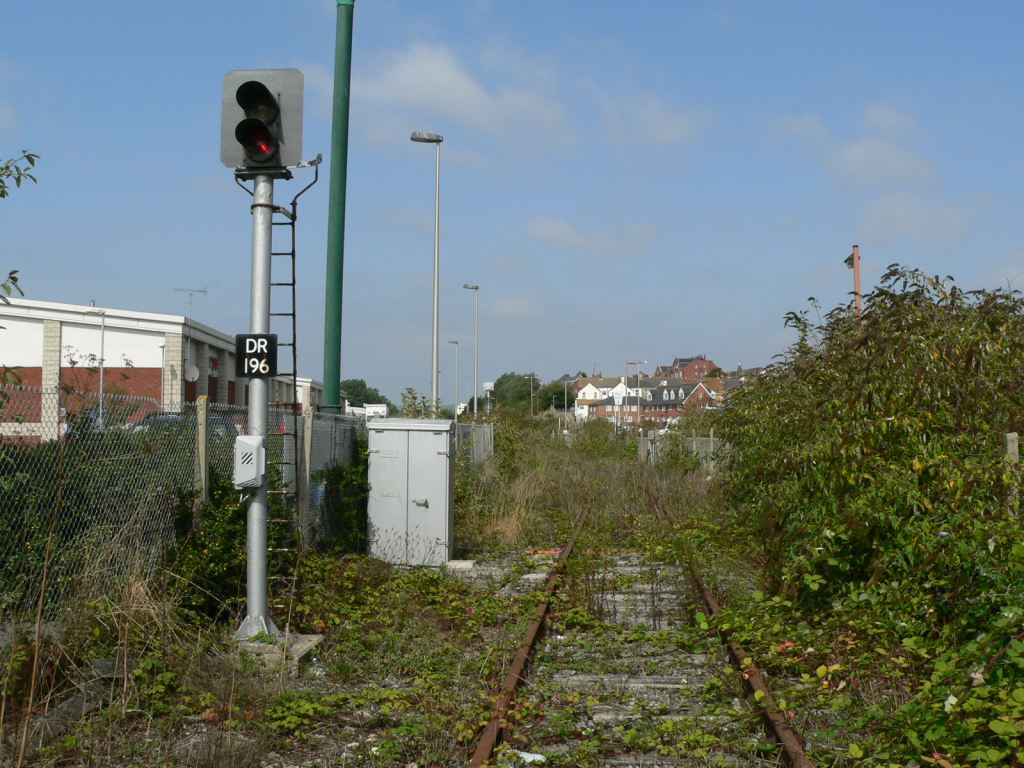 WQ-009N-01.jpg (160577 bytes)
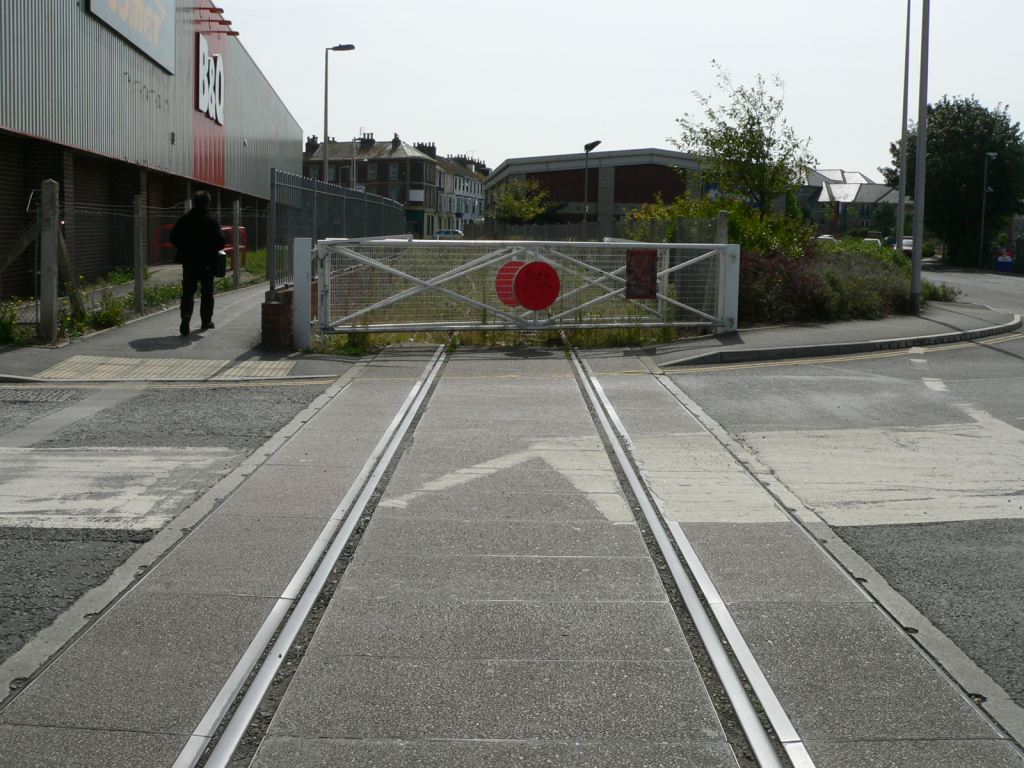 WQ-009S-01.jpg (162139 bytes)
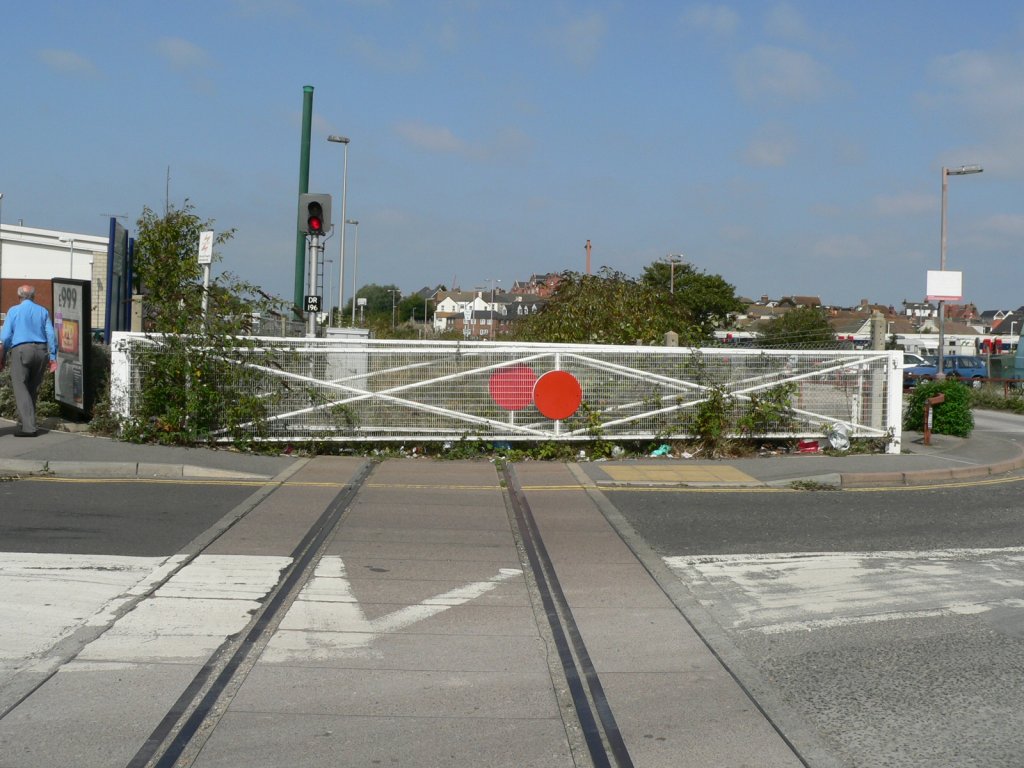 WQ-010N-01.jpg (159528 bytes)
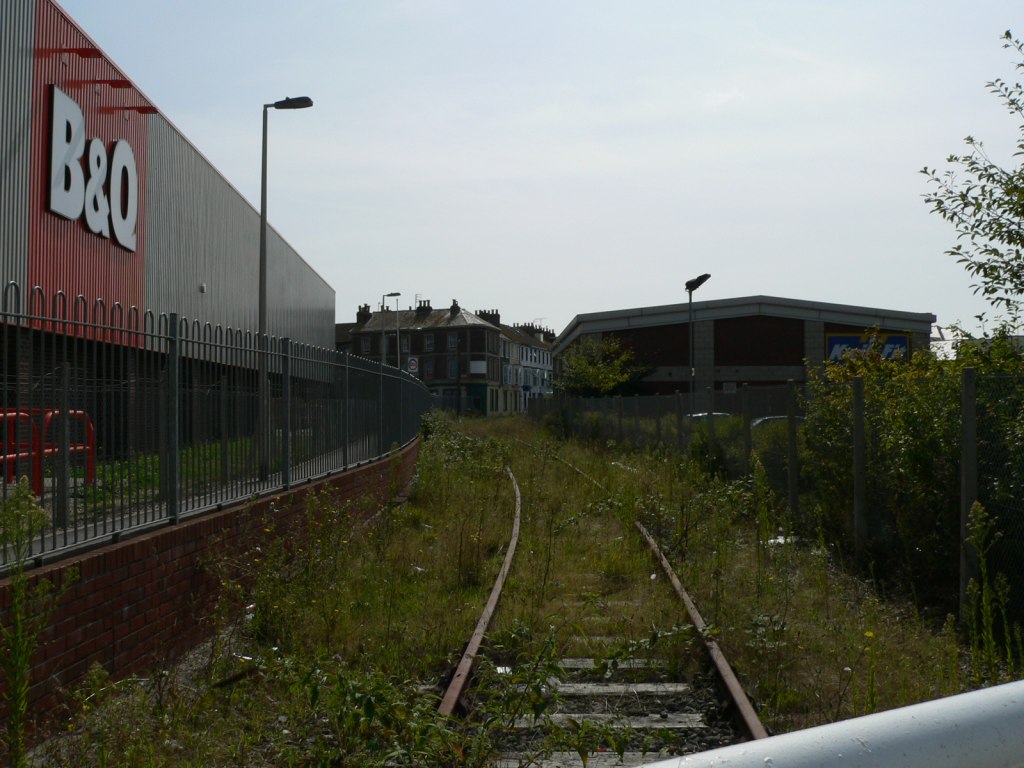 WQ-010S-01.jpg (158904 bytes)
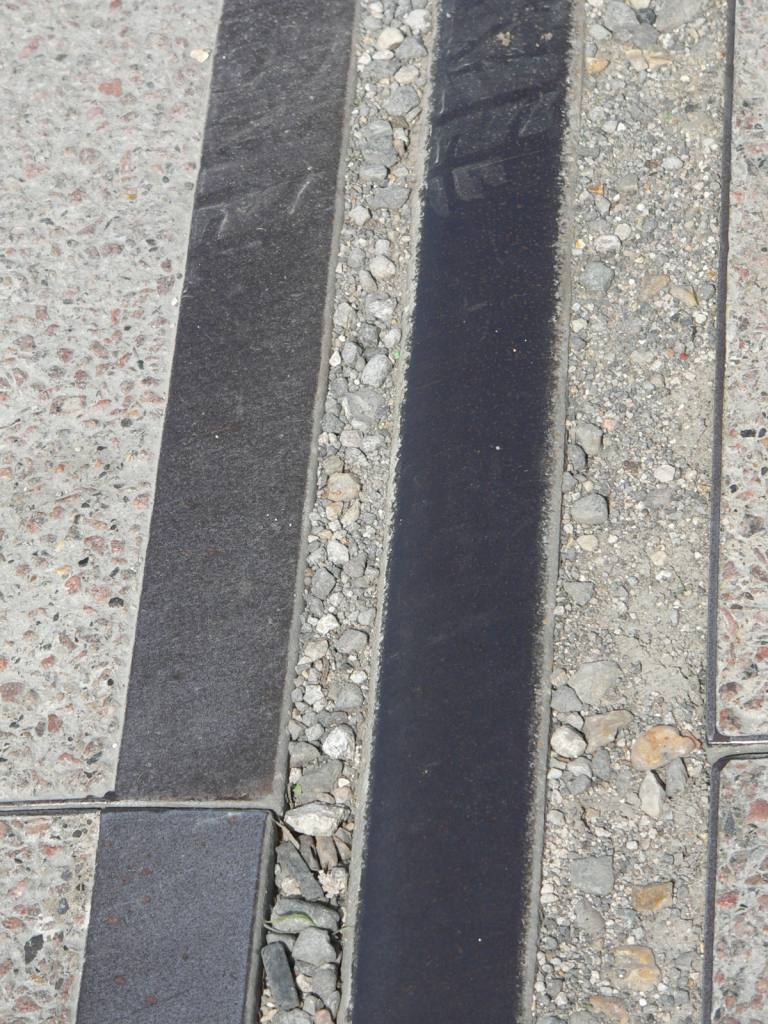 WQ-010rails-01.jpg (160137 bytes)
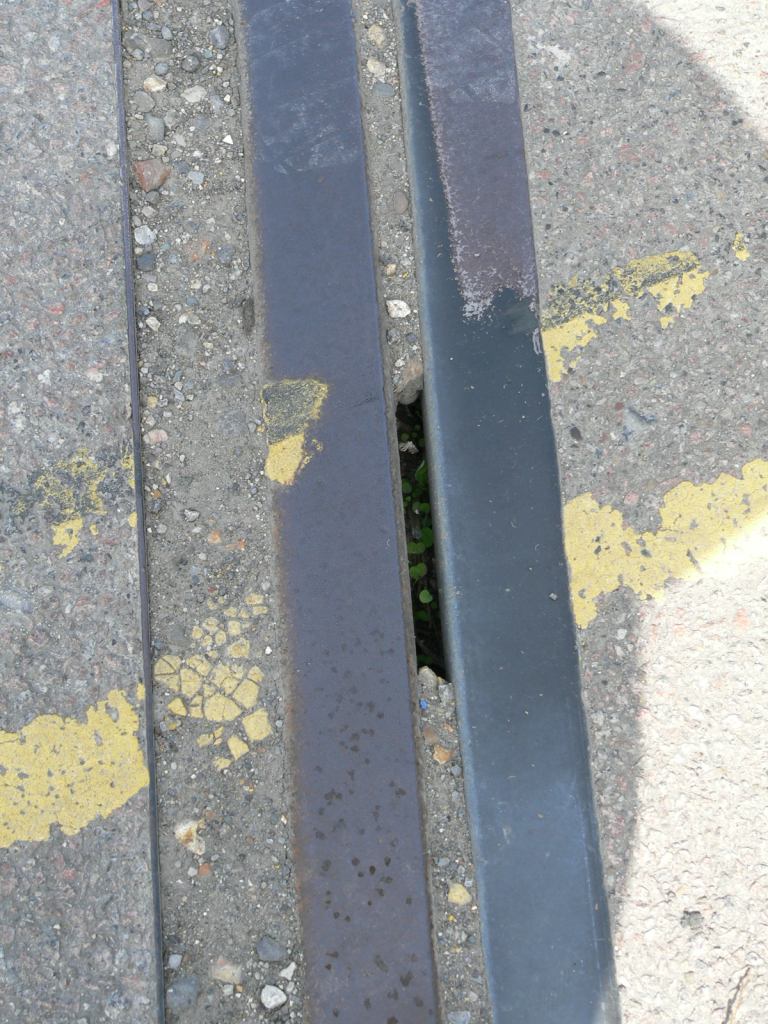 WQ-010rails-02.jpg (161683 bytes)
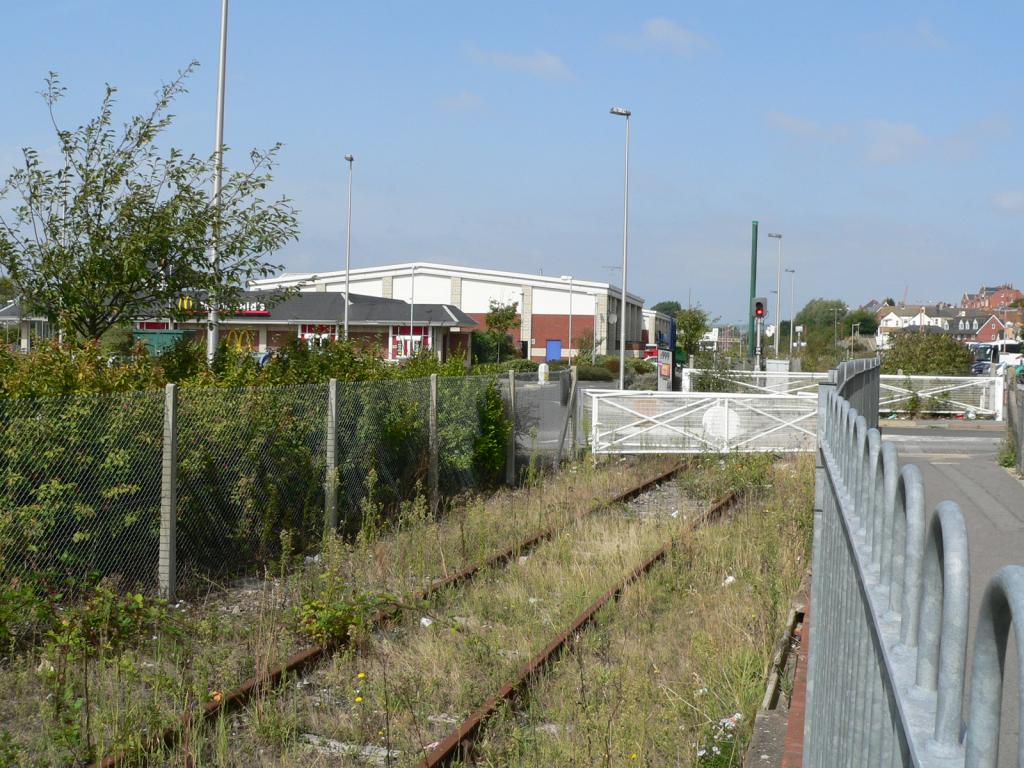 WQ-011N-01.jpg (162139 bytes)
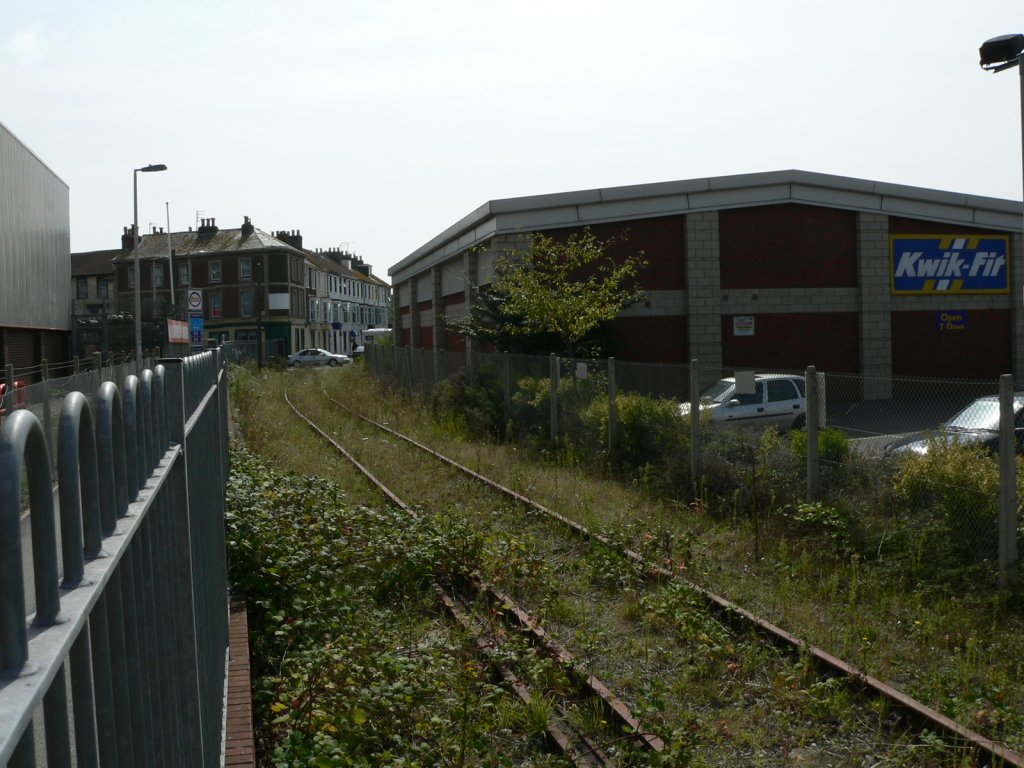 WQ-011S-01.jpg (162557 bytes)
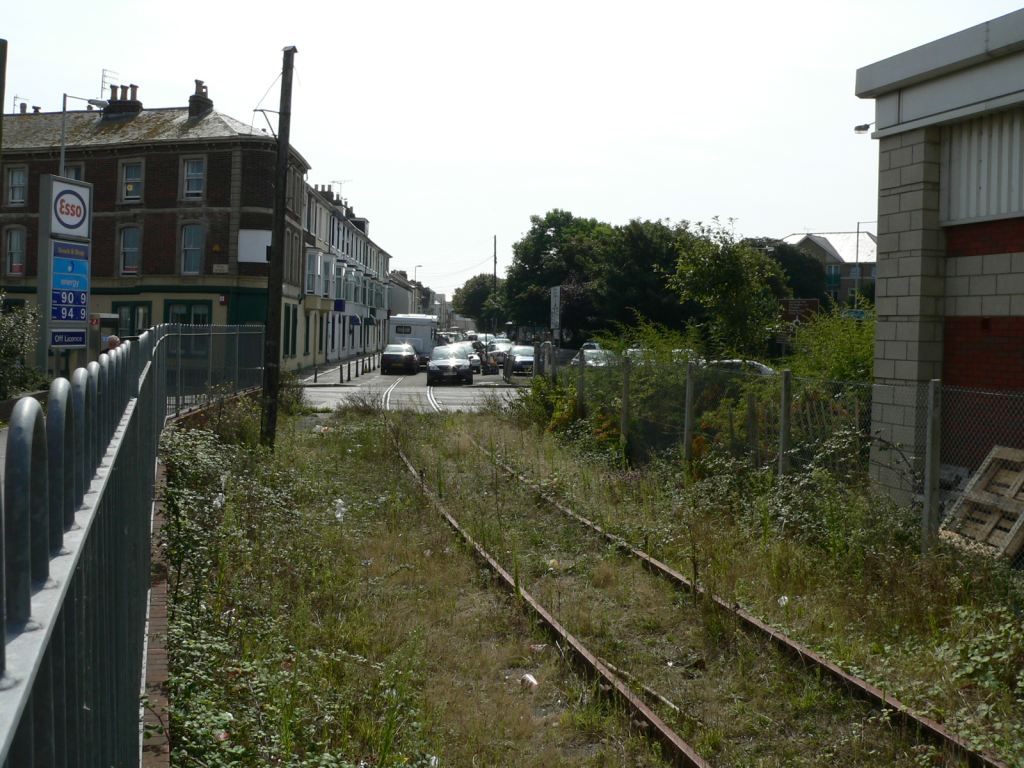 WQ-012S-01.jpg (159823 bytes)
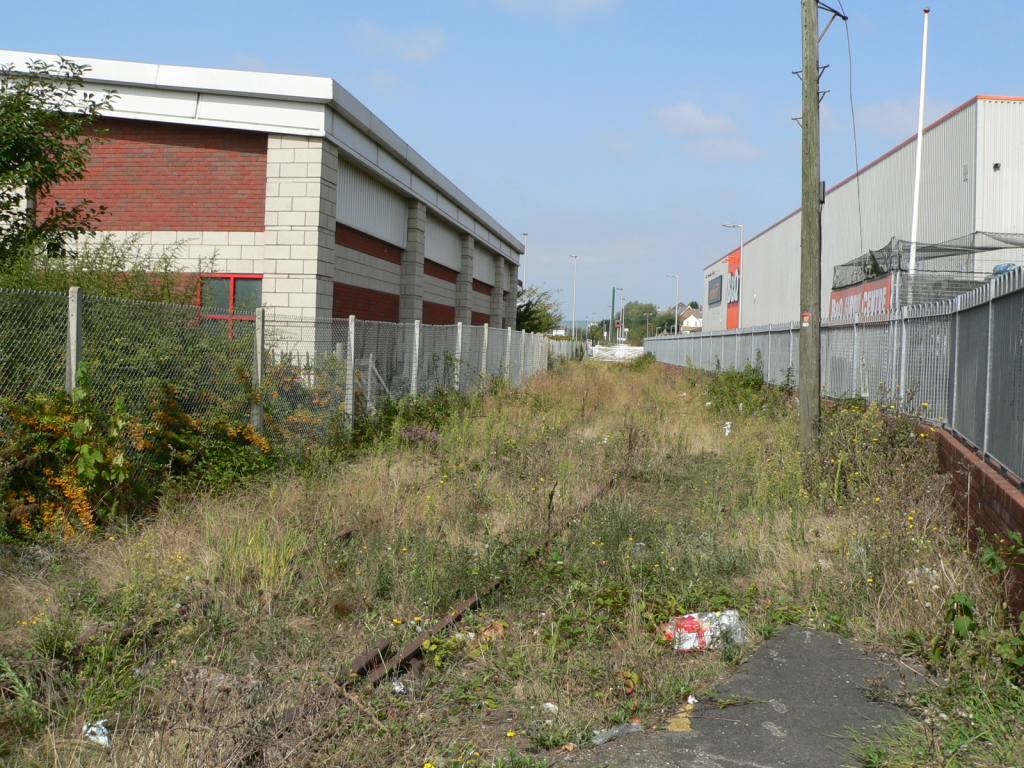 WQ-013N-01.jpg (162765 bytes)
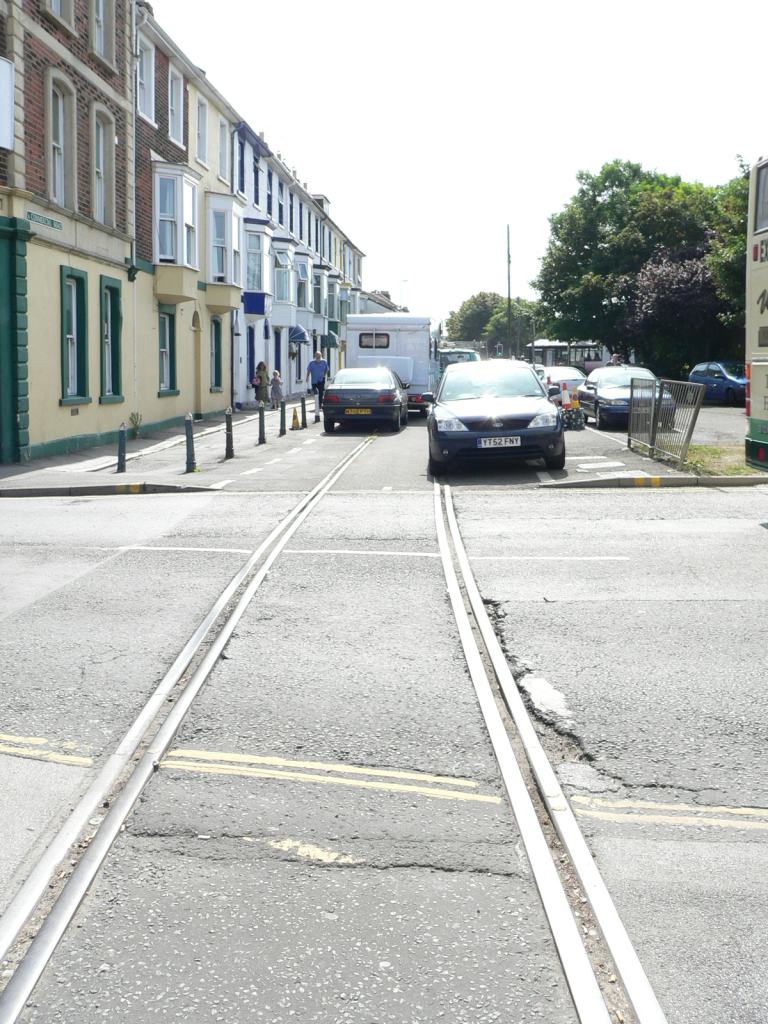 WQ-013S-01.jpg (159030 bytes)
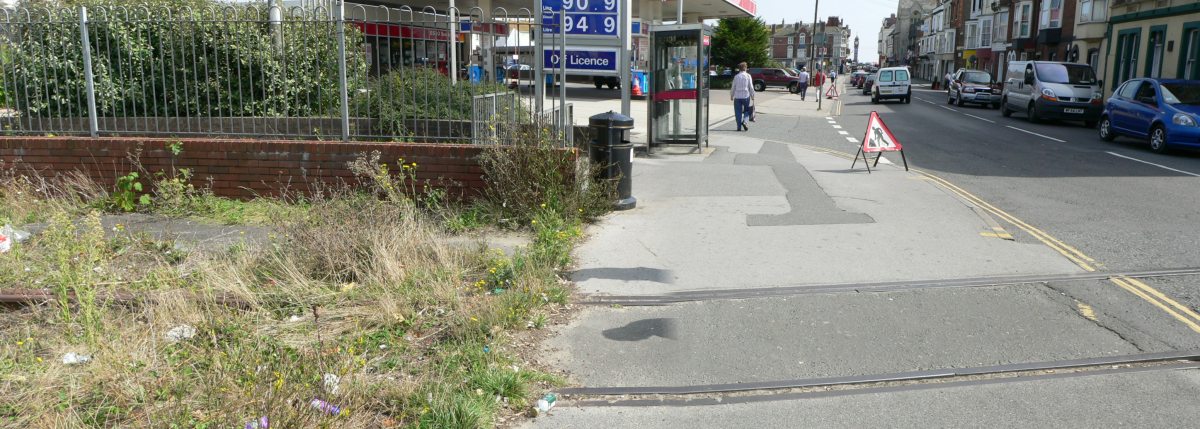 WQ-014E-01.jpg (163163 bytes)
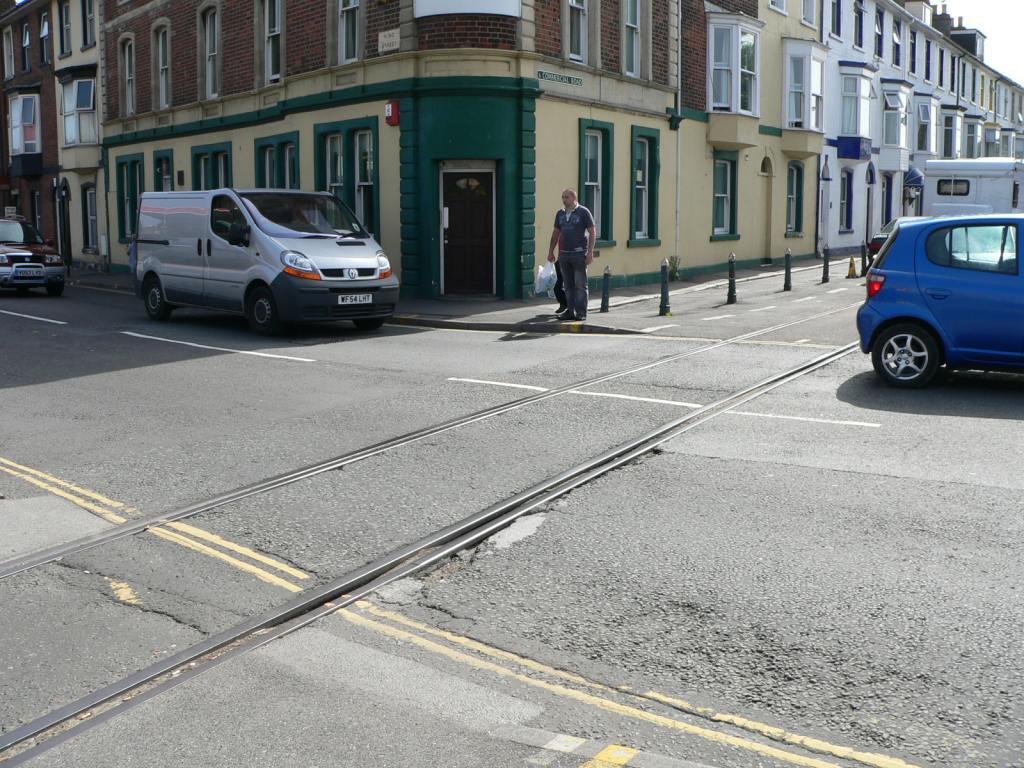 WQ-014SE-01.jpg (162463 bytes)
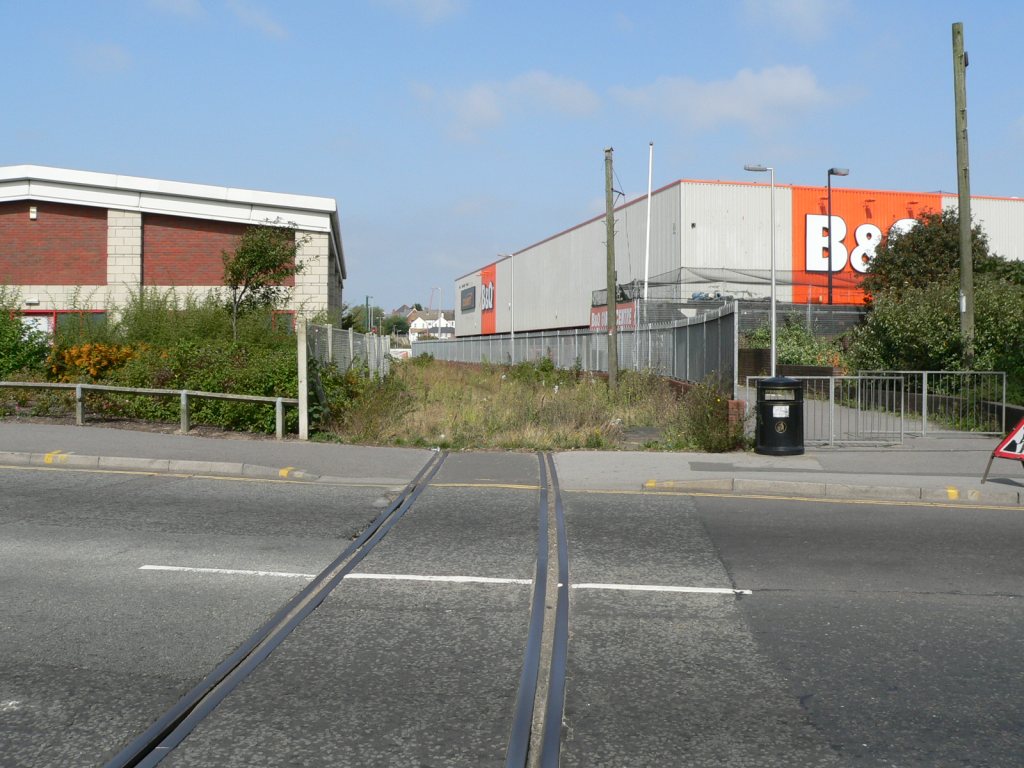 WQ-015N-01.jpg (161364 bytes)
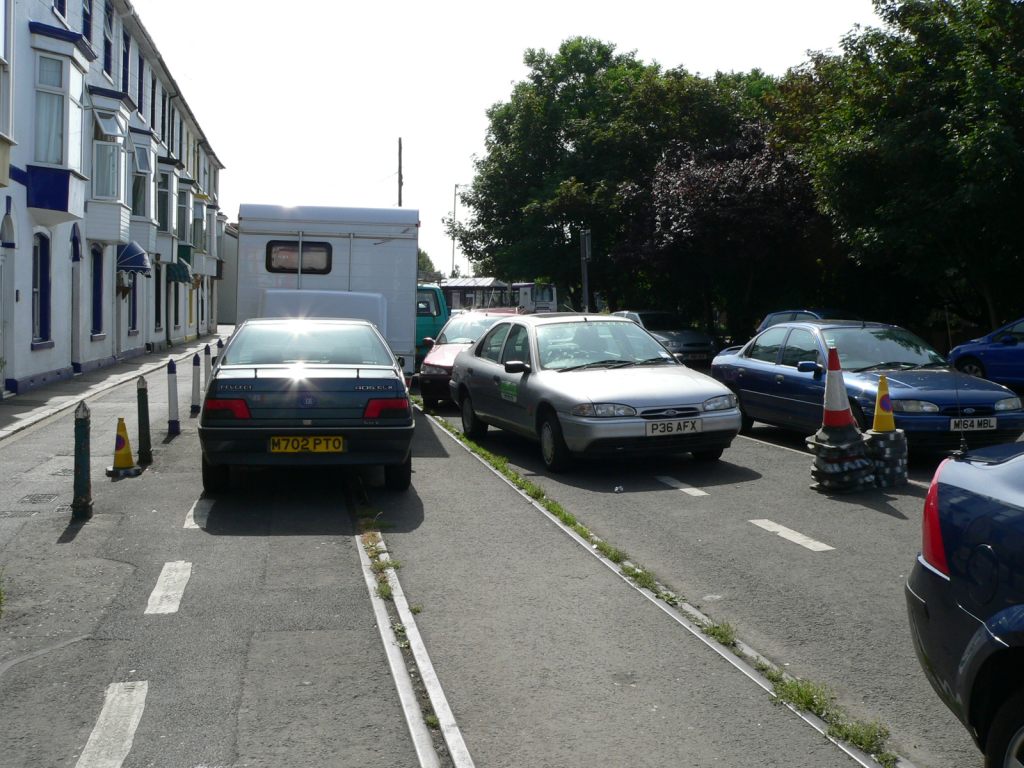 WQ-015S-01.jpg (162243 bytes)
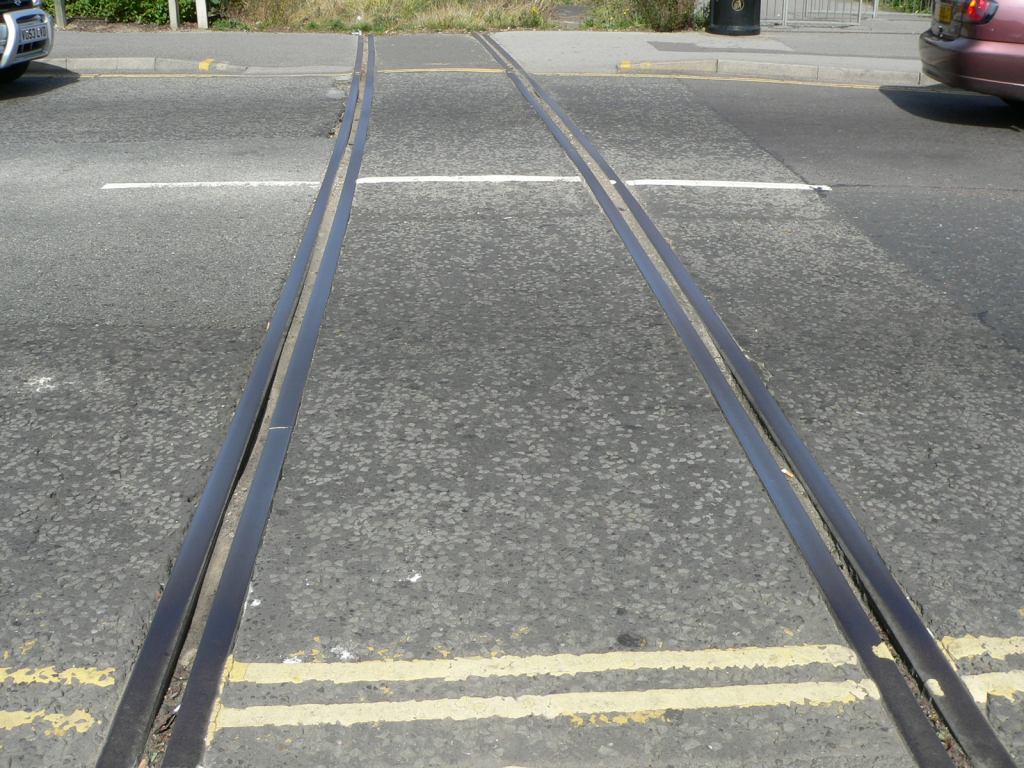 WQ-015rails-01.jpg (161492 bytes)
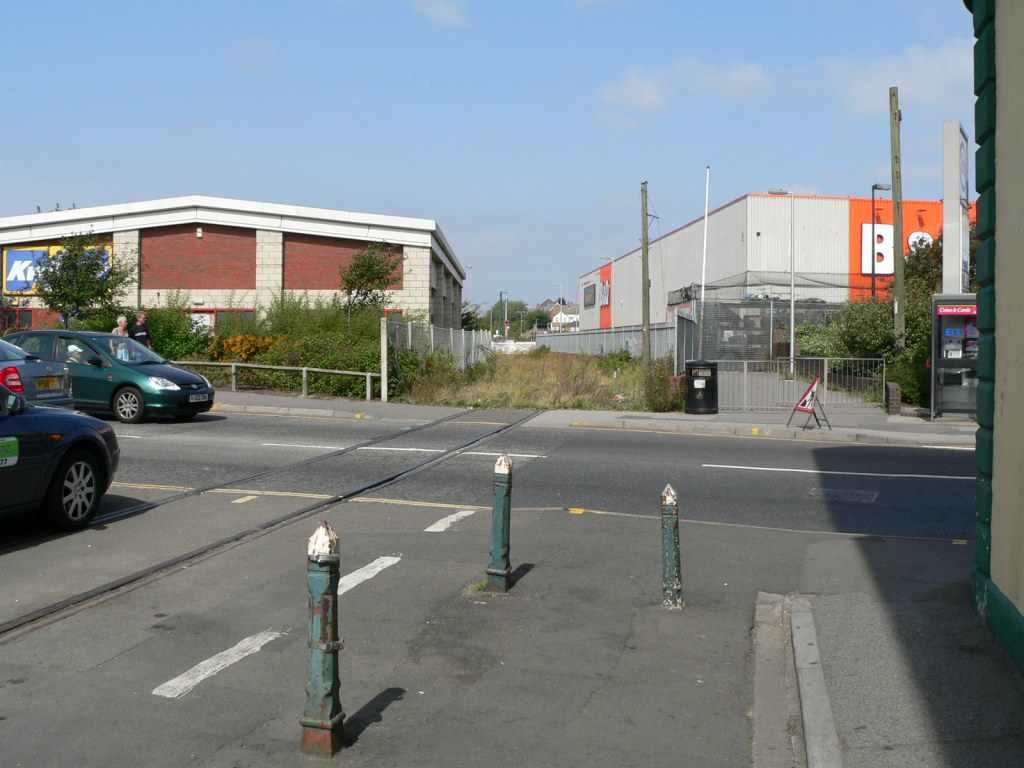 WQ-016N-01.jpg (160941 bytes)
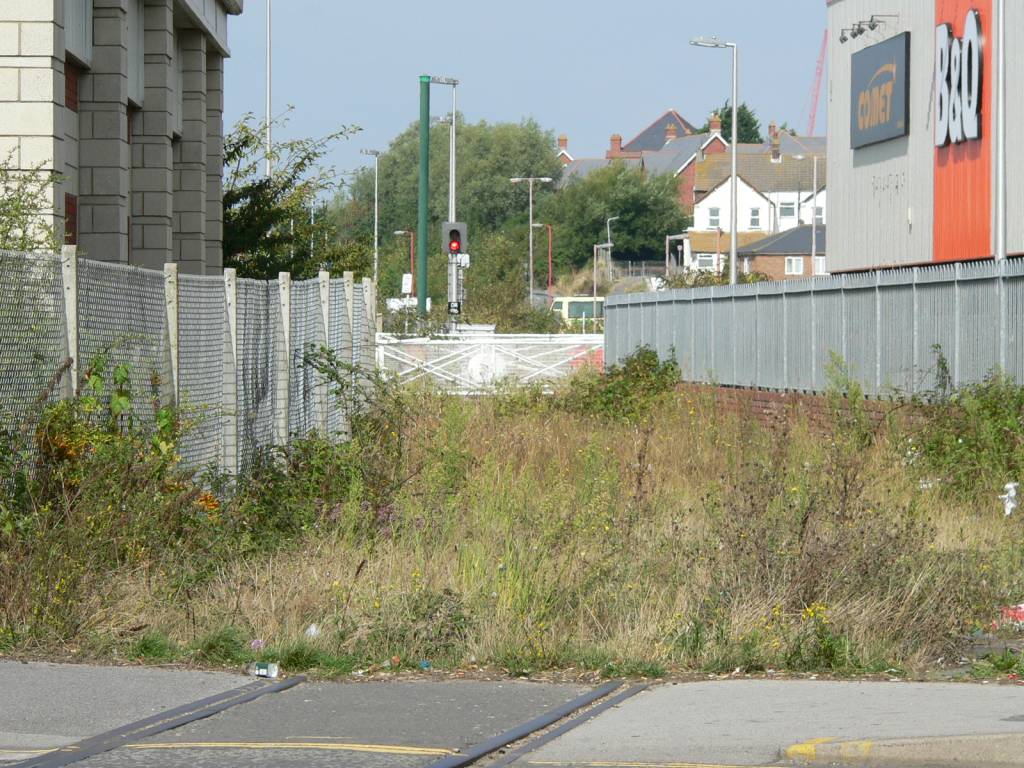 WQ-016N-02.jpg (161900 bytes)
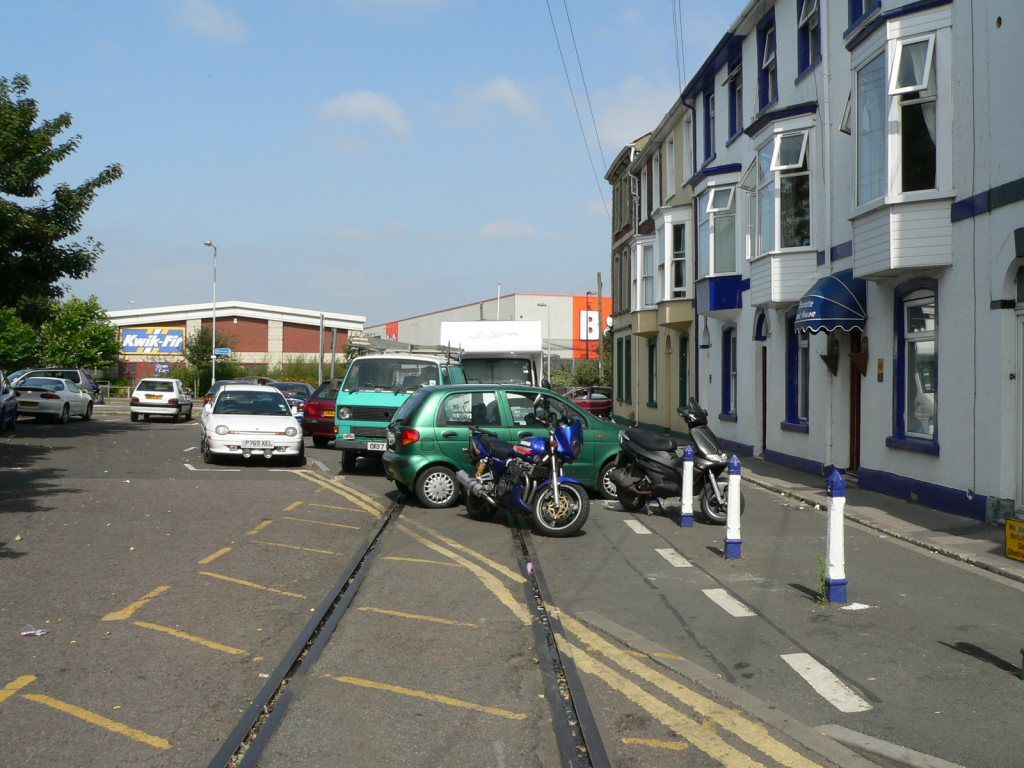 WQ-017N-01.jpg (159588 bytes)
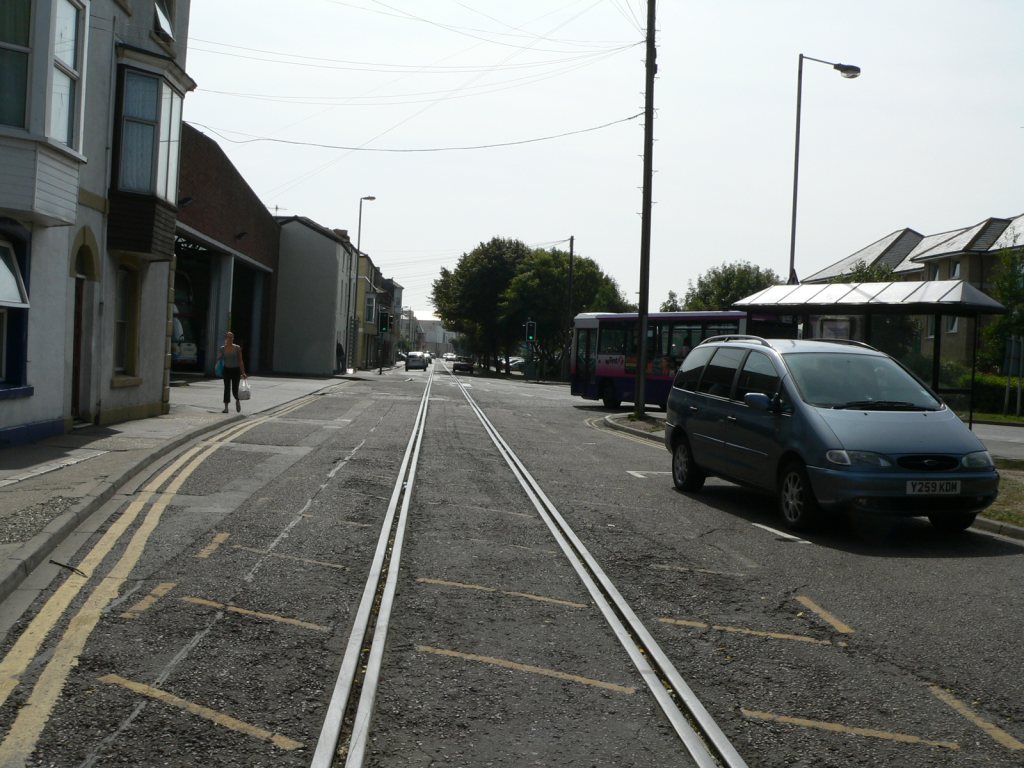 WQ-017S-01.jpg (164500 bytes)
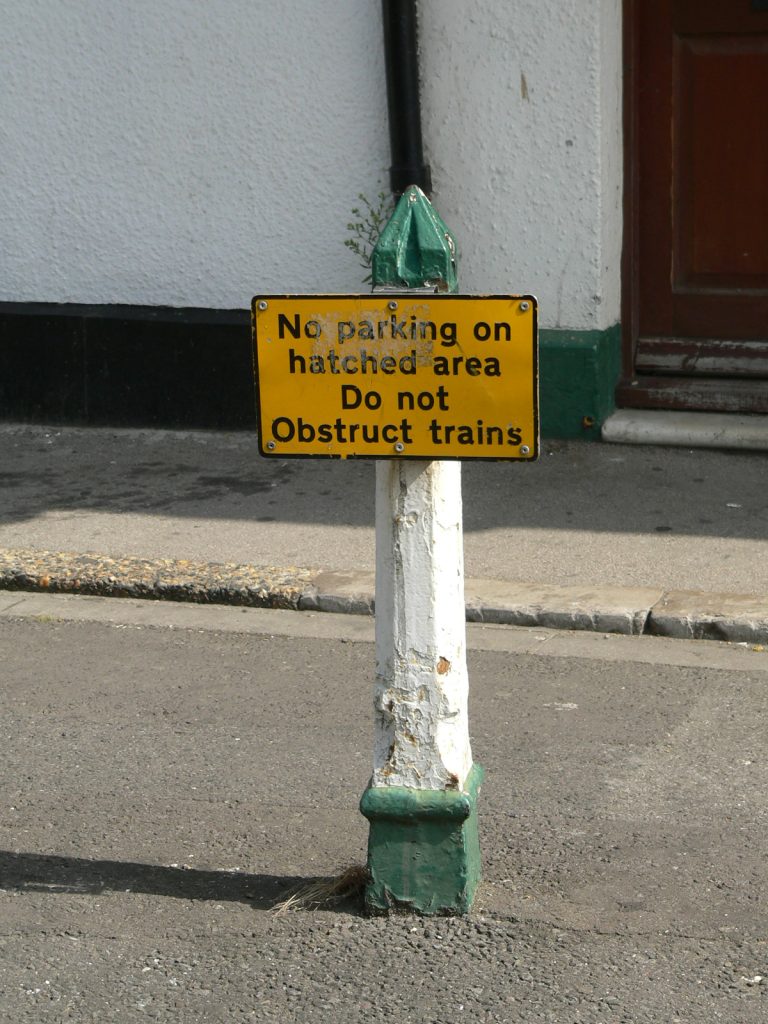 WQ-017sign-01.jpg (162790 bytes)
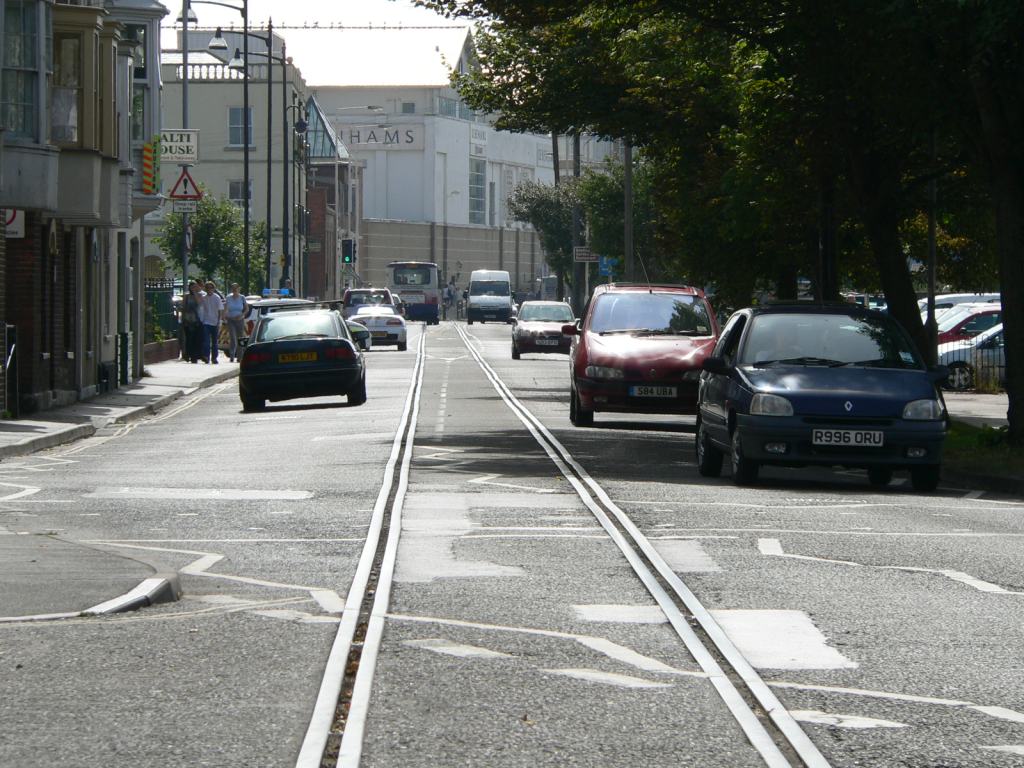 WQ-018S-01.jpg (160106 bytes)
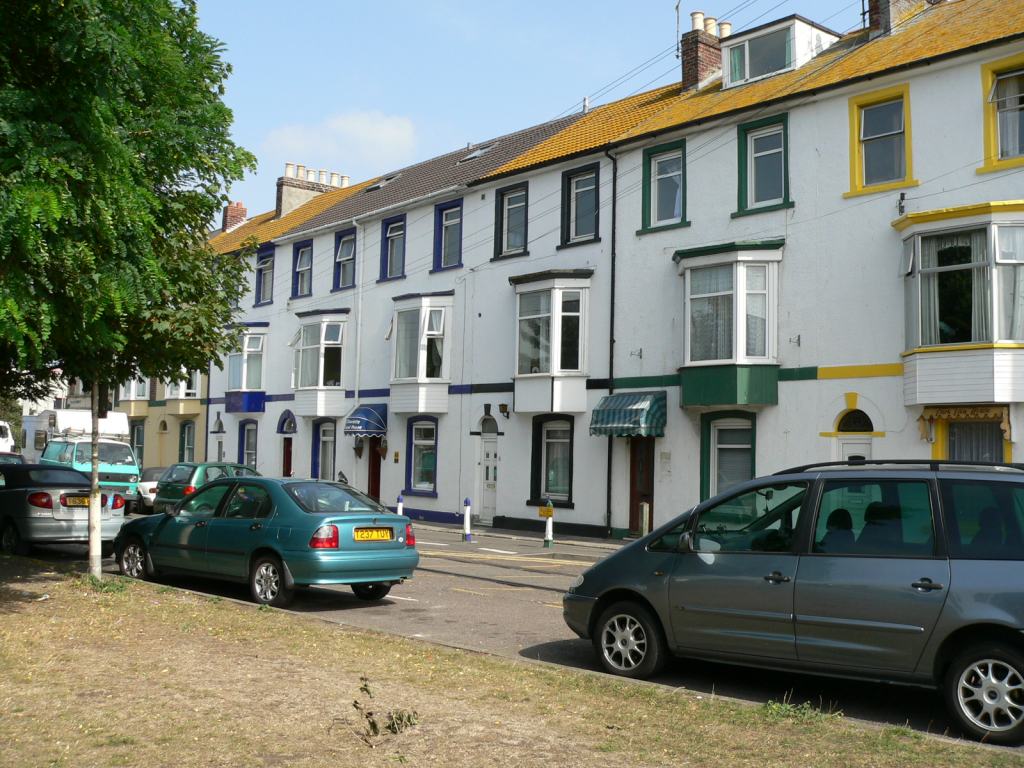 WQ-019NE-01.jpg (162612 bytes)