 WQ-020sign-01.jpg (162455 bytes)
|
The Railfaneurope.net Picture Gallery
Directory: /pix/gb/misc/Weymouth_Quay/020-040
Last update: Sat Nov 15 20:07:00 CET 2014
|
|
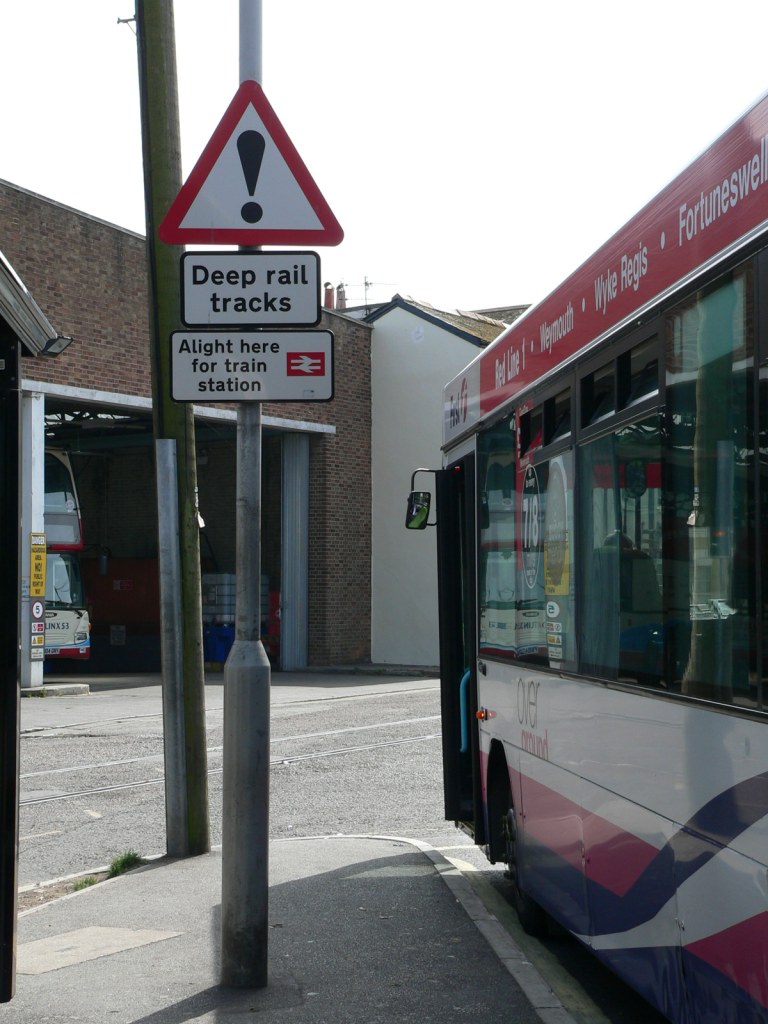
The sign warning drivers of deep rail tracks at point 20 on the map, this is where when heading southbound, the new road alignment joins with the old and cars must swing accross the rail tracks, which continue straight between the bus in the foreground and the bus garage in the background.
Photo by Chris McKenna 06/09/2006. |
|
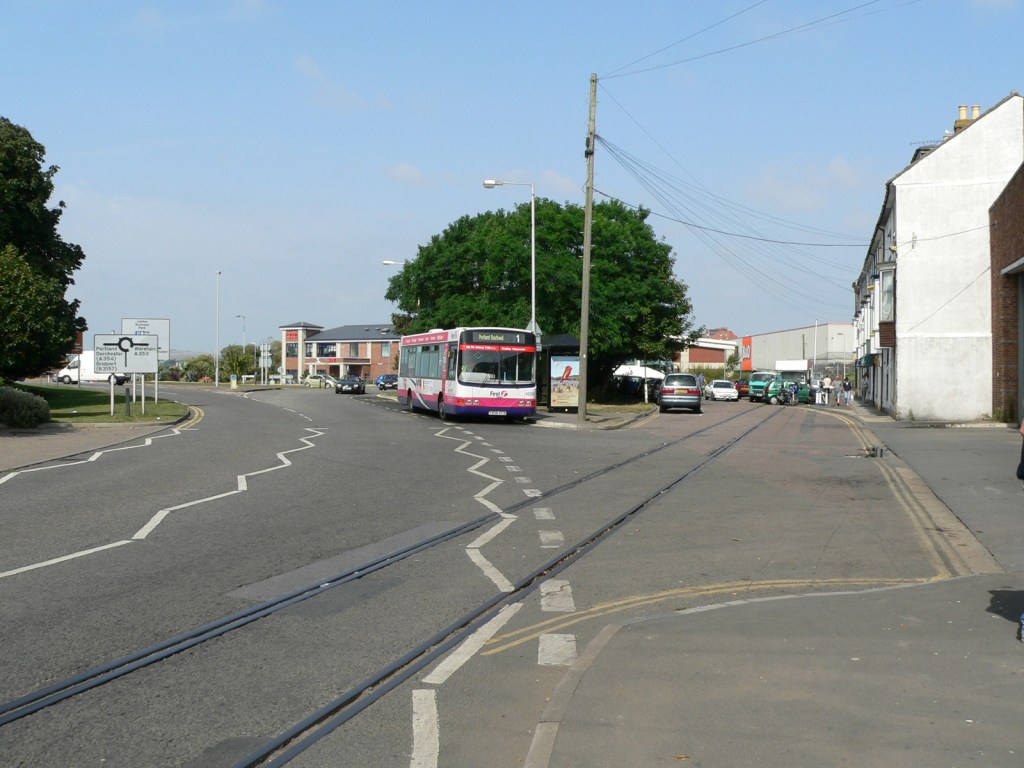
Looking northwest from point 21, where the modern main road alignment diverges from the original line of Commercial Road, followed by the railway. In the background the line runs to the left of the big B&Q building.
Photo by Chris McKenna 06/09/2006. |
|
Looking south from point 21 on the map. Along this stretch of the route the railway runs along the busy Commercial Road. Although here the line is in the centre of the road, and at least in theory cars could run either side, it doesn't stay this way.
Photo by Chris McKenna 06/09/2006. |
|
Looking south from point 22 on the map along the busy Commercial Road. The traffic lights in the middle distance are for a pedestrian crossing - perhaps the only one over a railway line in the country.
Photo by Chris McKenna 06/09/2006. |
|
Looking west from point 23 on the map, where the four-foot between the rails is used as the centre waiting lane for traffic turning into Melcombe Regis car park.
Photo by Chris McKenna 06/09/2006. |
|
Looking north from point 24 on the map, in the middle of Commercial road. You can see here that the railway and centre line of the road are starting to diverge.
Photo by Chris McKenna 06/09/2006. |
|
Looking south from point 24 on the map, in the middle of Commercial road. The pelican crossing ahead is perhaps the only one to cross a railway as well as a road - whether trains or pedestrians have right of way is not defined in the highway code!
Photo by Chris McKenna 06/09/2006. |
|
Looking southeast from point 25 on the map, the junction of Commercial Road and Westham Road. The pelican crossing ahead is perhaps the only one to cross a railway as well as a road - whether trains or pedestrians have right of way is not defined in the highway code!
Photo by Chris McKenna 06/09/2006. |
|
Looking north from point 26 on the map, the pelican crossing over Commercial Road and the railway.
Photo by Chris McKenna 06/09/2006. |
|
Looking south from point 26 on the map, the pelican crossing over Commercial Road and the railway. The rail tracks are gradually moving over to the left of the road, to allow trains a more gentle turn on the outside of the bend head.
Photo by Chris McKenna 06/09/2006. |
|
Looking north from point 27 on the map. The rail tracks here are on the southbound lane of the road, to allow trains a more gentle turn on the outside of the bend behind the camera.
Photo by Chris McKenna 06/09/2006. |
|
Looking north from point 27 on the map. The rail tracks here are on the southbound lane of the road, to allow trains a more gentle turn on the outside of the bend.
Photo by Chris McKenna 06/09/2006. |
|
Looking north from point 28 on the map. The rail tracks here are on the southbound lane of the road, to allow trains a more gentle turn on the outside of the bend.
Photo by Chris McKenna 06/09/2006. |
|
Looking south from point 28 on the map. The rail tracks here are on the southbound lane of the road, to allow trains a more gentle turn on the outside of the bend.
Photo by Chris McKenna 06/09/2006. |
|
Looking north from point 29 on the map. The rail tracks here are on the southbound lane of the road, to allow trains a more gentle turn on the outside of the bend. The Backwater area of the harbour is just the other side of the car park.
Photo by Chris McKenna 06/09/2006. |
|
Looking south from point 29 on the map. The rail tracks here meander accross the road to allow trains the smothest route through the bends. The Backwater area of the harbour is ahead and on the other side of the car park to the right.
Photo by Chris McKenna 06/09/2006. |
|
Looking North from point 30 on the map. This is actually a much busier stretch of road than this photograph suggests, and it would be blocked in both directions by the passage of a train.
Photo by Chris McKenna 06/09/2006. |
|
Looking Southwest from point 31 on the map. Here the railway originally followed the road, but in 1938/9 the Great Western Railway constructed this loop on a newly infilled section of the harbour to allow a more genlte curve. This was necessitated by the stock of the day being longer than that commonly in use in the 1860s original construction.
Photo by Chris McKenna 06/09/2006. |
|
Looking northeast from point 32 on the map, the northern end of the 1938 loop.
Photo by Chris McKenna 06/09/2006. |
|
Looking Southwest from point 32 on the map, looking along the 1938/9 loop. The sign prohibits entry to all but "Tramway permit holders".
Photo by Chris McKenna 06/09/2006. |
|
The rails at point 32 on the map, the flange gap is completely full of mud, and have been since before the double yellow lines were last painted.
Photo by Chris McKenna 06/09/2006. |
|
These signs, at point 32 of the map, are at the entry to the 1938/9 loop section of the Weymouth Quay/Weymouth Tramway.
Photo by Chris McKenna 06/09/2006. |
|
Looking Northeast from point 33 on the map, looking along the 1938/9 loop to where it at and Commercial Road diverge/rejoin.
Photo by Chris McKenna 06/09/2006. |
|
Looking North from point 34 on the map, about the mid point of the 1938/9 loop.
Photo by Chris McKenna 06/09/2006. |
|
Looking south from point 34 on the map, about the mid point of the 1938/9 loop - note the large number of parked vehicles that would be in the way of a train.
Photo by Chris McKenna 06/09/2006. |
|
Looking southeast from point 35 on the map towards the southern end of the 1938/9 loop where the railway and Commercial Road once again share a route.
Photo by Chris McKenna 06/09/2006. |
|
Looking northwest from point 36 on the map along the 1938/9 loop - built by the Great Western Railway to allow an easier passage for longer wheelbase stock than the original 1860s line that shared Commercial Road's tight turn. The signs are duplicates of those at the northern end.
Photo by Chris McKenna 06/09/2006. |
|
Looking southeast from point 36 on the map towards the southern end of the 1938/9 loop where the railway and Commercial Road once again share a route. This photograph also shows jus thow tight the original corner was.
Photo by Chris McKenna 06/09/2006. |
|
An interesting sign at point 36 on the map, giving a brief overview of the branch and the construction of the Loop.
Photo by Chris McKenna 06/09/2006. |
|
Looking northwest from point 37 on the map. In the original 1860s construction the railway followed Commercial Road round to the right, but in 1938/9 the Great Western Railway constructed the loop on the left to allow trains a much more gentle curve.
Photo by Chris McKenna 06/09/2006. |
|
Looking northwest from point 37 on the map at the southern entrance to the 1938/9 loop.
Photo by Chris McKenna 06/09/2006. |
|
Looking southeast from point 37 on the map, where the railway and Commercial Road share the route round the corner of the river/harbour towards the quay.
Photo by Chris McKenna 06/09/2006. |
|
Looking southeast from point 37 on the map, where the railway and Commercial Road share the route round the corner of the river/harbour towards the quay. The brdige is Town Bridge, the only road that crosses the railway other than on the level.
Photo by Chris McKenna 06/09/2006. |
|
Looking east from point 38 on the map, towards Town Bridge, the only road that crosses the railway other than on the level.
Photo by Chris McKenna 06/09/2006. |
|
Looking northwest from point 38 on the map, around the corner of Commercial Road.
Photo by Chris McKenna 06/09/2006. |
|
Looking east from point 39 on the map, towards Town Bridge, the only road that crosses the railway other than on the level. Note the proliferation of traffic signs.
Photo by Chris McKenna 06/09/2006. |
|
Looking east from point 40 on the map, towards Town Bridge, the only road that crosses the railway other than on the level. Note the proliferation of traffic signs. Although road traffic heading west has priority over that travelling east, it too must give way to a train.
Photo by Chris McKenna 06/09/2006. |
|
Looking east from point 40 on the map, through Town Bridge, the only road that crosses the railway other than on the level. Note the proliferation of traffic signs. Although road traffic heading west has priority over that travelling east, it too must give way to a tra
in.
Photo by Chris McKenna 06/09/2006. |
|
Looking west from point 40 on the map - Town Bridge. Note how the level of the road surface slopes down to the rails from both sides.
Photo by Chris McKenna 06/09/2006. |
|
A sign on the town bridge (point 40) warning drivers about possible flooding.
in.
Photo by Chris McKenna 06/09/2006. |
 WQ-021NW-01.jpg (161735 bytes)
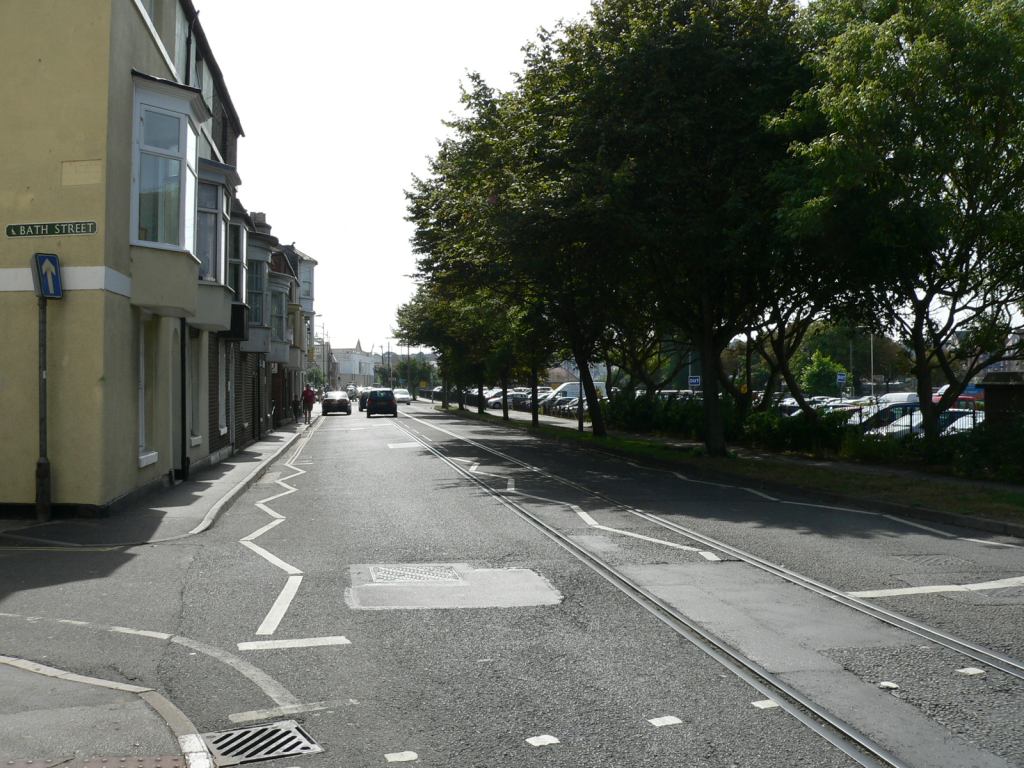 WQ-021S-01.jpg (160157 bytes)
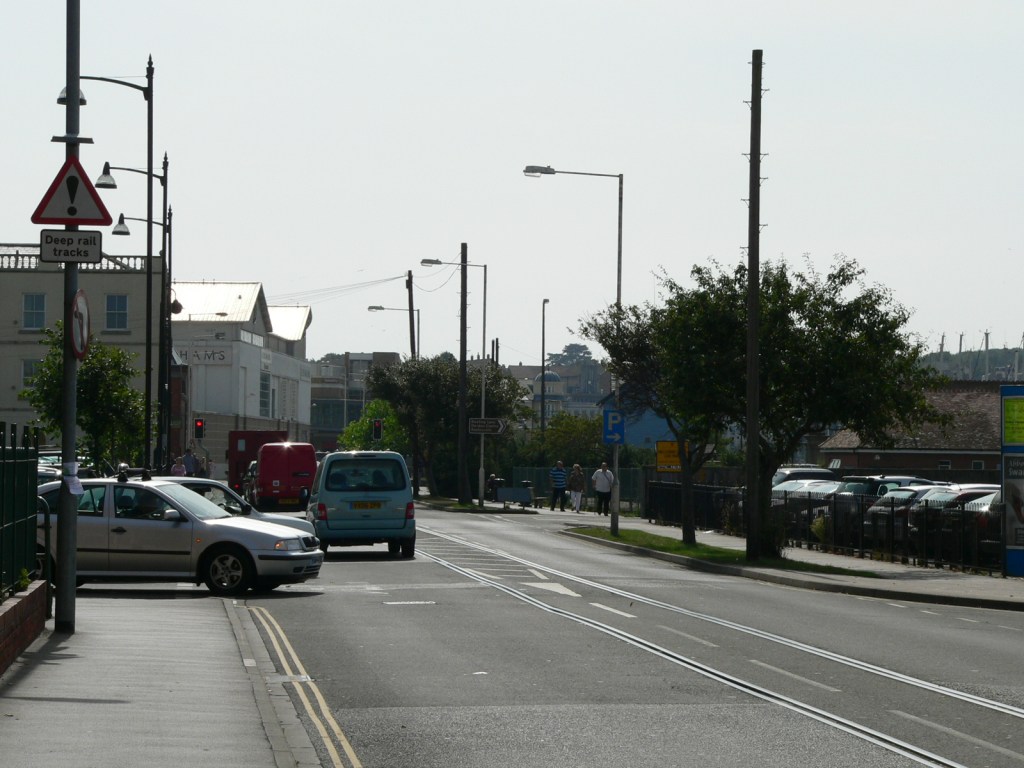 WQ-022S-01.jpg (158796 bytes)
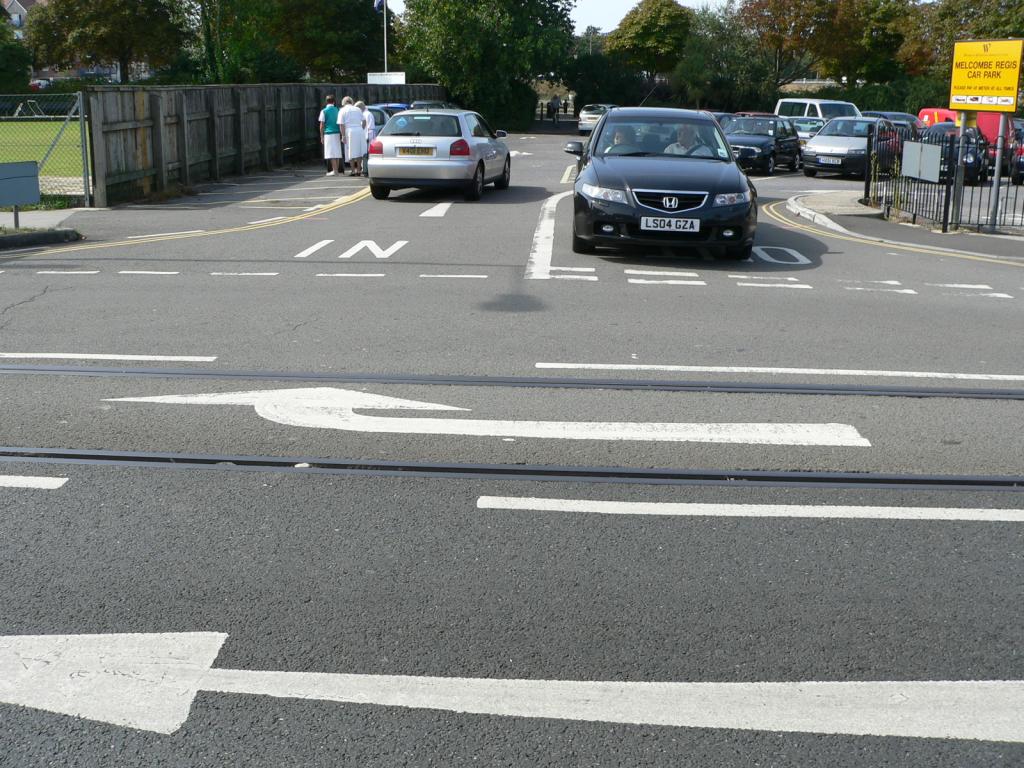 WQ-023W-01.jpg (162767 bytes)
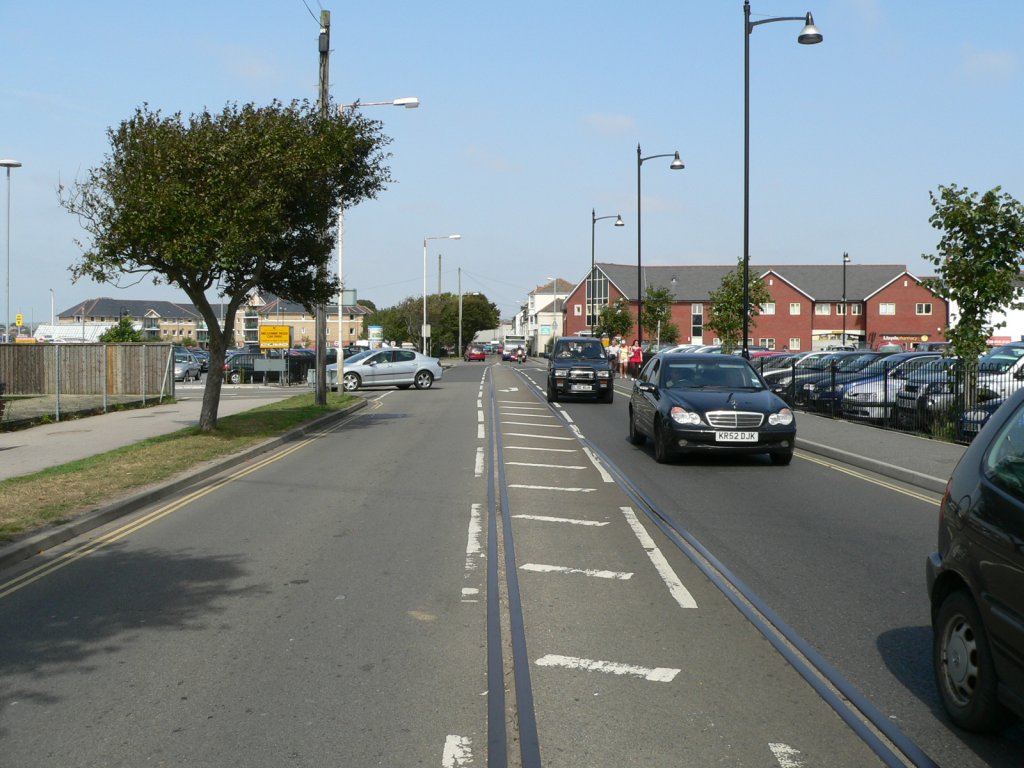 WQ-024N-01.jpg (159483 bytes)
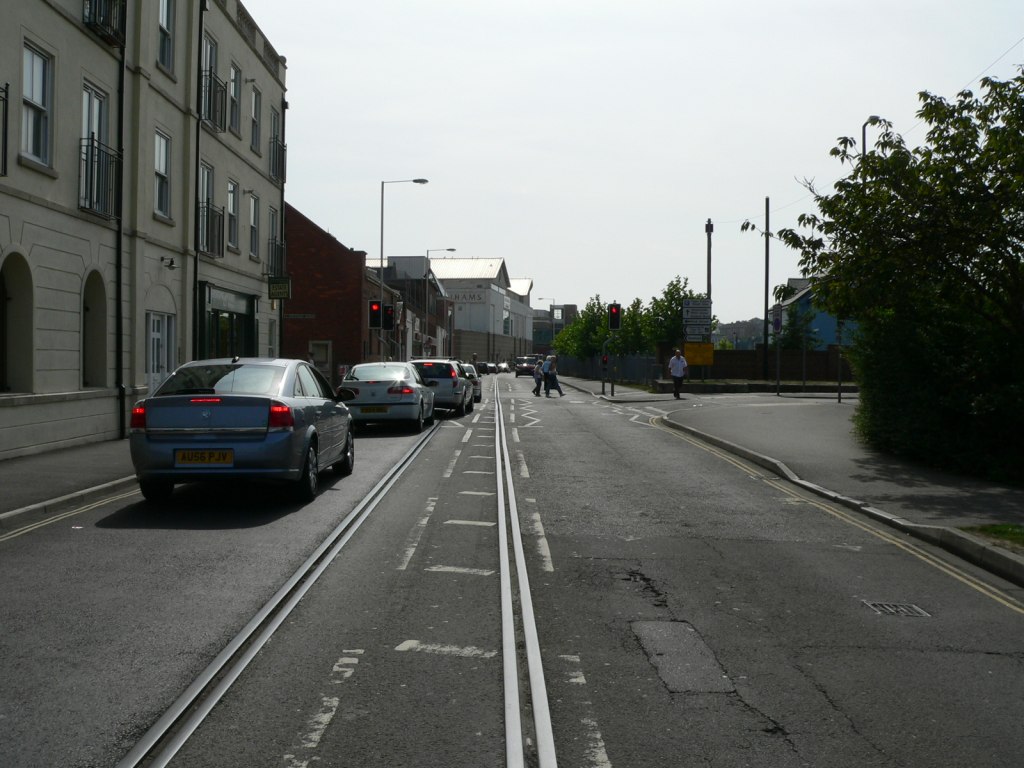 WQ-024S-01.jpg (158494 bytes)
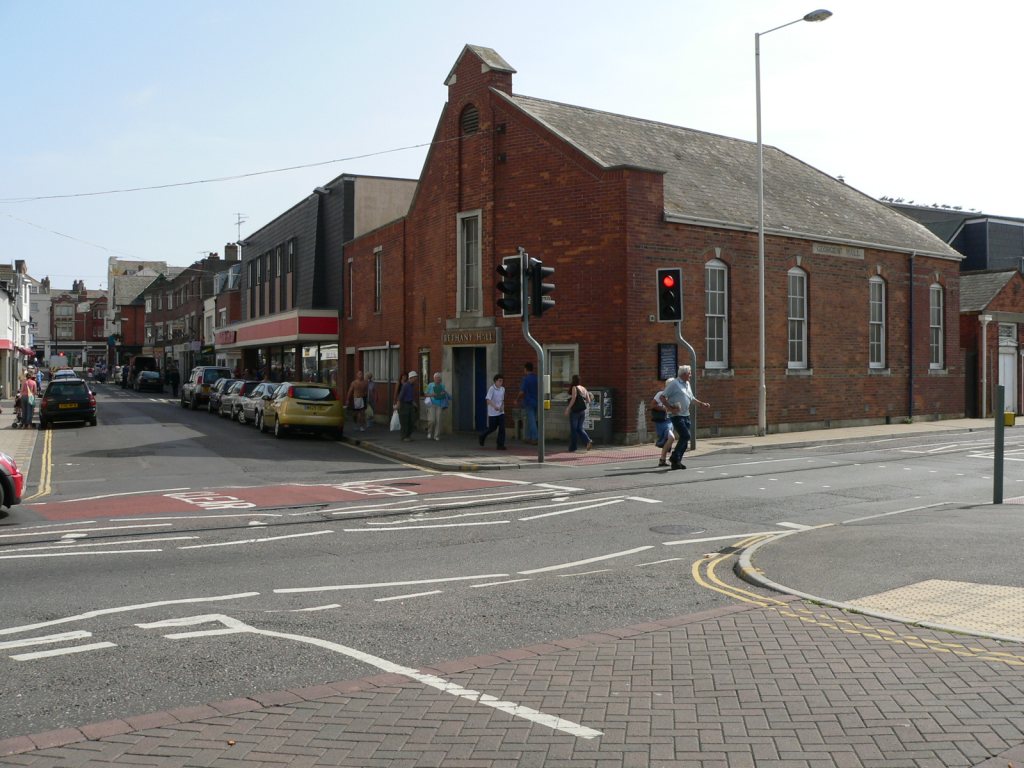 WQ-025SE-01.jpg (160060 bytes)
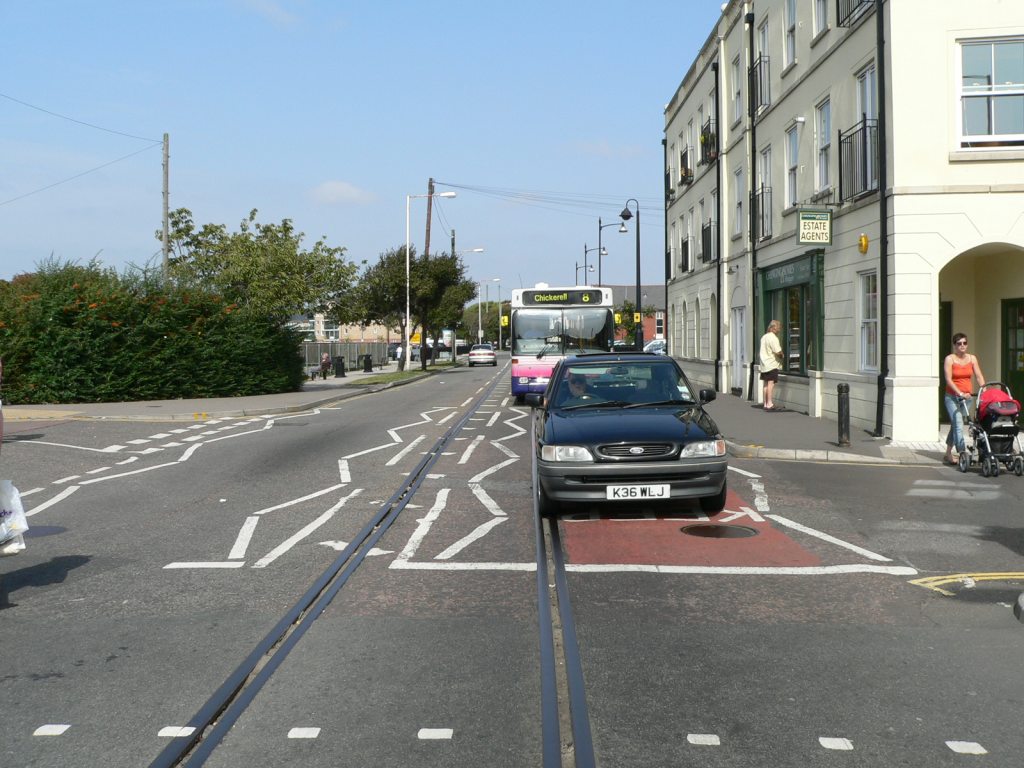 WQ-026N-01.jpg (160595 bytes)
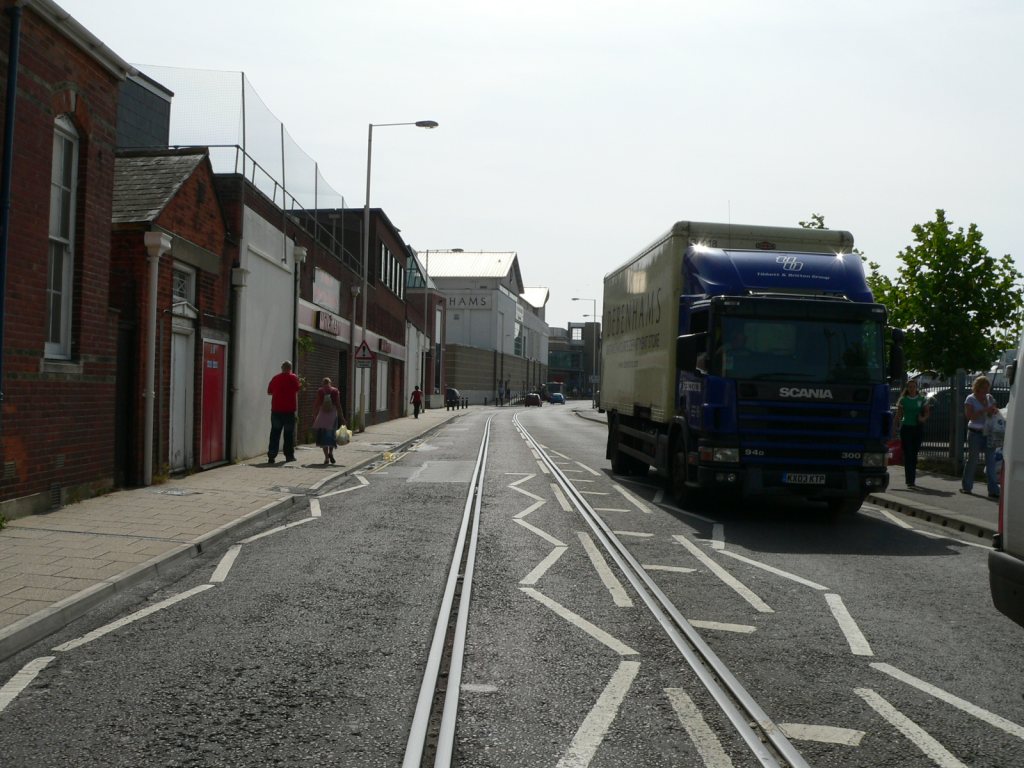 WQ-026S-01.jpg (160577 bytes)
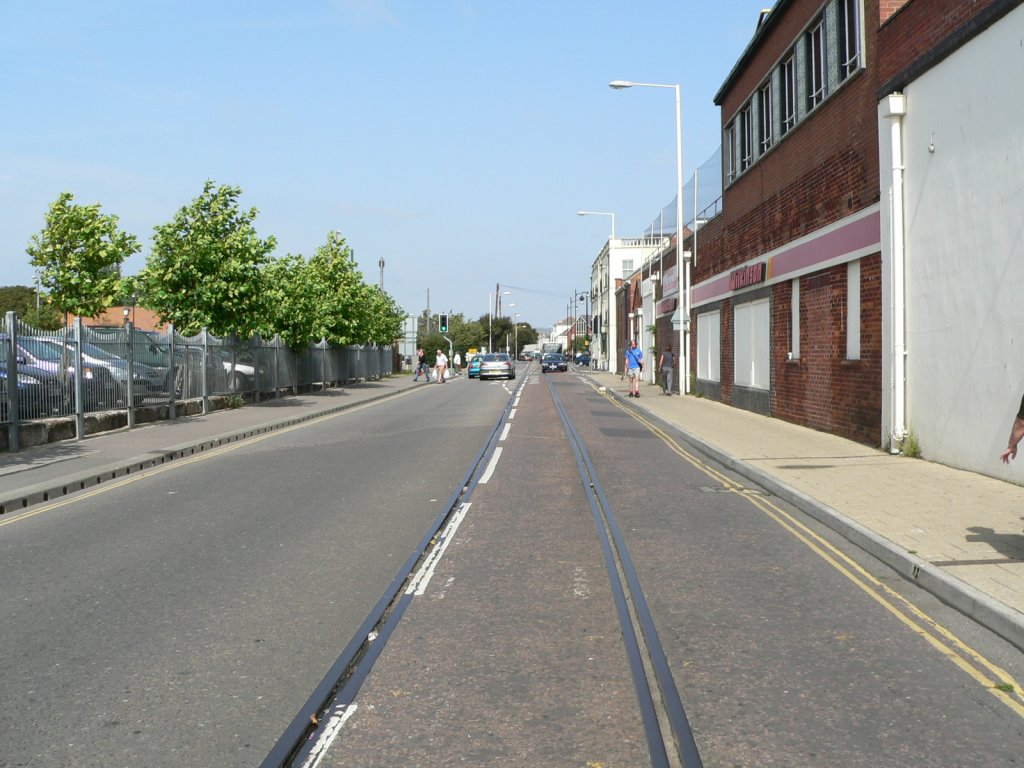 WQ-027N-01.jpg (157390 bytes)
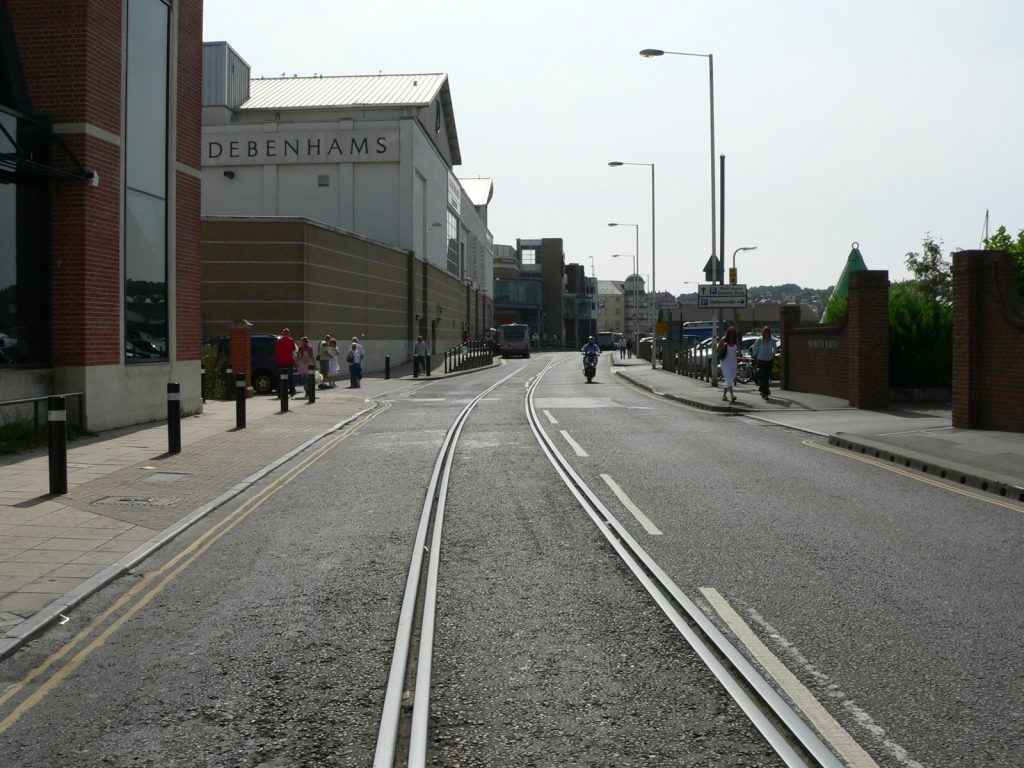 WQ-027S-01.jpg (157886 bytes)
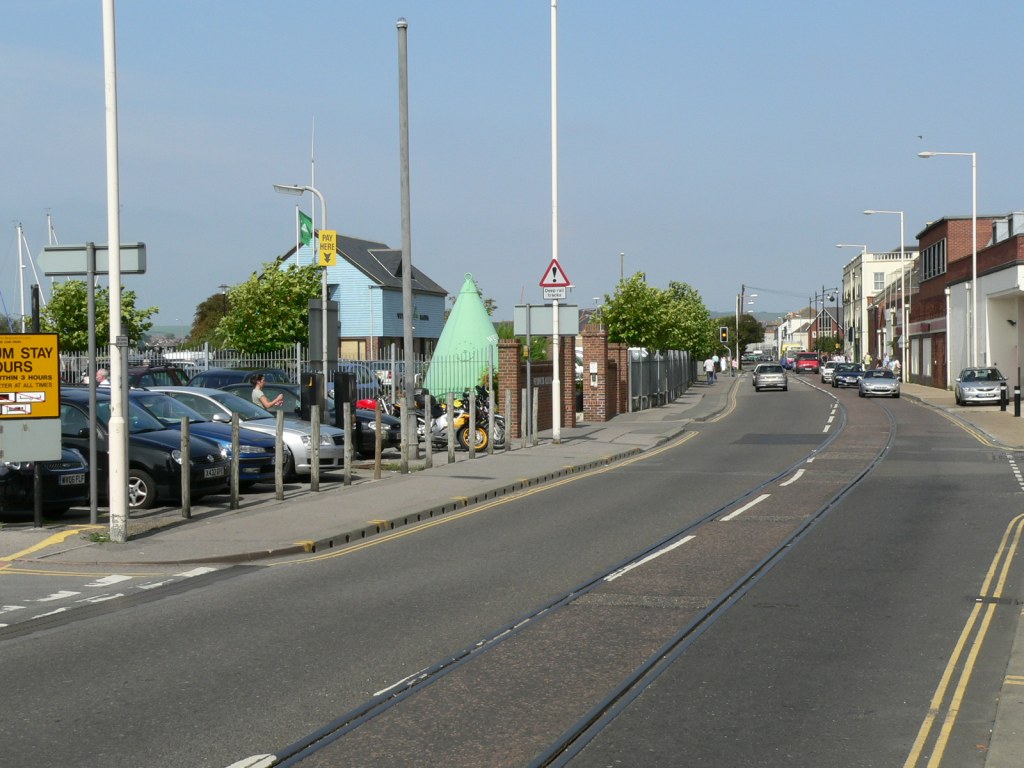 WQ-028N-01.jpg (163411 bytes)
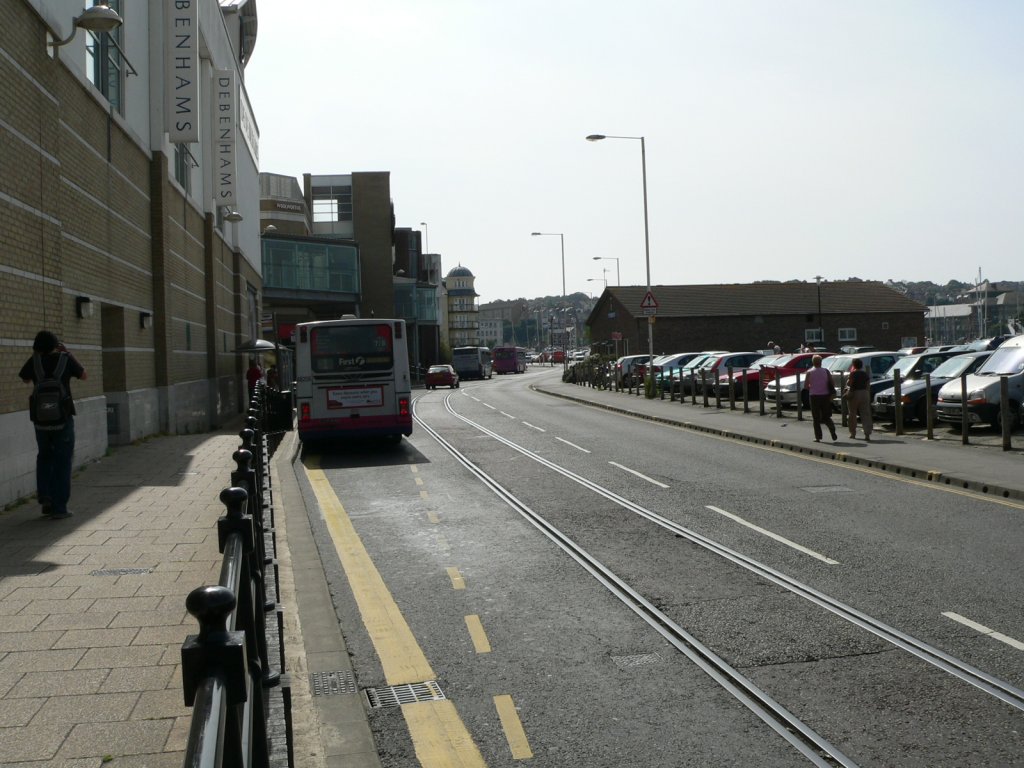 WQ-028S-01.jpg (160226 bytes)
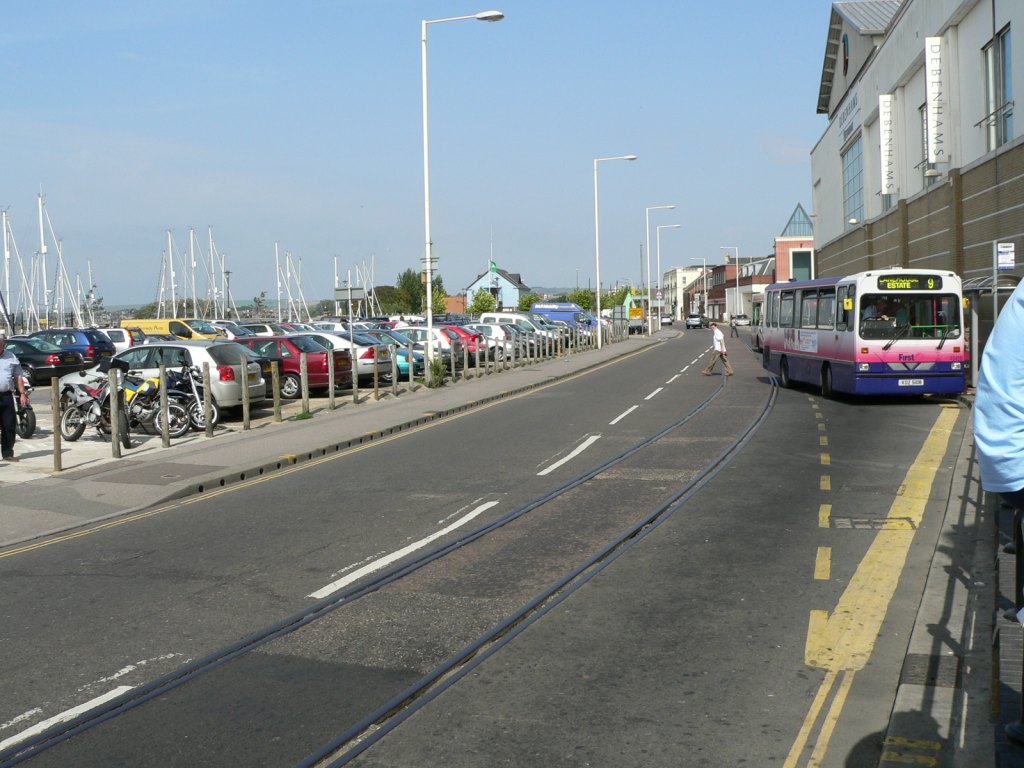 WQ-029N-01.jpg (162374 bytes)
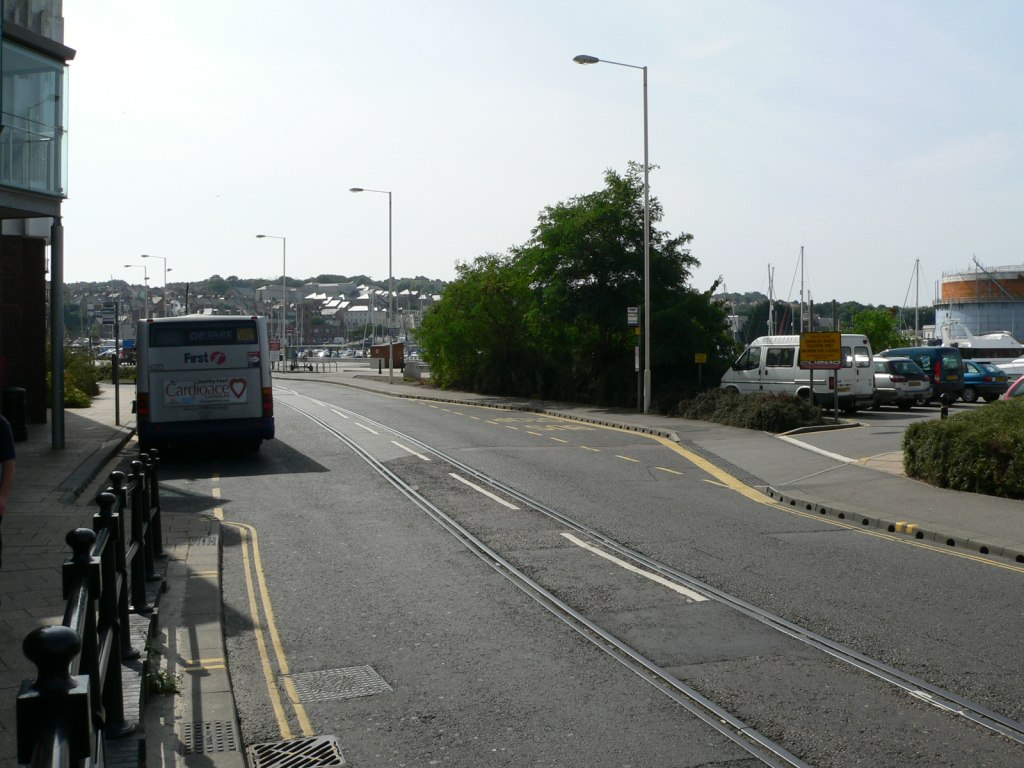 WQ-029S-01.jpg (160972 bytes)
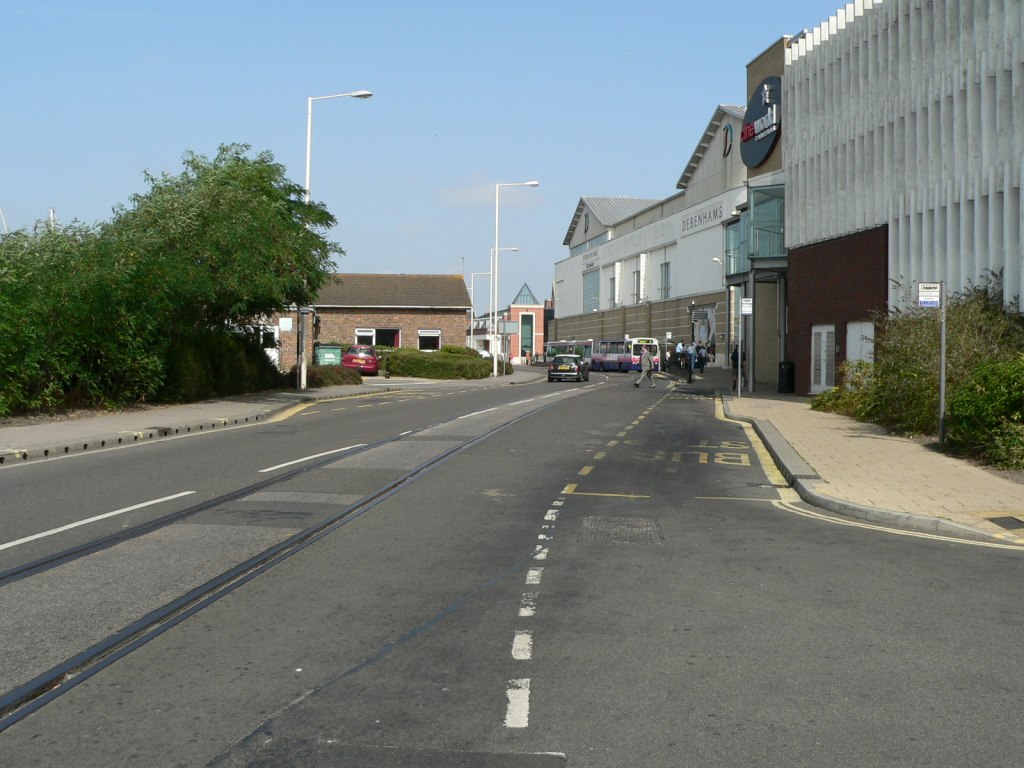 WQ-030N-01.jpg (163619 bytes)
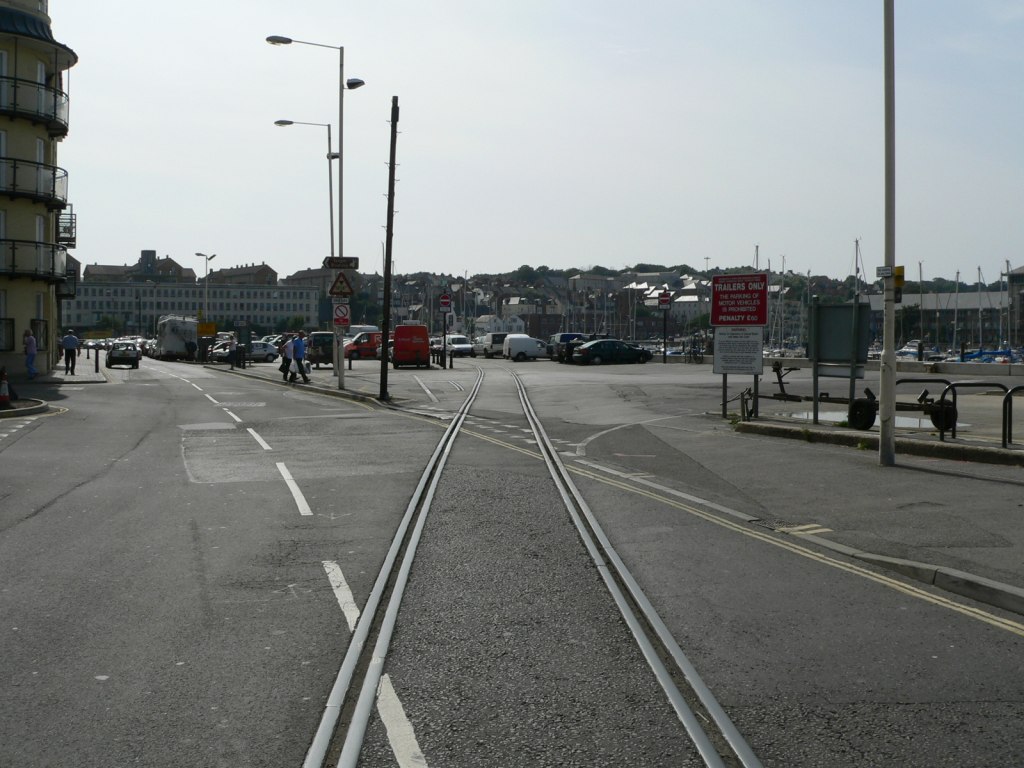 WQ-031SW-01.jpg (157328 bytes)
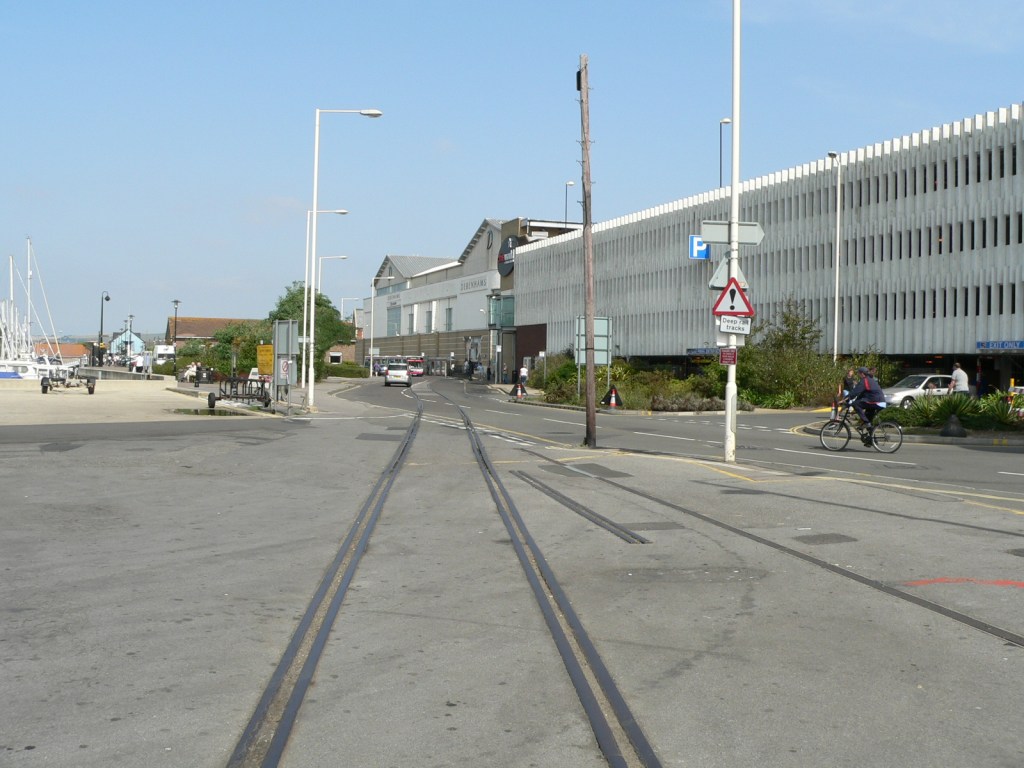 WQ-032NE-01.jpg (162442 bytes)
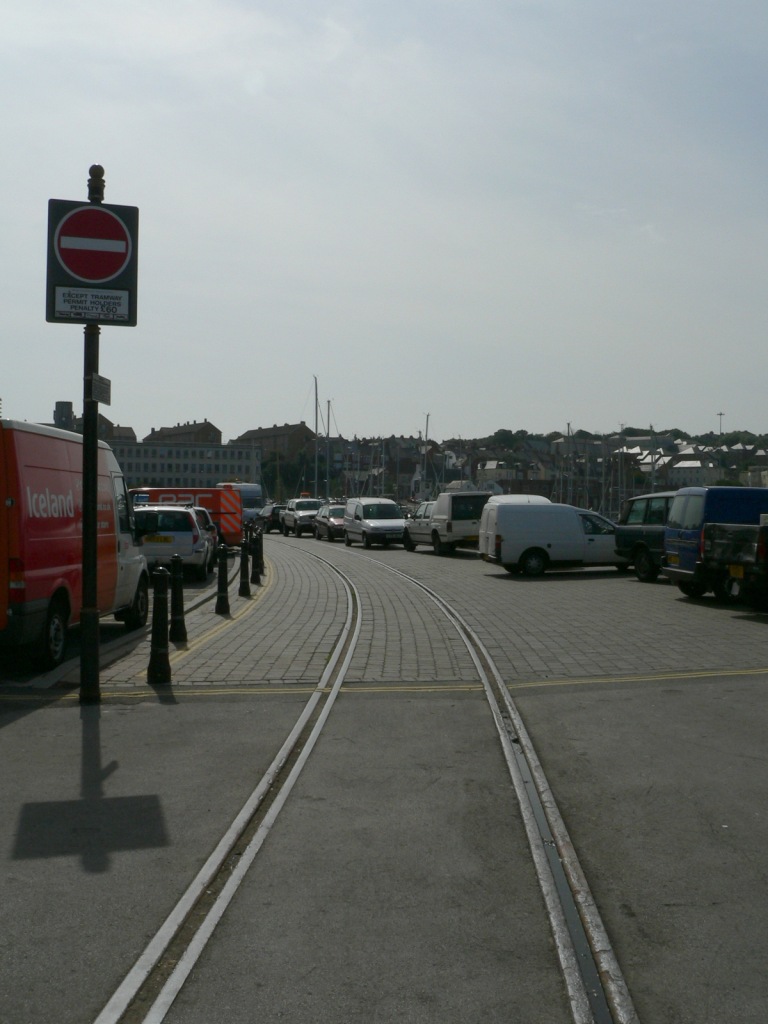 WQ-032SW-01.jpg (163700 bytes)
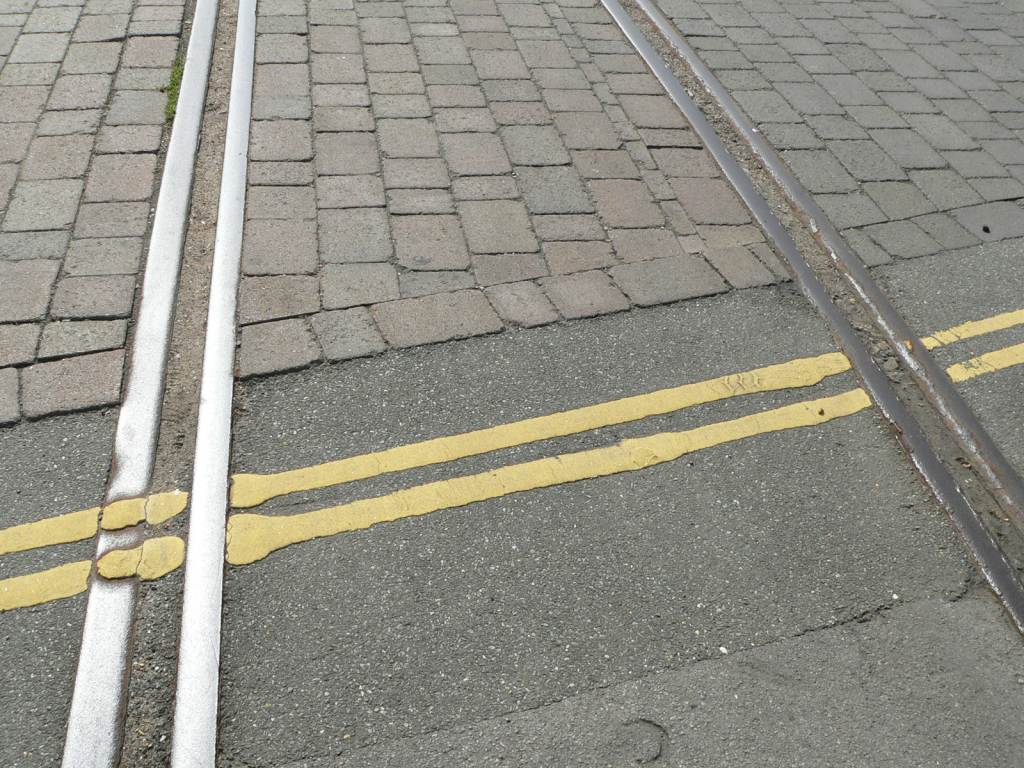 WQ-032rails-01.jpg (160361 bytes)
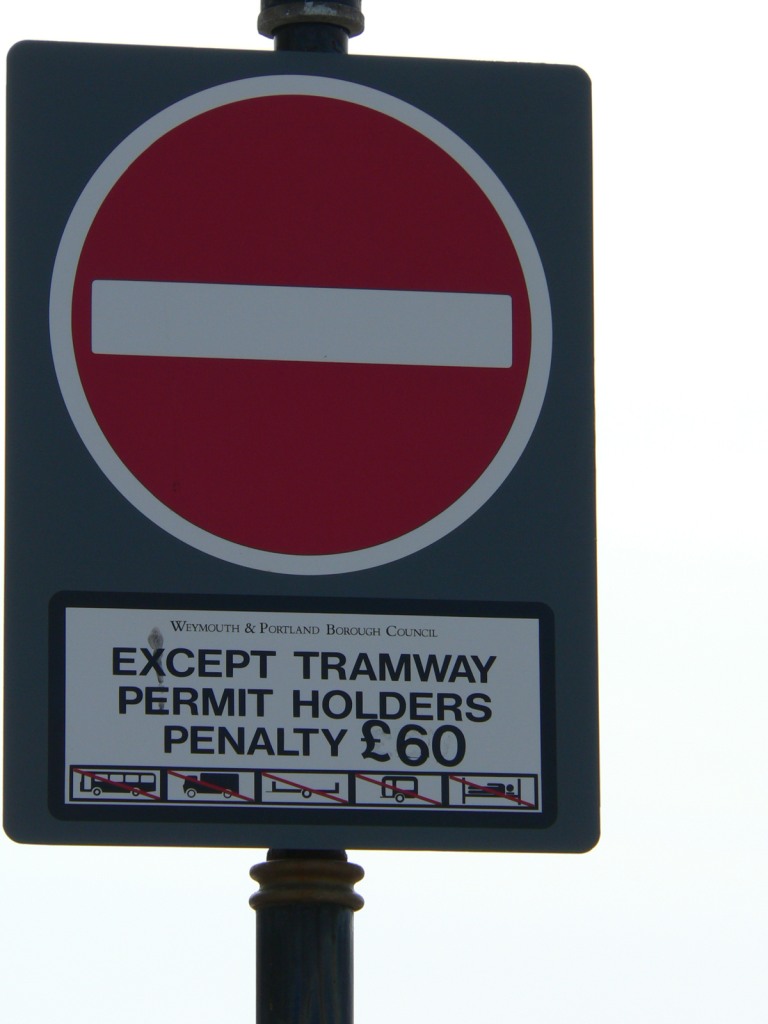 WQ-032sign-01.jpg (95798 bytes)
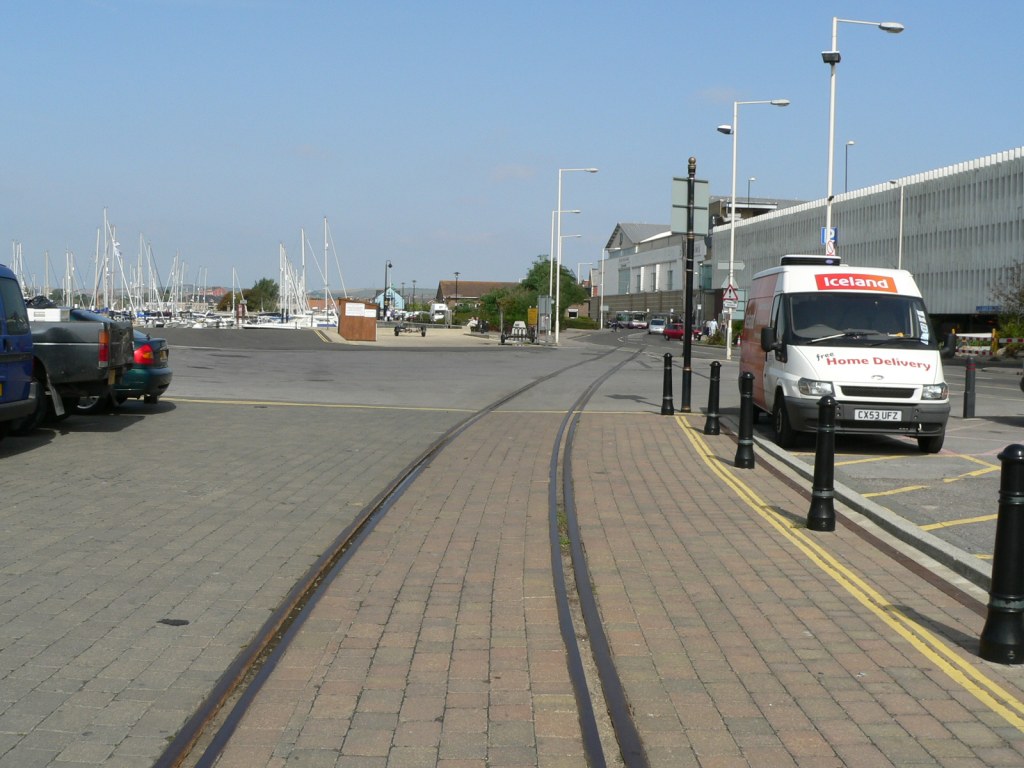 WQ-033NE-01.jpg (158045 bytes)
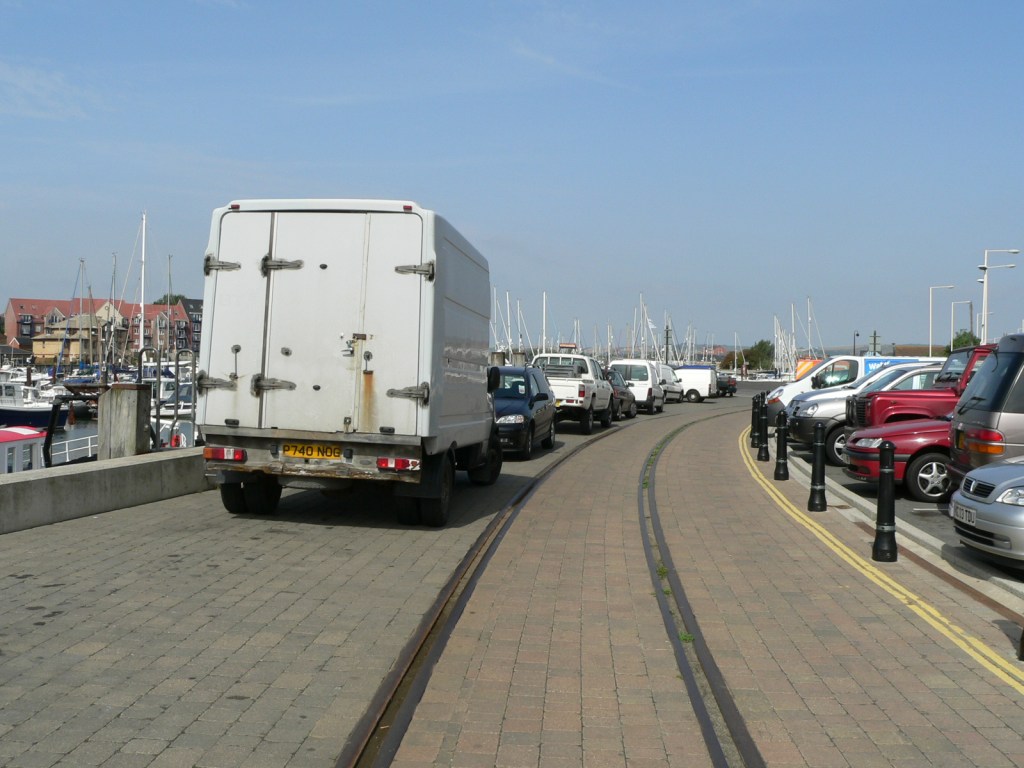 WQ-034N-01.jpg (153800 bytes)
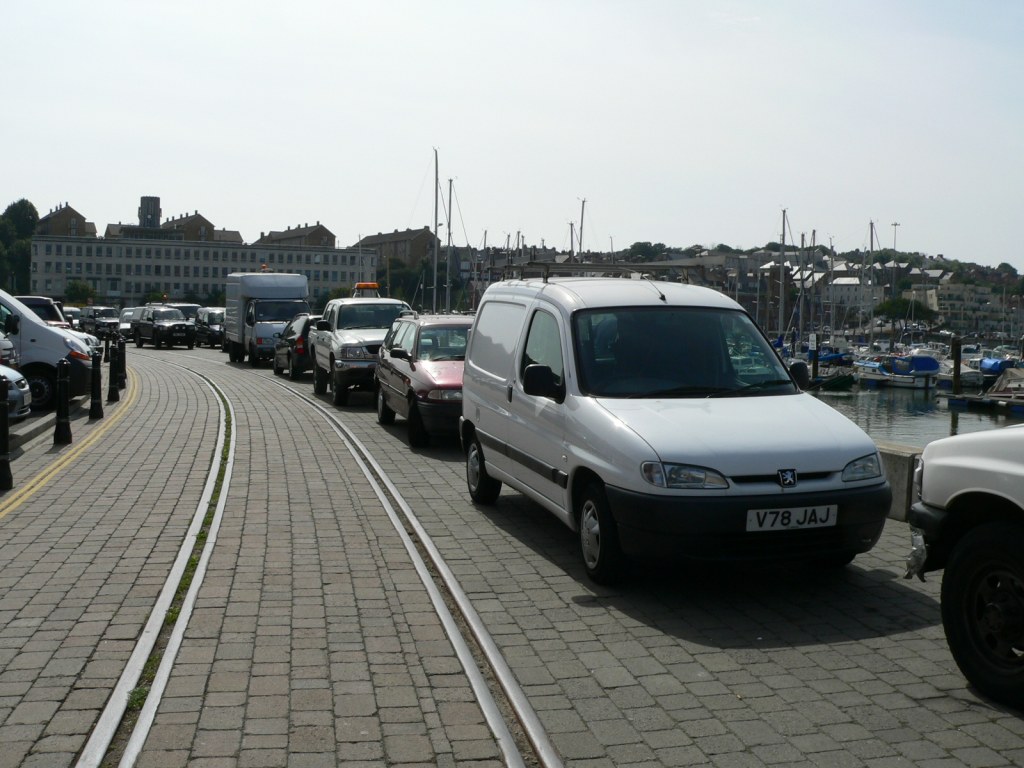 WQ-034S-01.jpg (162776 bytes)
 WQ-035SE-01.jpg (161451 bytes)
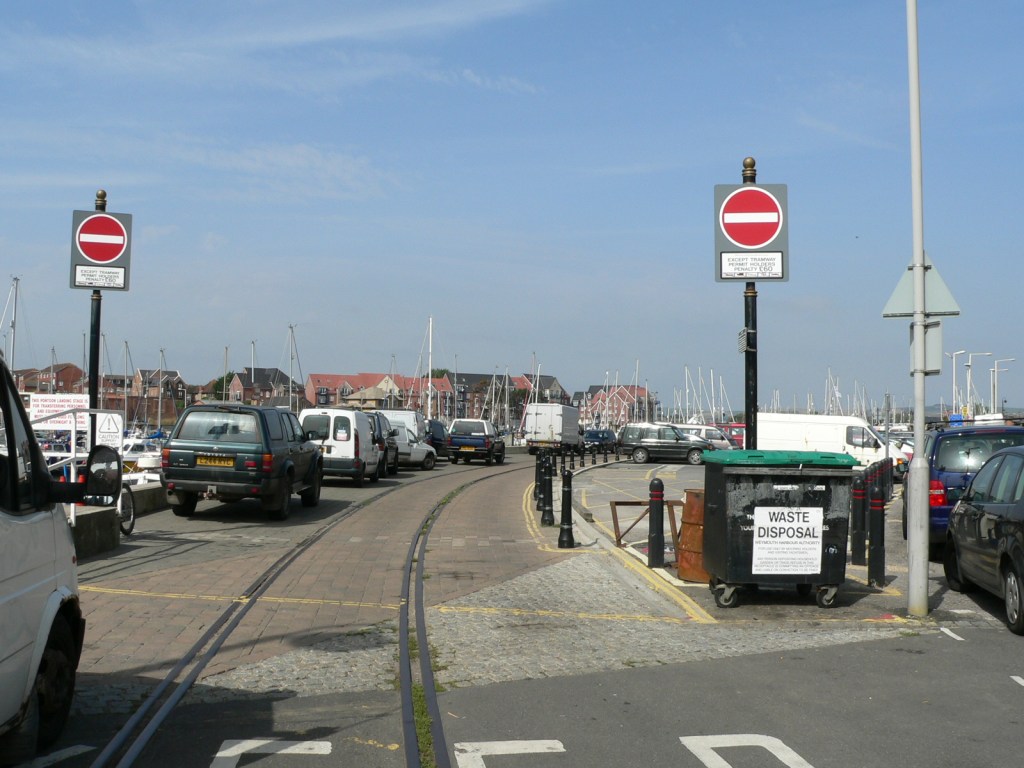 WQ-036NW-01.jpg (160740 bytes)
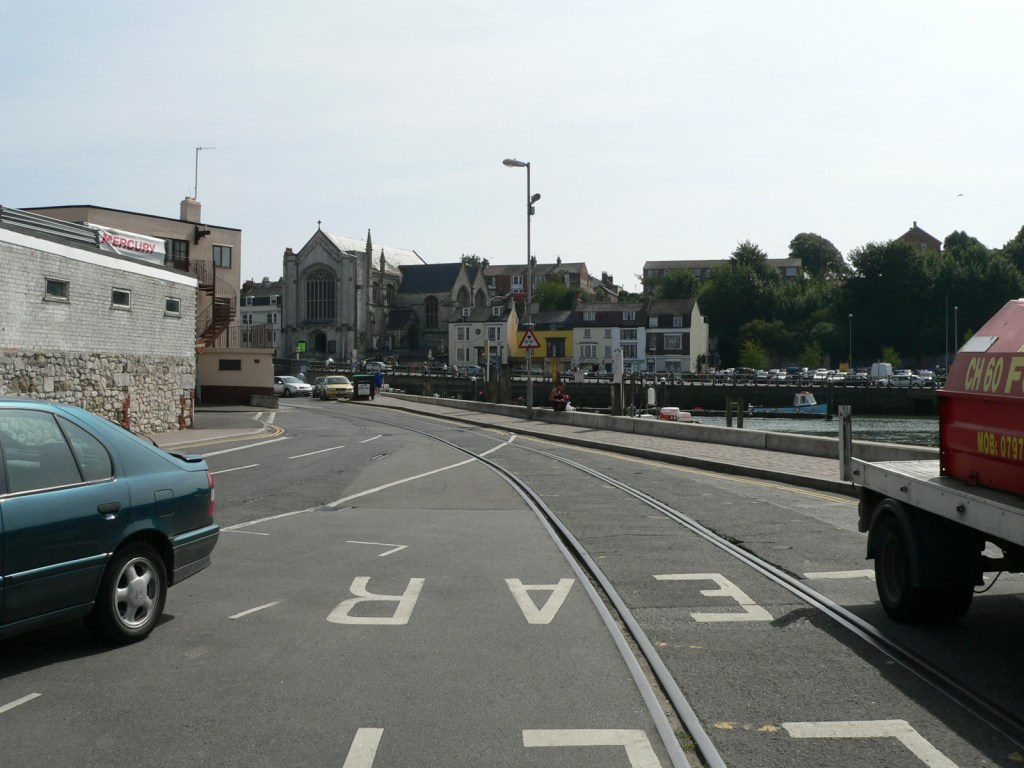 WQ-036SE-01.jpg (161040 bytes)
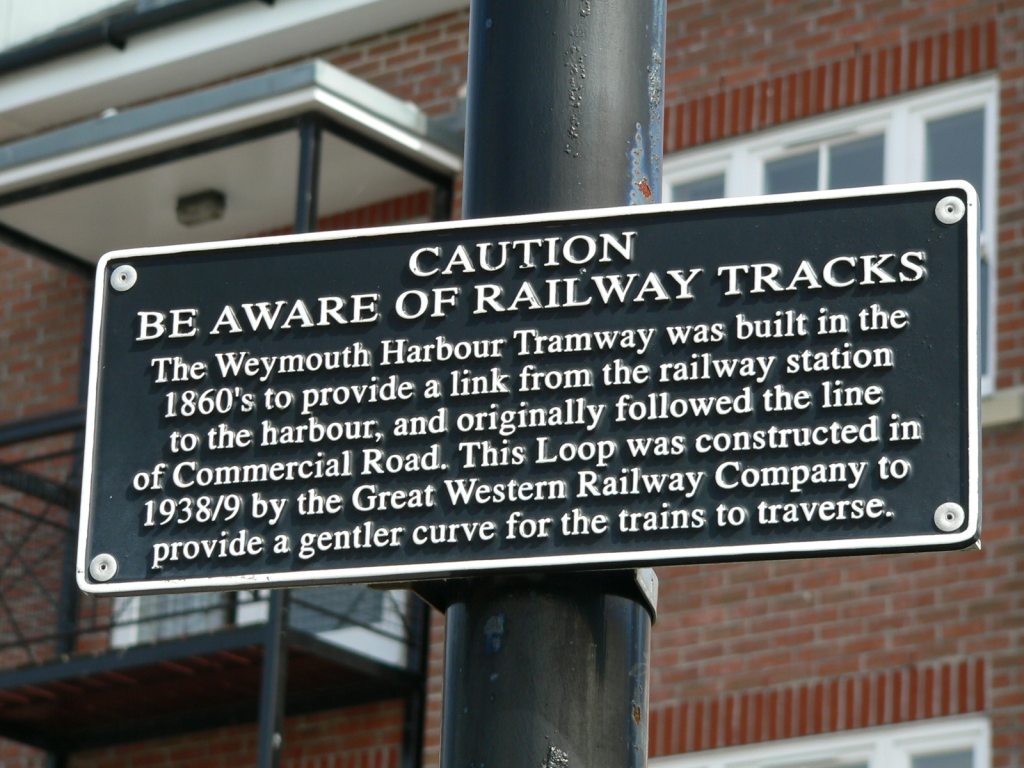 WQ-036sign-01.jpg (160009 bytes)
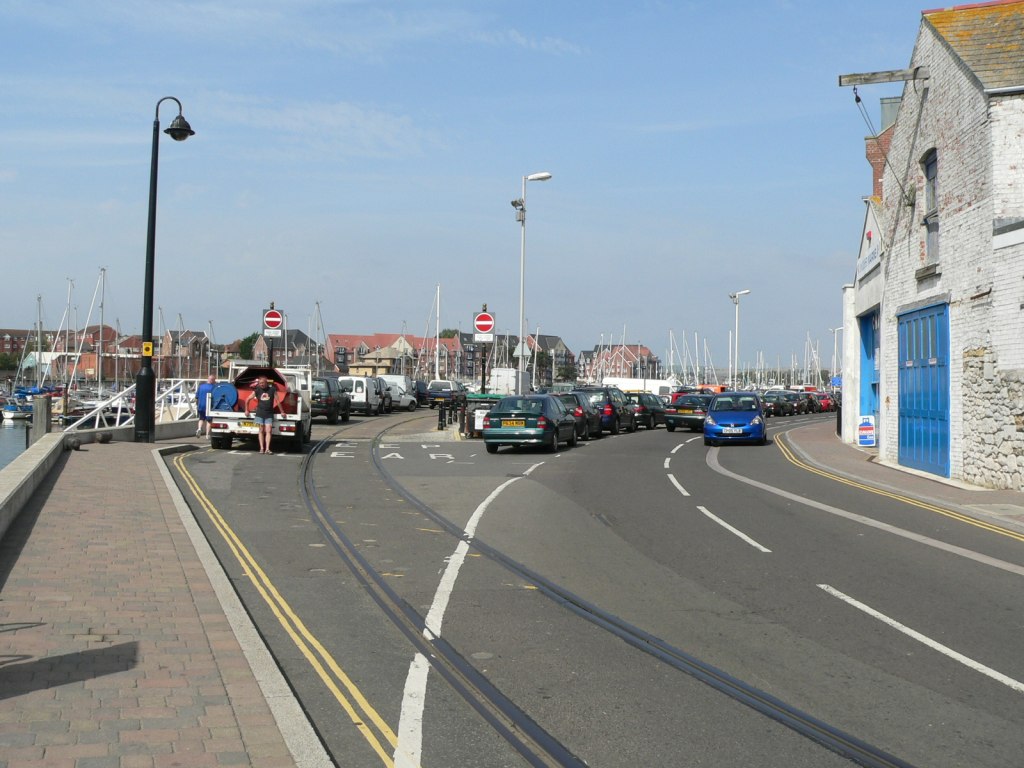 WQ-037NW-01.jpg (157581 bytes)
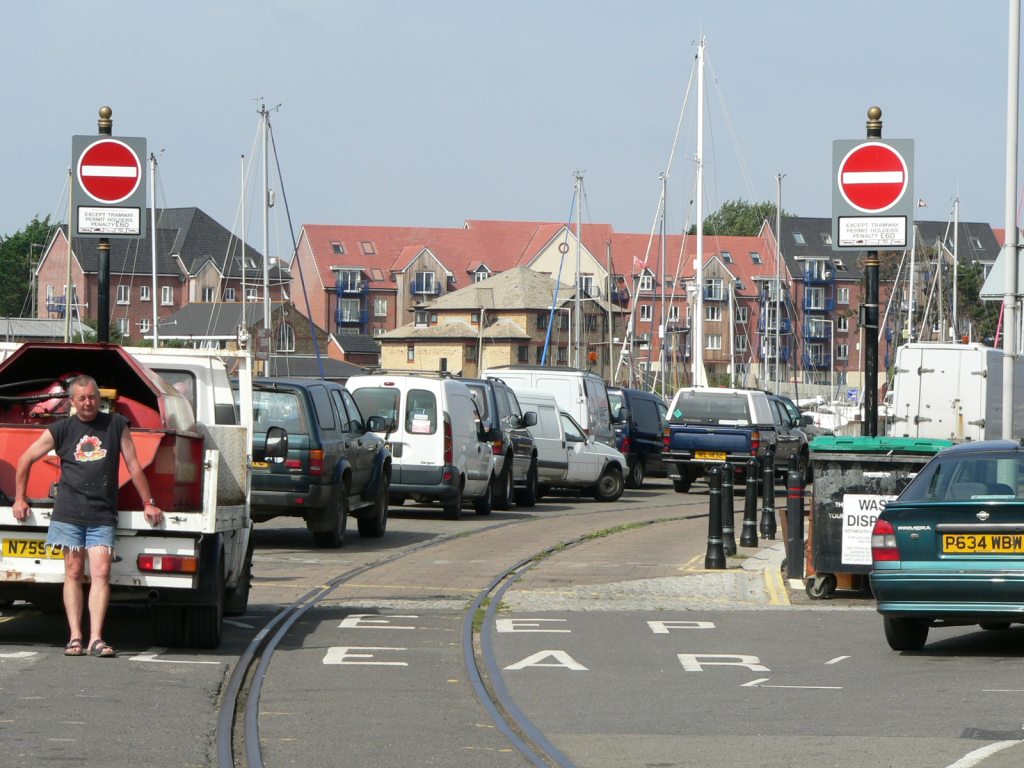 WQ-037NW-02.jpg (163633 bytes)
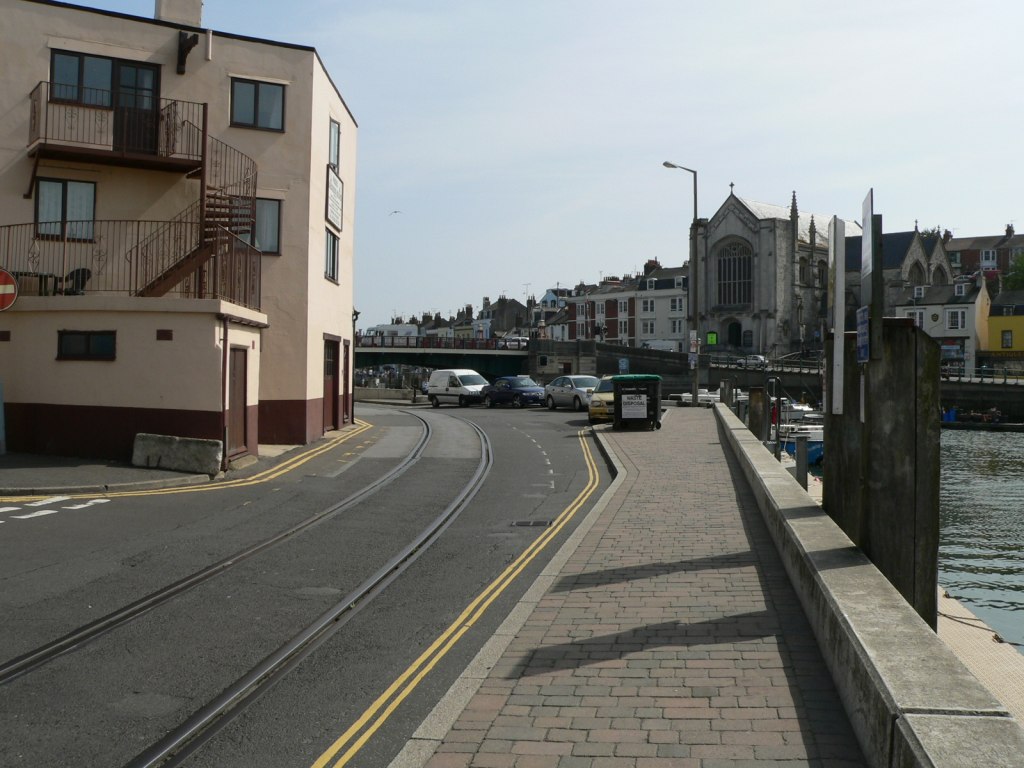 WQ-037SE-01.jpg (157667 bytes)
 WQ-037SE-02.jpg (159275 bytes)
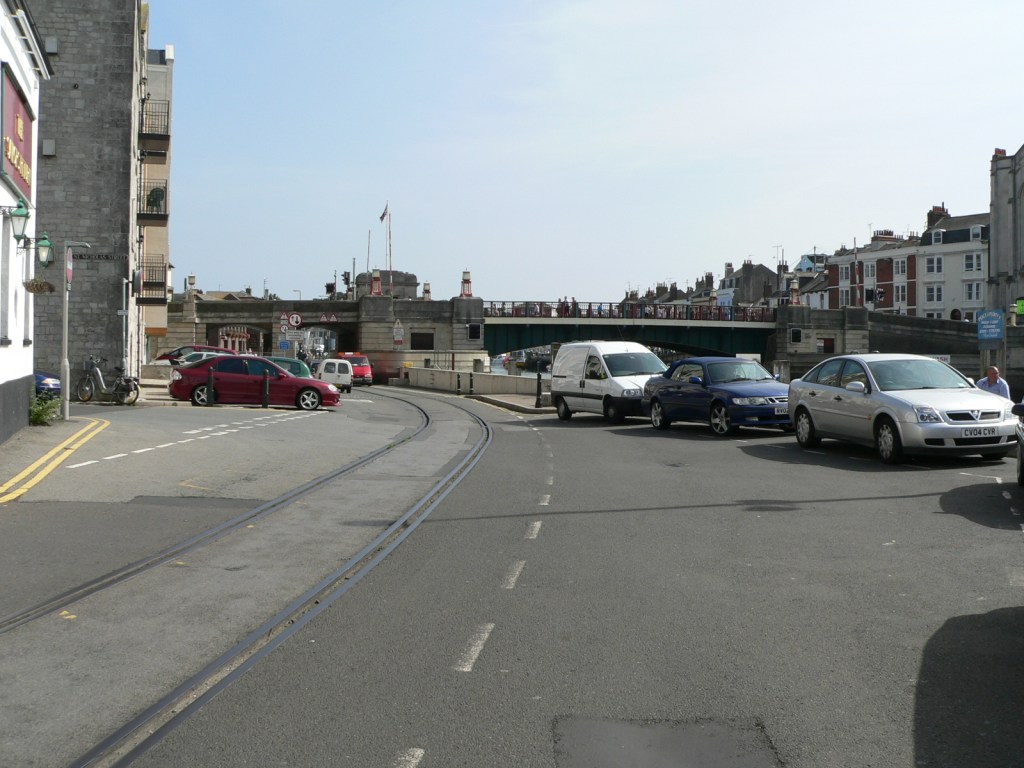 WQ-038E-01.jpg (163313 bytes)
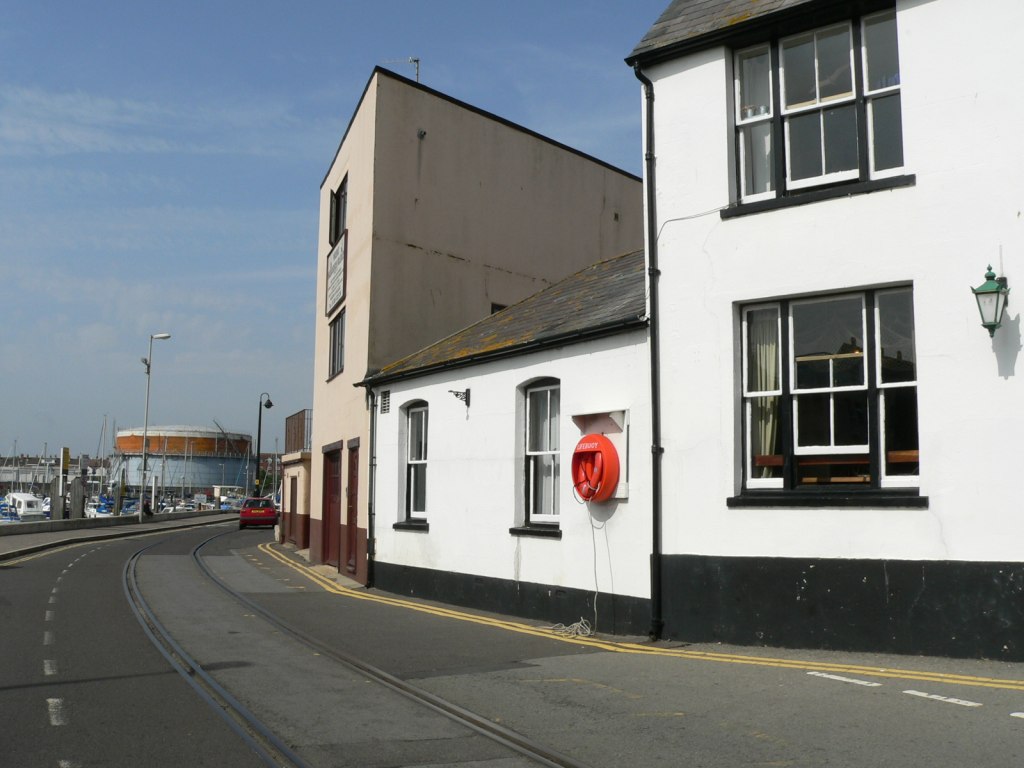 WQ-038NW-01.jpg (124225 bytes)
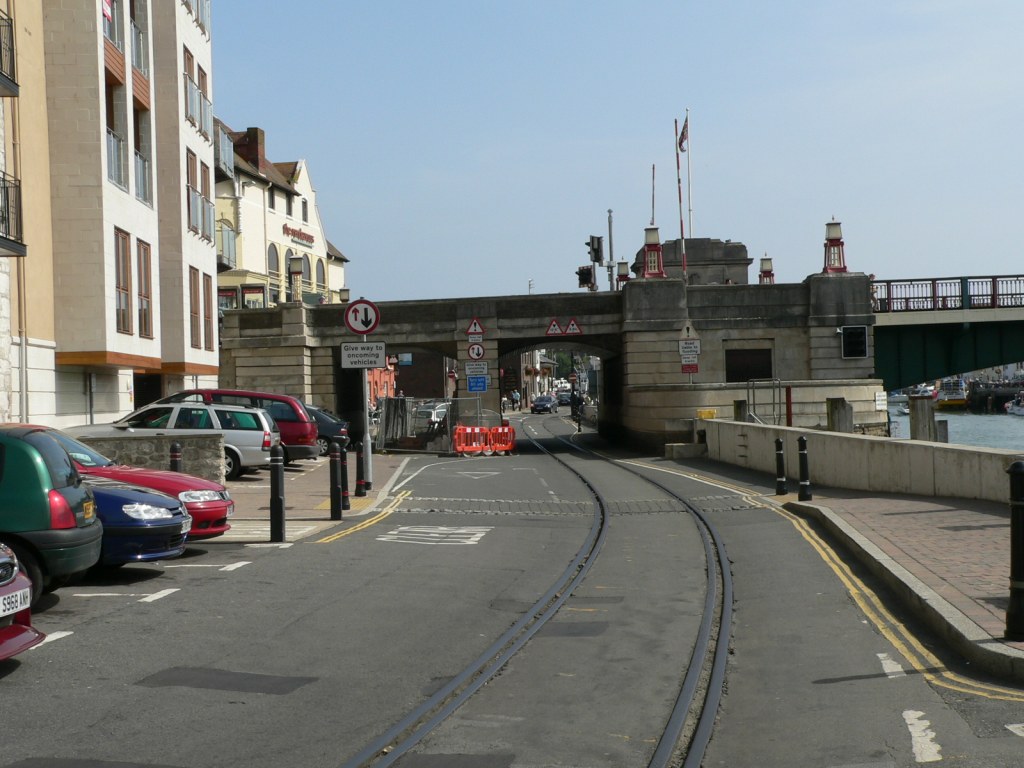 WQ-039E-01.jpg (161793 bytes)
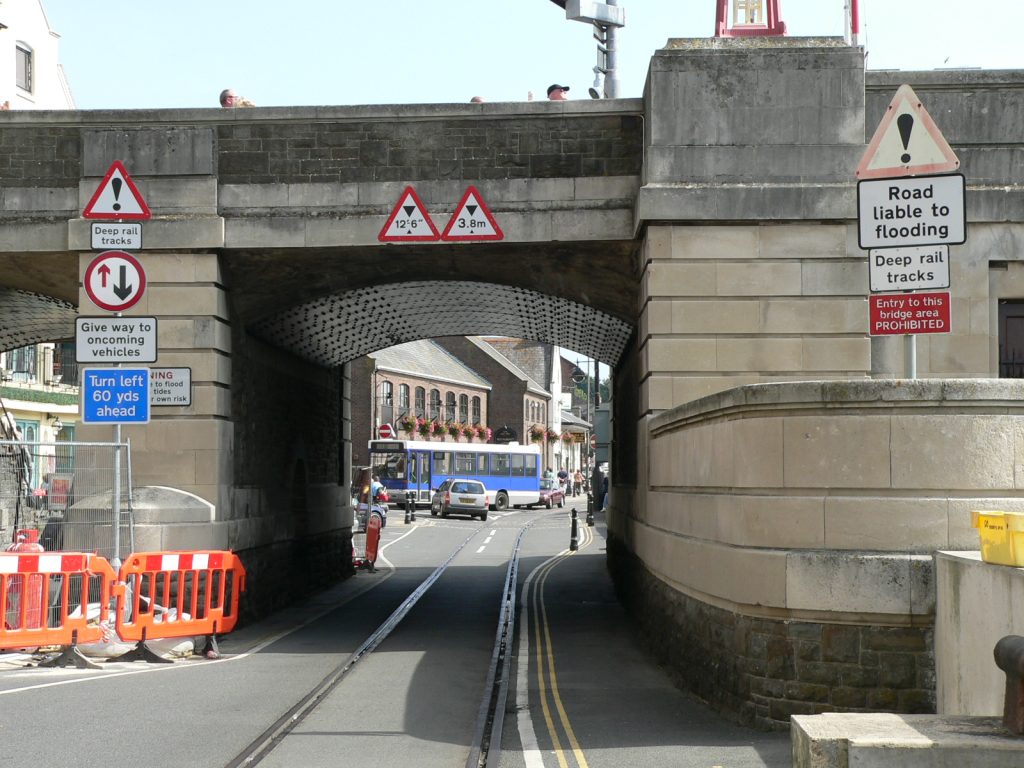 WQ-040E-01.jpg (159595 bytes)
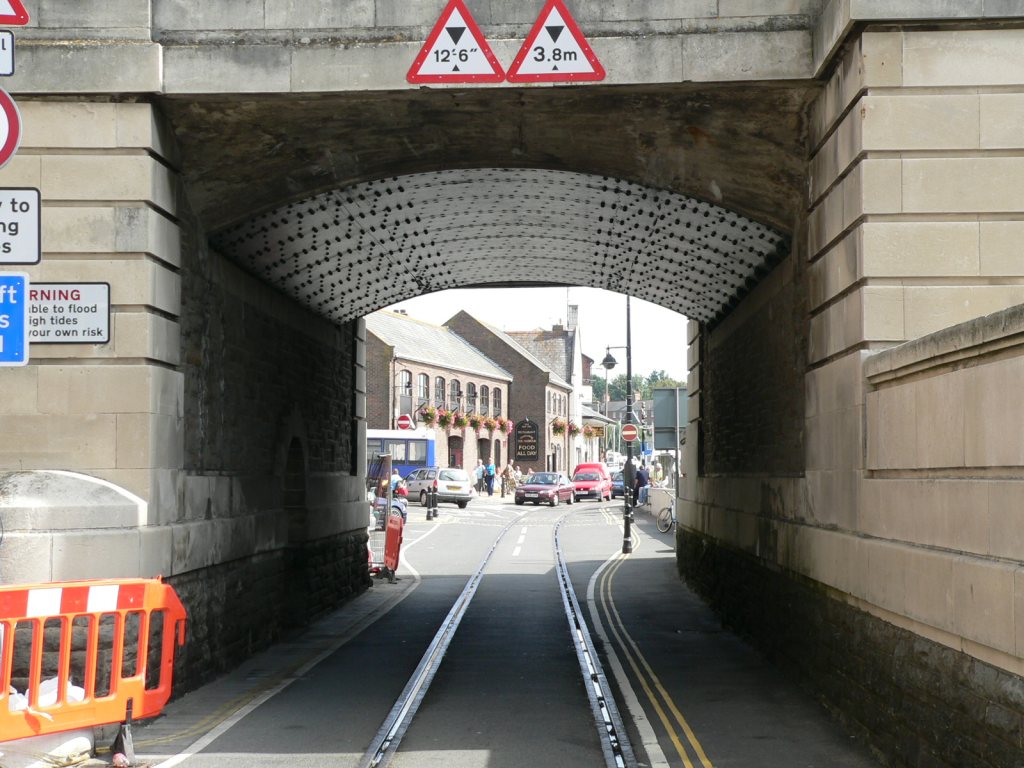 WQ-040E-02.jpg (162865 bytes)
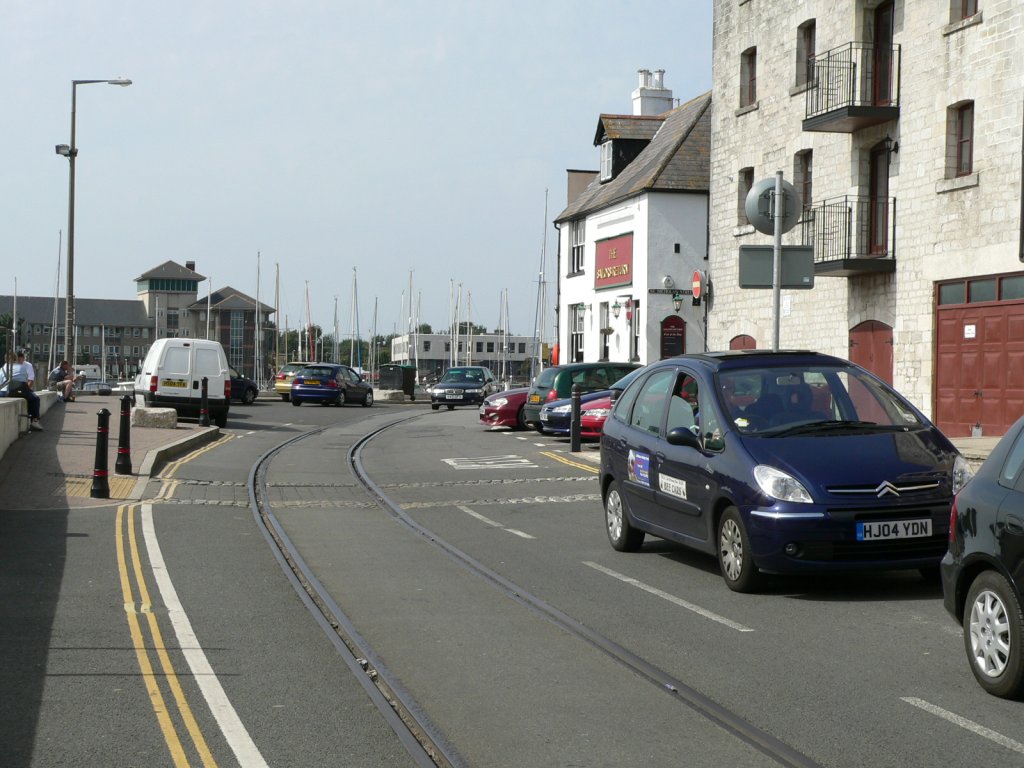 WQ-040W-01.jpg (156932 bytes)
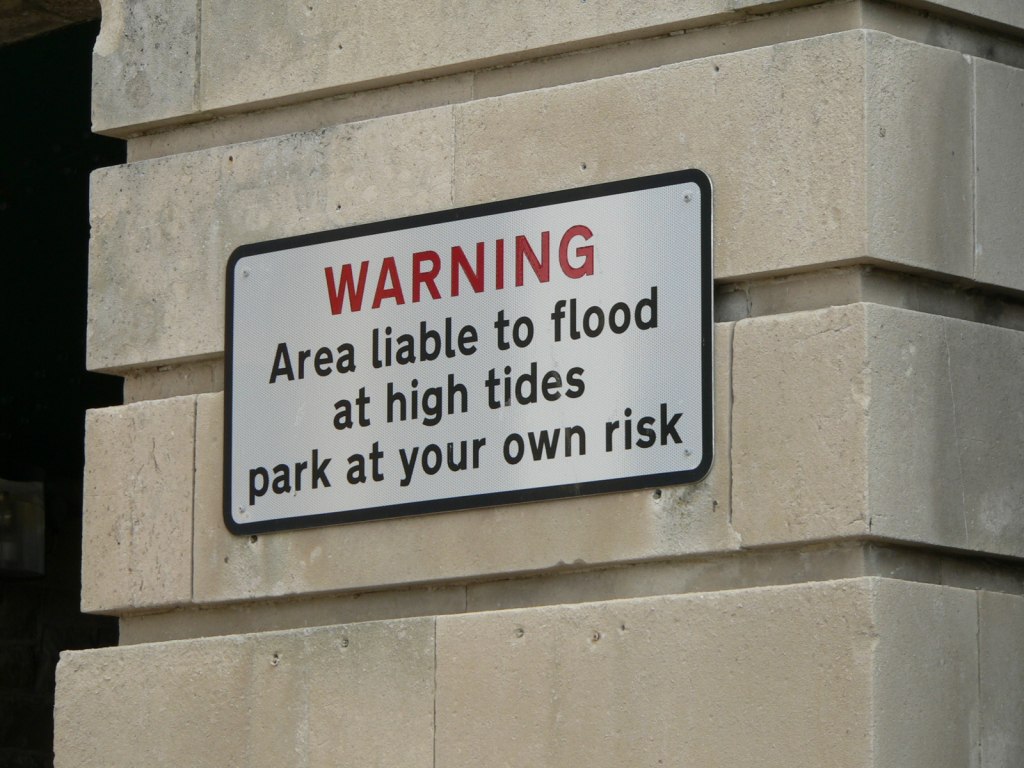 WQ-040sign-01.jpg (162706 bytes)