 2s-beware-trams-jp.jpg (161277 bytes)
|
The Railfaneurope.net Picture Gallery
Directory: /pix/gb/trams/Croydon/misc
Last update: Wed Oct 25 18:23:35 CEST 2017
|
|
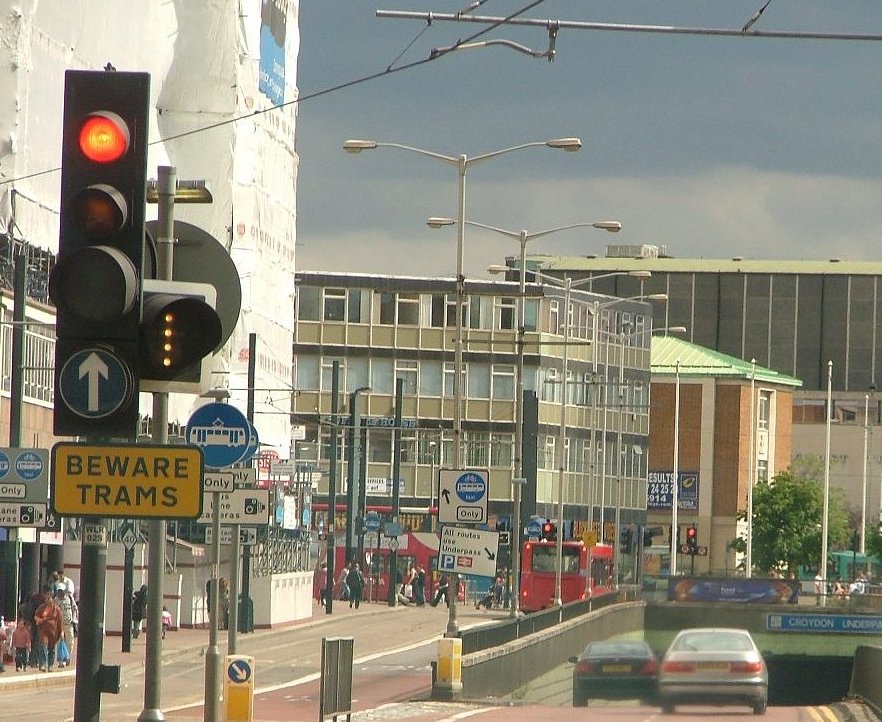
BEWARE TRAMS is not a sign frequently seen in Britain which does not unfortunately share the same enthusiasm
for them as on the Continent. Manchester, Sheffield and Nottingham plus the long eastablished Blackpool trams
join this network Tramlink as seen from one here in Croydon South London. Other proposed schemes
may in the future be added to these but there is often considerable opposition to them initially in addition to finding the
money. Once in place though I think the travelling public take to them being both efficient and fast...I clocked ours doing 80 KPH
around 50 MPH...the date August 10th 2006.
Photo from James & Martin's Picture Collection Copyright 'Jampics' m.hawkes7@ntlworld.com British and Foreign Railway Pictures Jampics Fotopic. |
|
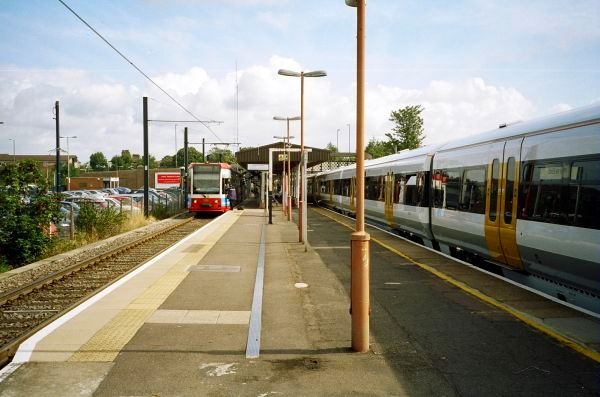
Tramlink and South Eastern Trains (Networker 465) seen connecting with each other at Elmers End, on the London-Hayes line.
In this area, Tramlink actually makes use of former railway chords, which would be run by BR-Network South East in the past. Elmers End. 19th August 2004. P.L.Guillemin (plguillemin@yahoo.fr) |
|
Morden Road Tramlink station, looking east towards Phipps Bridge stop. This section is built on the former Wimbledon to West Croydon mainline railway.
Photo by Chris McKenna15/01/2006. |
|
Morden Road Tramlink station, looking west towards Merton Park stop. This section is built on the former Wimbledon to West Croydon mainline railway.
Photo by Chris McKenna15/01/2006. |
|
A pedestrian level crossing is the usual means of crossing between platforms on the Tramlink system. This one at Mordon Road is a typical example.
Photo by Chris McKenna15/01/2006. |
|
Looking under the bridge that carries Morden Road over the Tramlink network immediately east of Morden Road stop. This section was originally part of the Wimbledon to West Croydon suburban mainline.
Photo by Chris McKenna15/01/2006. |
|
Looking east along the Tramlink line towards Phipps Bridge from Morden Road. Note the two pedestrian level crossings.
Photo by Chris McKenna15/01/2006. |
|
Looking west at Morden Road Tramlink stop from the pedestrian level crossing between the platforms. Trams towards Wimbledon call at the left hand platform while the right hand platform is served by trams en route to Croydon. Like all the other stops on the network, the platforms at Morden Road are 350mm above the height of the rail - matching the floor height of the trams.
Photo by Chris McKenna15/01/2006. |
|
Looking west from Morden Road Tramlink stop along the line towards Merton Park and Wimbledon. This was formerly part of the Wimbledon to West Croydon suburban mainline, closed in 1997 to allow construction of the Tramlink system.
Photo by Chris McKenna15/01/2006. |
|
A transponder detection loop at Morden Road Tramlink stop. I presume this tells the signalling system the tram is at the stop.
Photo by Chris McKenna15/01/2006. |
|
The top of one of the OHLE posts at Morden Road Tramlink stop. Two 11.5mm wires electrified at a nominal 750v DC supply the motive power to the trams.
Photo by Chris McKenna15/01/2006. |
|
A closeup of the OHLE at Morden Road Tramlink stop. Two 11.5mm wires electrified at a nominal 750v DC supply the motive power to the trams.
Photo by Chris McKenna15/01/2006. |
|
Tramlink tram 2532 heads towards Phipps Bridge with an eastbound route 1 service to Elmers End.
Photo by Chris McKenna15/01/2006. |
|
A geographic map showing the Tramlink routes (thick yellow, green and red lines) in relation to mainline railways (thin dark grey lines), London Underground lines (black lines, slightly thicker than mainlines) roads served by busses (dark grey) and other main roads in the area (light grey). The red numbers are the bus routes.
Photo by Chris McKenna15/01/2006. |
|
Birkbeck station in south London on the evening of 24 October 2005. This station is served by both Tramlink trams and suburban mainline trains operated by Southern.
Photo by Chris McKenna 24/10/2005. |
|
An eastbound Tramlink tram arrives into Birkbeck station on the evening of 24 October 2005.
Photo by Chris McKenna 24/10/2005. |
|
Tramlink tram 2547 on Station Road in Croydon on 24 October 2005. At this point the trams run on-street in lane shared with buses and taxis only, running contraflow to all other traffic.
Photo by Chris McKenna 24/10/2005. |
|
A tramlink tram on route 3 approaches West Croydon station in rush-hour traffic on 24 October 2005.
Photo by Chris McKenna 24/10/2005. |
|
The junction where Tramlink Line 1 diverges/joins Lines 2 and 3 on the western edge of Croydon town centre. Line 1 continues to Wimbledon - heading off towards teh right of this picture, while lines 2 and 3 continue round towards the camera onto western side of the town centre loop.
Photo by Chris McKenna 24/10/2005. |
|
A Tramlink tram at Chruch Street station in central Croydon. Note the double track in the foreground, the right hand pair are for line 1 services towards Wimbledon, while left hand pair are for the western side of the town centre loop. The actual routes do not diverge for several hundred metres after the split.
Photo by Chris McKenna 24/10/2005. |
|
The next tram indicator on the Tramlink platform at Birkbeck station. This station is located on a single line stretch of tramway, so the "See tram front" for destination was particularly unhelpful! It turned out that the tram was heading eastbound to Beckenham Junction.
Photo by Chris McKenna 24/10/2005. |
|
A Tramlink ticket machine, photographed at Birkbeck station on Line 2.
Photo by Chris McKenna 24/10/2005. |
|
The buffer stops of the Tramlink platform, and mainline bay platform 9 at Wimbledon station in South London. Although both systems use 750v DC electrification, powere to Tramlink trams is supplied through overheard cantenary wires, while the mainline trains use an electrified third rail.
Photo by Chris McKenna 24/10/2005. |
|
Beckenham Junction where the Croydon Tramlink terminates alongside the
main line station. Pictured on September 15th 2004.
Photo from James & Martin's Picture Collection Copyright 'Jampics' m.hawkes7@ntlworld.com British and Foreign Railway Pictures Jampics Fotopic. |
|
Looking towards Canary Wharf Station from the nearby one at Heron Quays on the Docklands
Light Railway in the late afternoon sun on the 15th September 2004.
Photo from James & Martin's Picture Collection Copyright 'Jampics' m.hawkes7@ntlworld.com British and Foreign Railway Pictures Jampics Fotopic. |
|
This is an old Duewag Tram that can now be found in the yard at Quorn on the Preserved Great Central Railway where
a local group is hoping to restore it. See note for more details.
Pictured on the 17th September 2004.
Photo from James & Martin's Picture Collection Copyright 'Jampics' m.hawkes7@ntlworld.com British and Foreign Railway Pictures Jampics Fotopic. |
|
To discover more about the old Duewag Tram and how it happenned to find its
way to Quorn on Britain's Great Central Railway, click on the thumbnail and read the
note that was attached to it on September 17th 2004.
Photo from James & Martin's Picture Collection Copyright 'Jampics' m.hawkes7@ntlworld.com British and Foreign Railway Pictures Jampics Fotopic. |
 Elmers_End_1.jpg (58195 bytes)
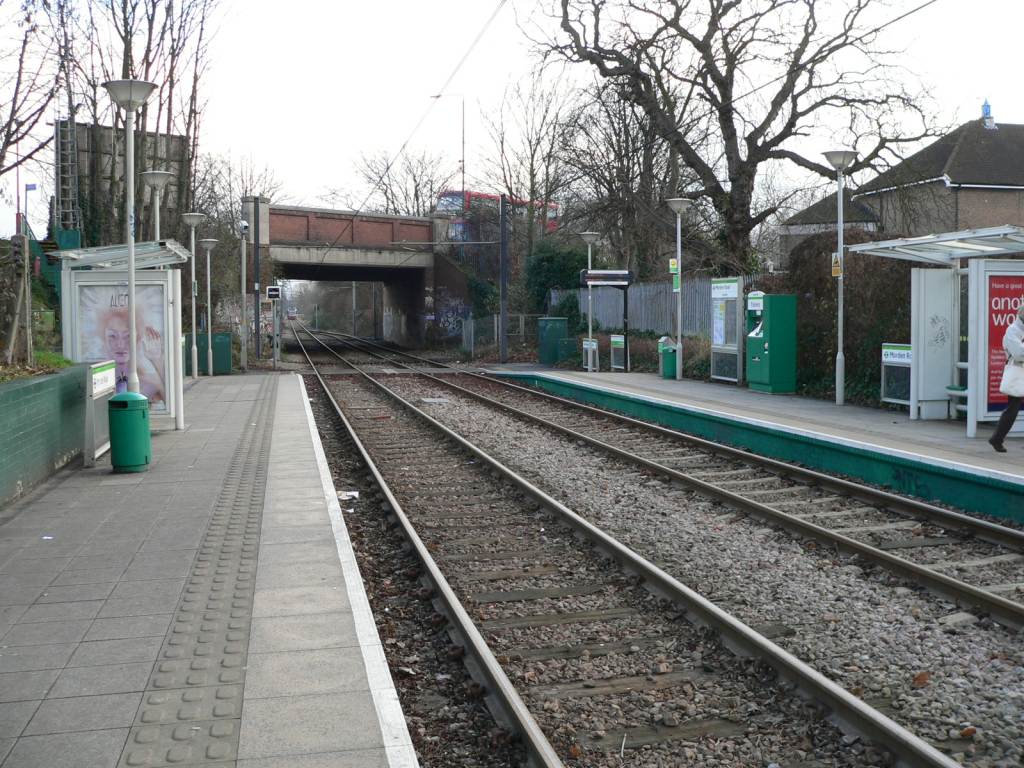 Tramlink-MordenRd-01.jpg (160587 bytes)
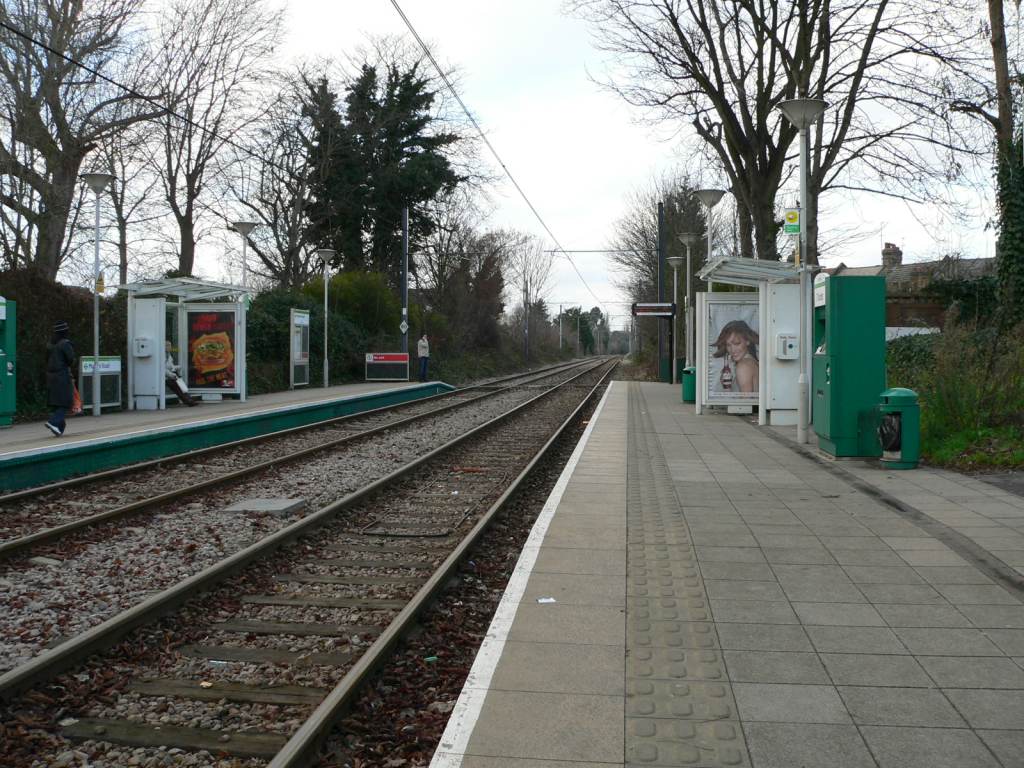 Tramlink-MordenRd-02.jpg (162312 bytes)
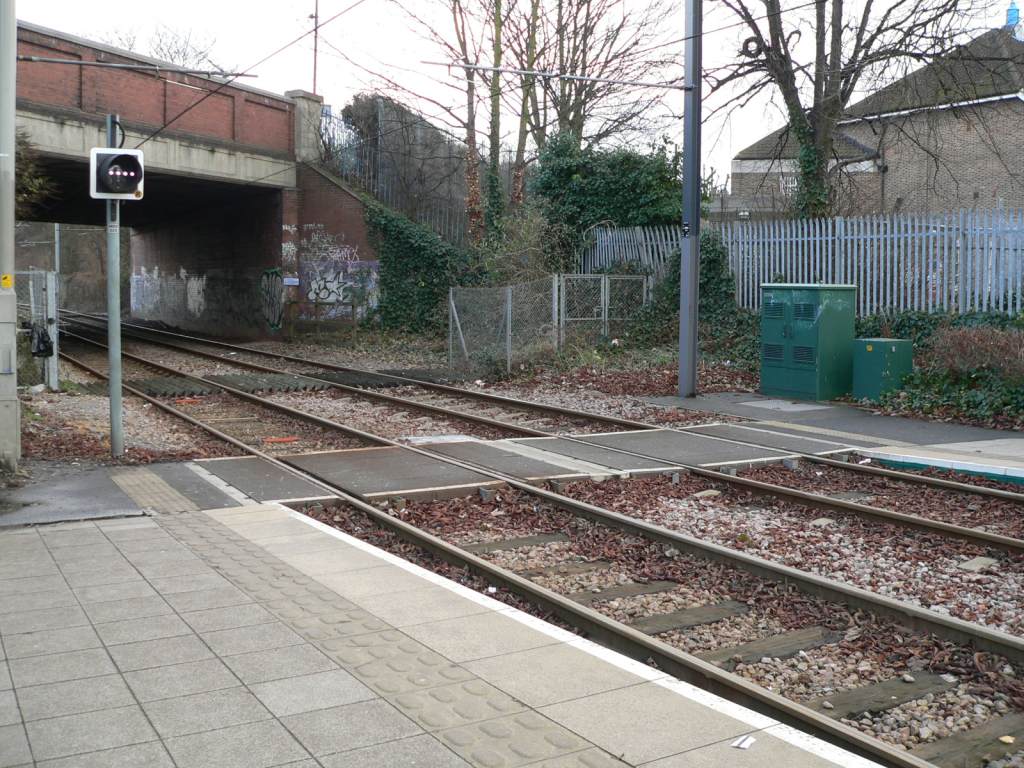 Tramlink-MordenRd-03.jpg (162609 bytes)
 Tramlink-MordenRd-04.jpg (163465 bytes)
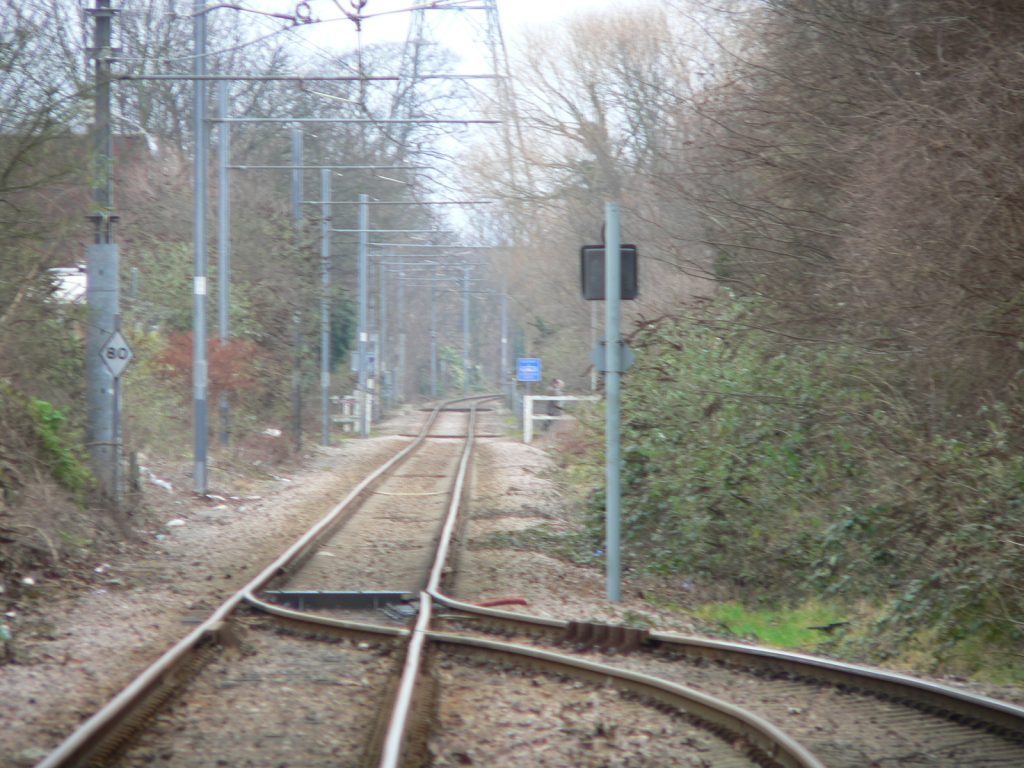 Tramlink-MordenRd-05.jpg (160782 bytes)
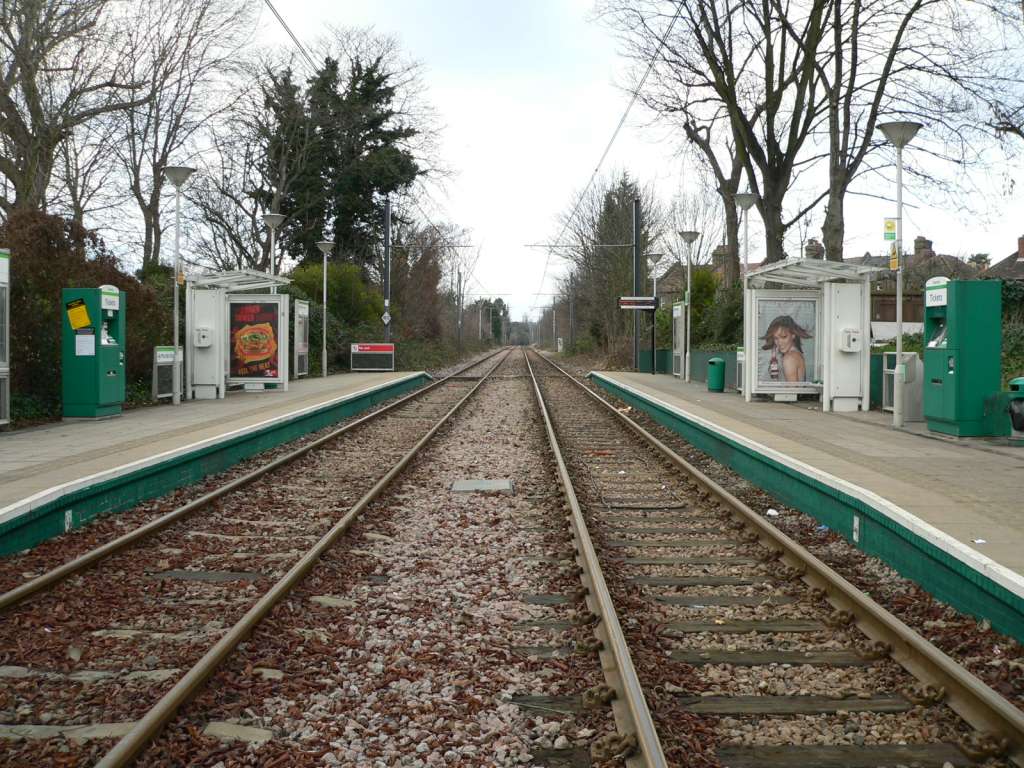 Tramlink-MordenRd-06.jpg (162313 bytes)
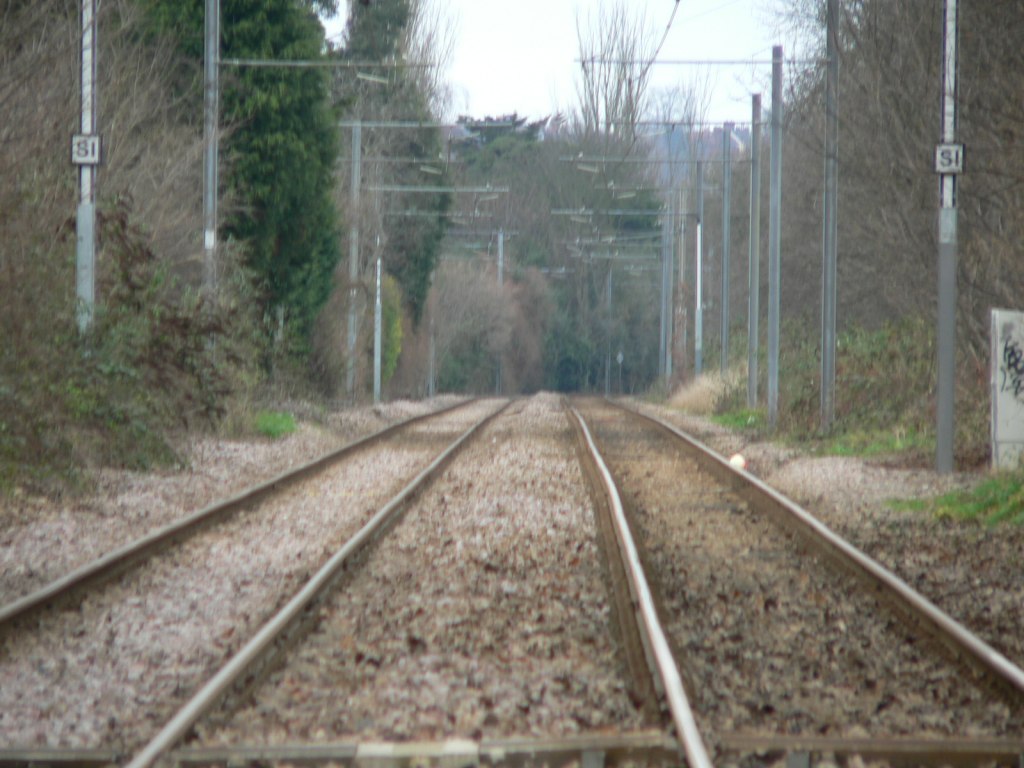 Tramlink-MordenRd-07.jpg (157224 bytes)
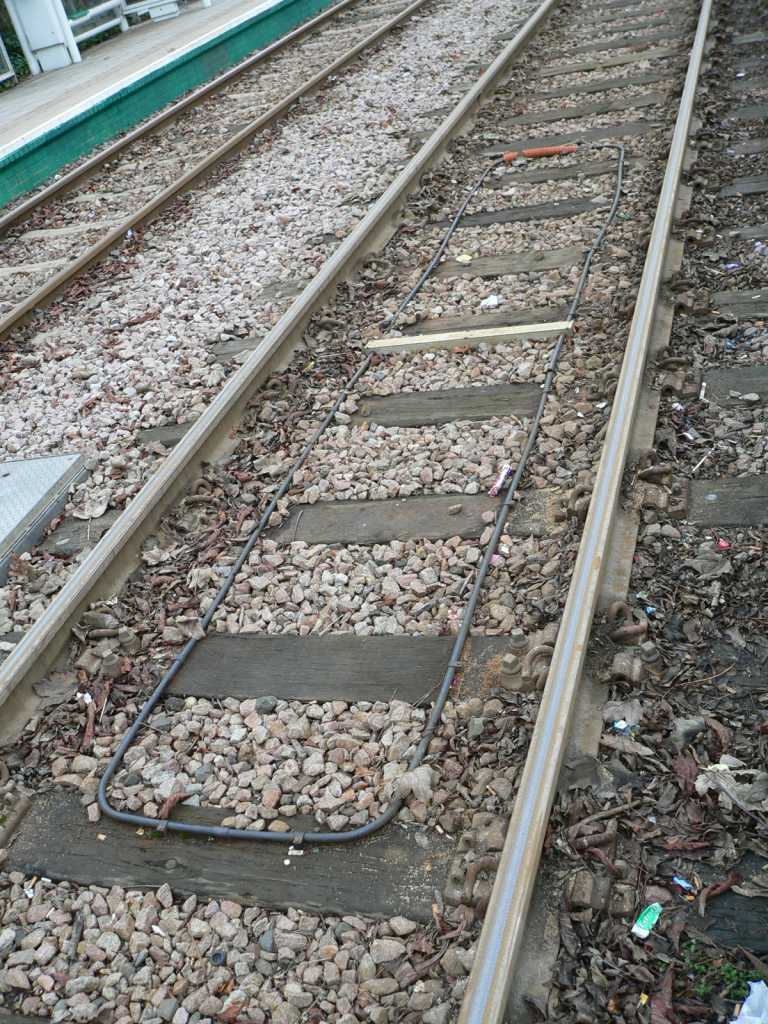 Tramlink-MordenRd-detectionloop.jpg (163369 bytes)
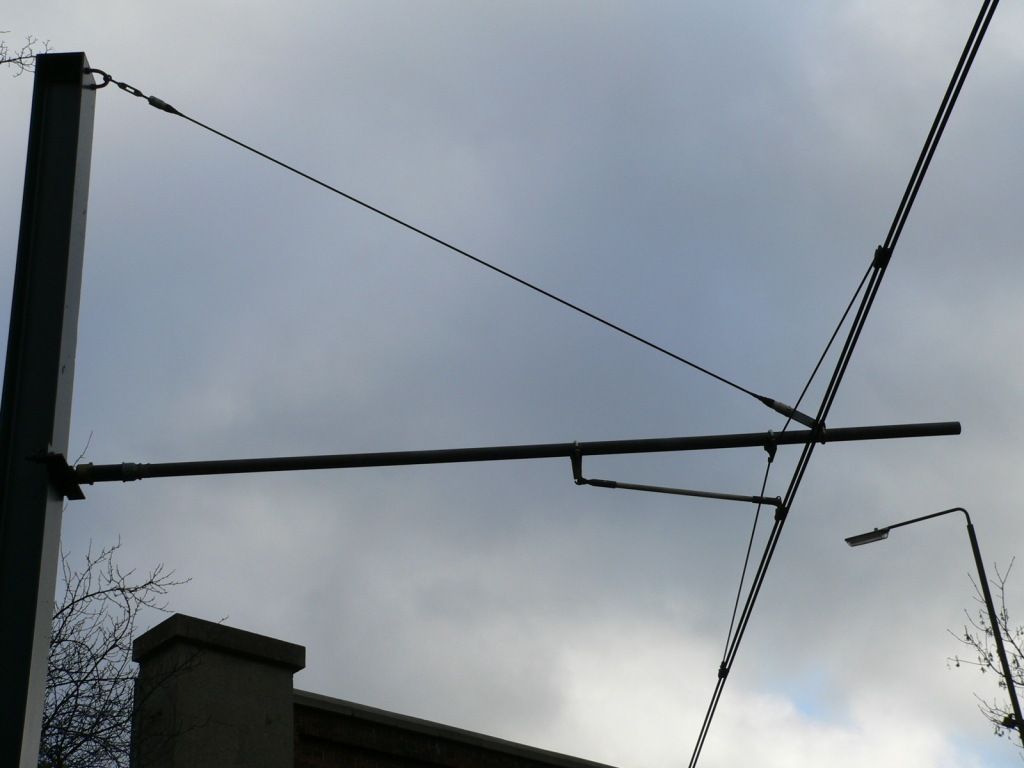 Tramlink-OHLE1.jpg (127656 bytes)
 Tramlink-OHLE2.jpg (107273 bytes)
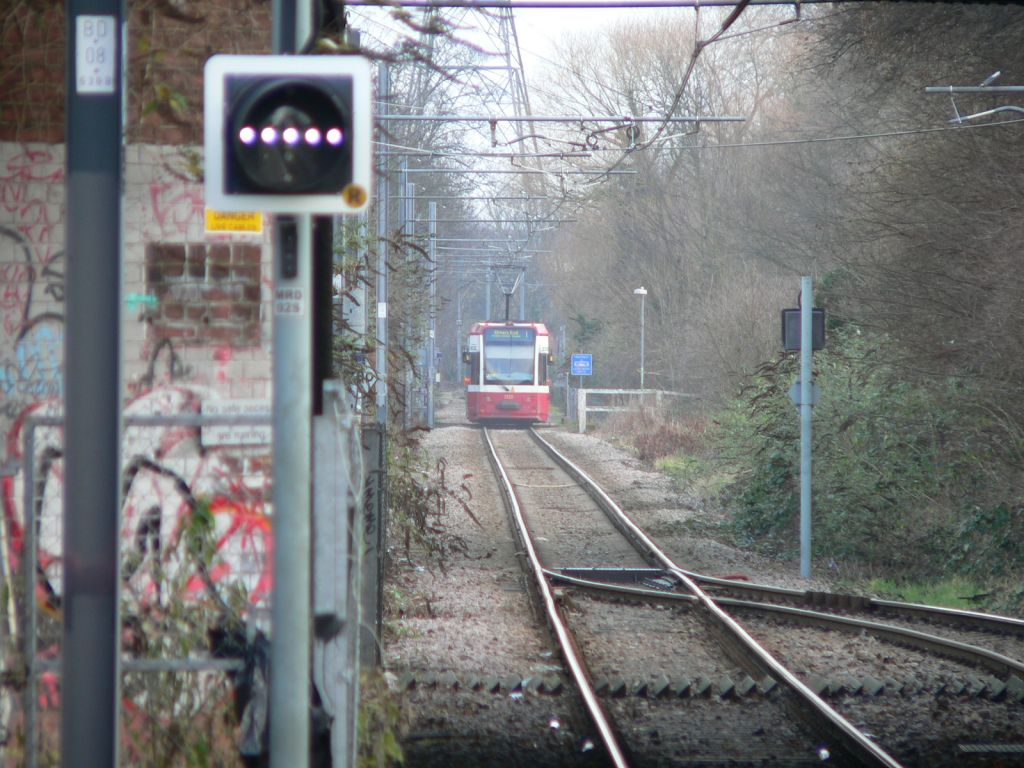 Tramlink-Tram2532-01.jpg (160837 bytes)
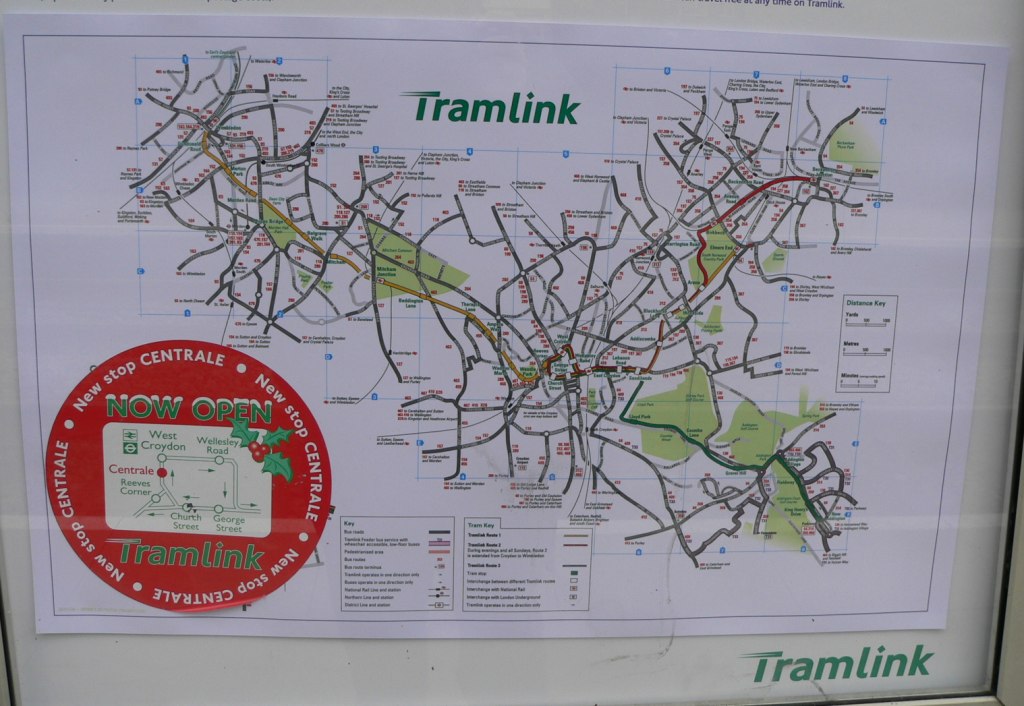 Tramlink-geomap.jpg (161839 bytes)
 gb-tramlink-birkbeck-01.jpg (162462 bytes)
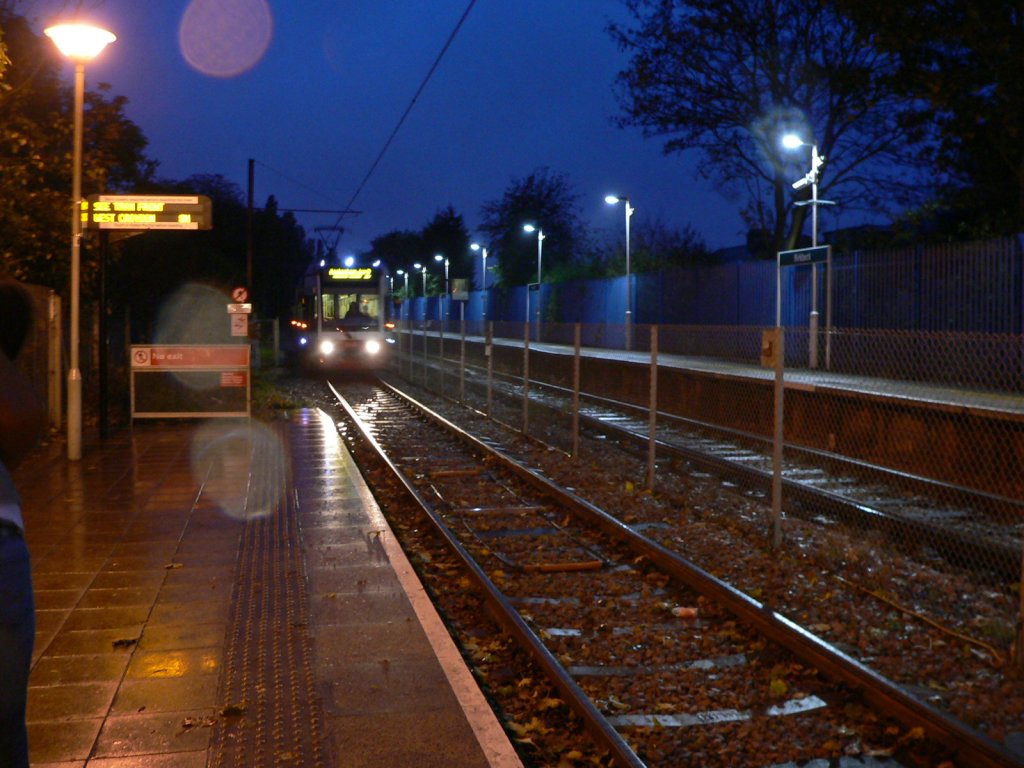 gb-tramlink-birkbeck-02.jpg (157007 bytes)
 gb-tramlink-croydoncentre-03.jpg (163342 bytes)
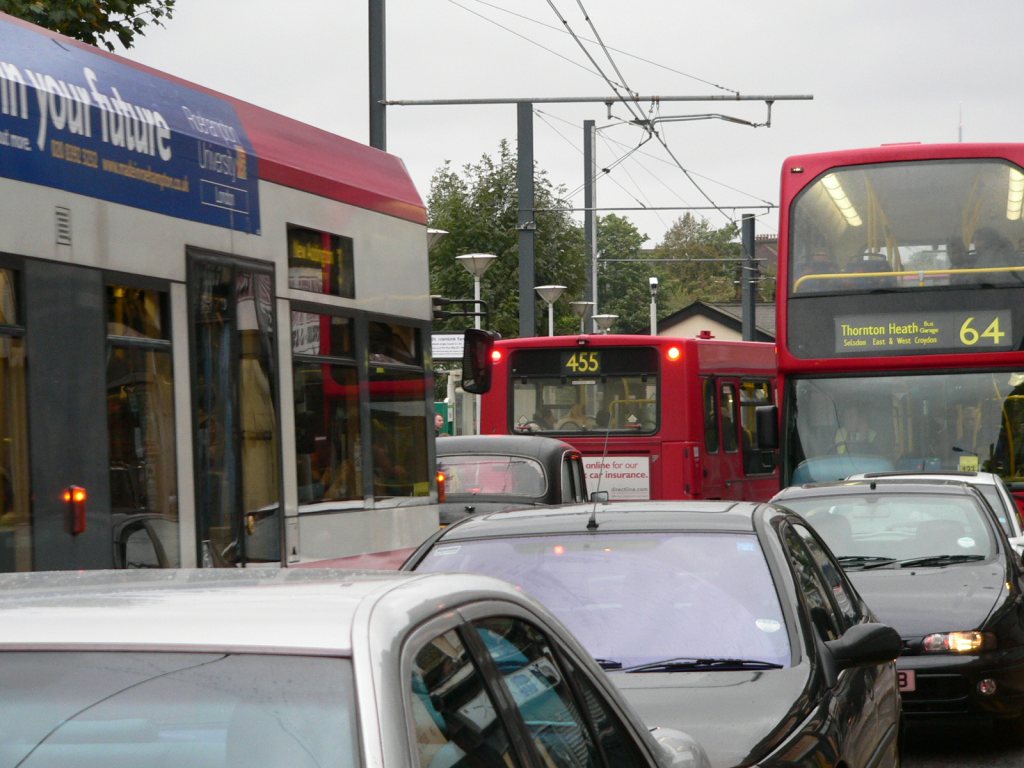 gb-tramlink-croydoncentre-04.jpg (145420 bytes)
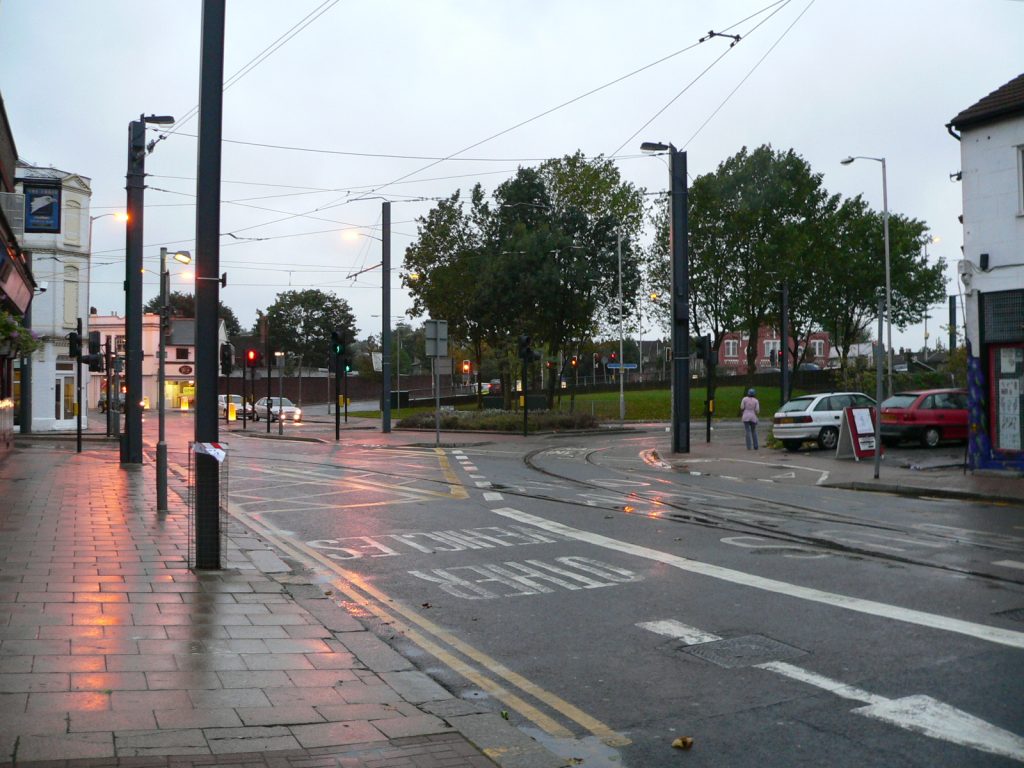 gb-tramlink-croydoncentre-08.jpg (159280 bytes)
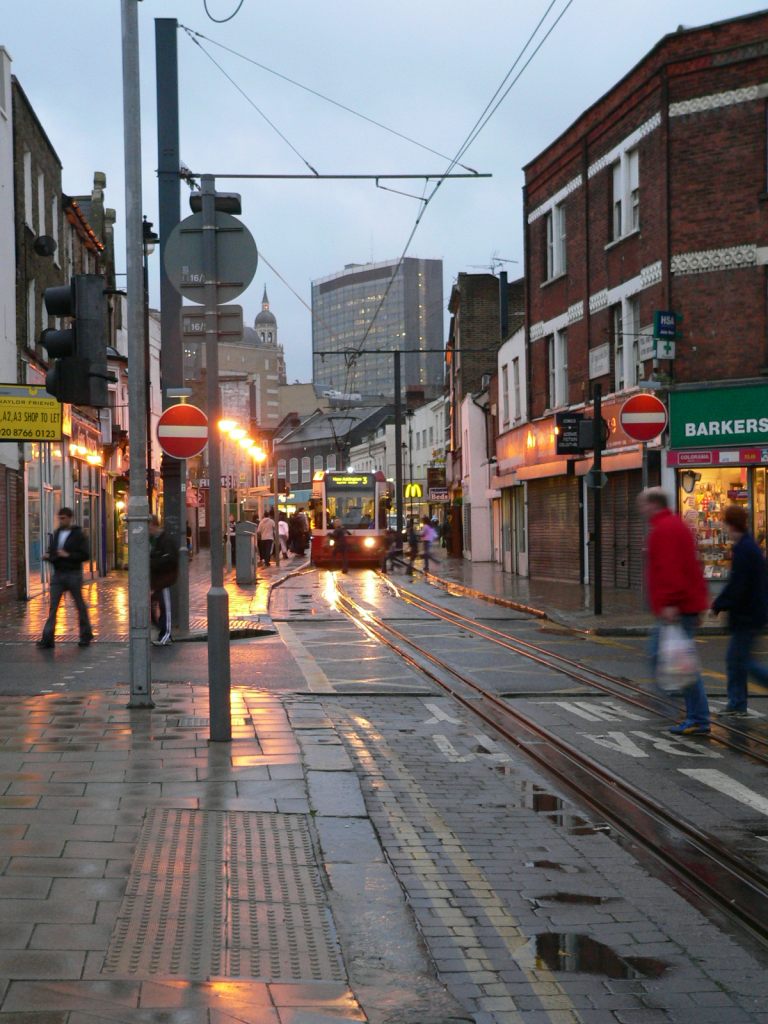 gb-tramlink-croydoncentre-09.jpg (161843 bytes)
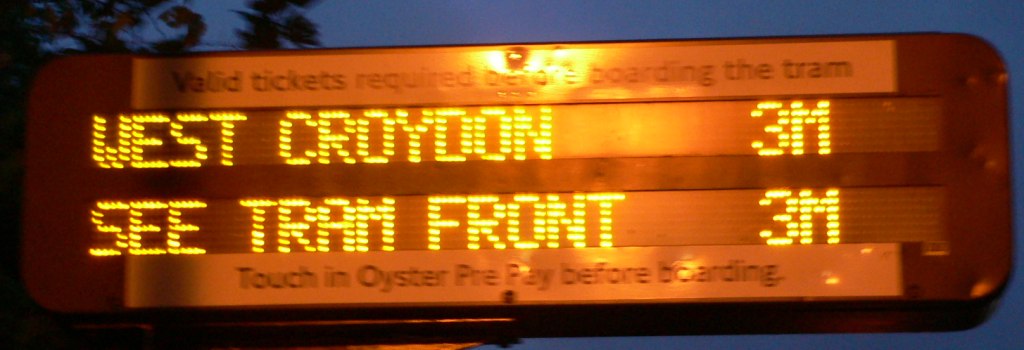 gb-tramlink-seetramfront.jpg (82050 bytes)
 gb-tramlink-tickets.jpg (140205 bytes)
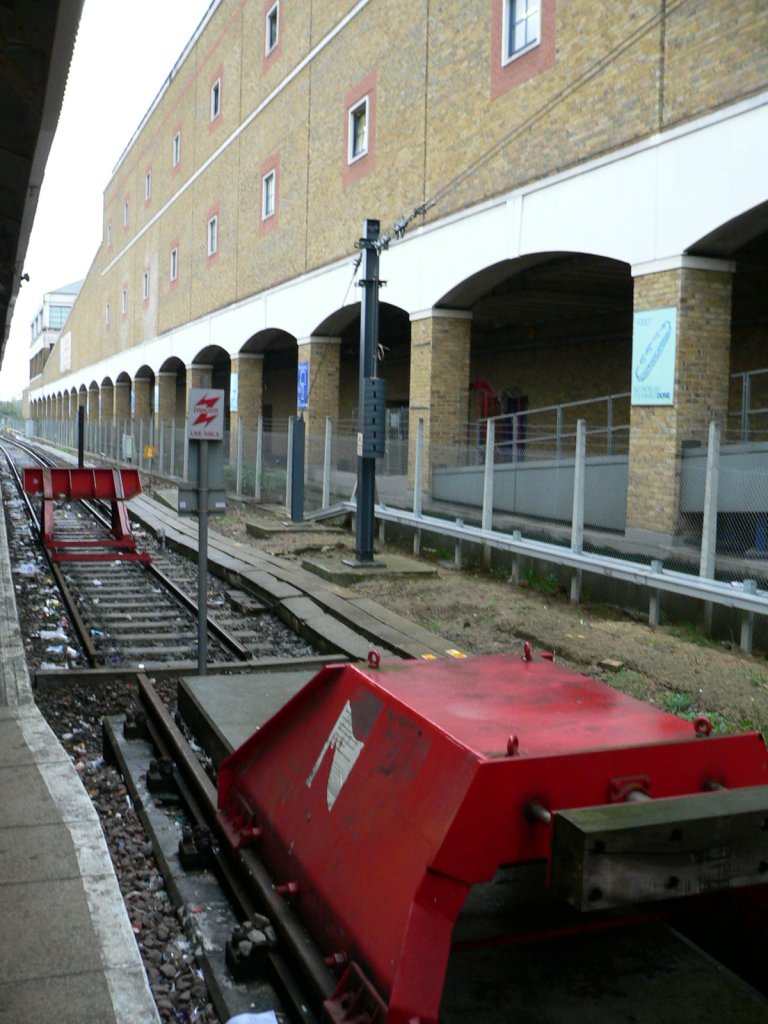 gb-tramlink-wimbledon-2.jpg (161994 bytes)
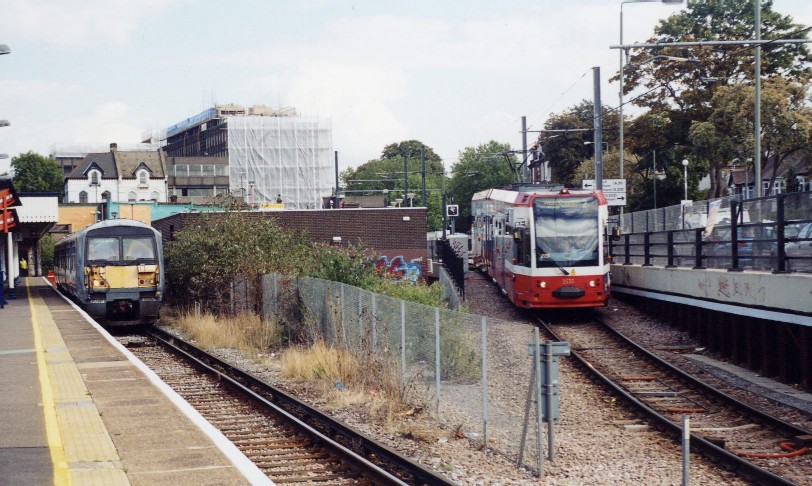 tramlink-a-jp.jpg (143892 bytes)
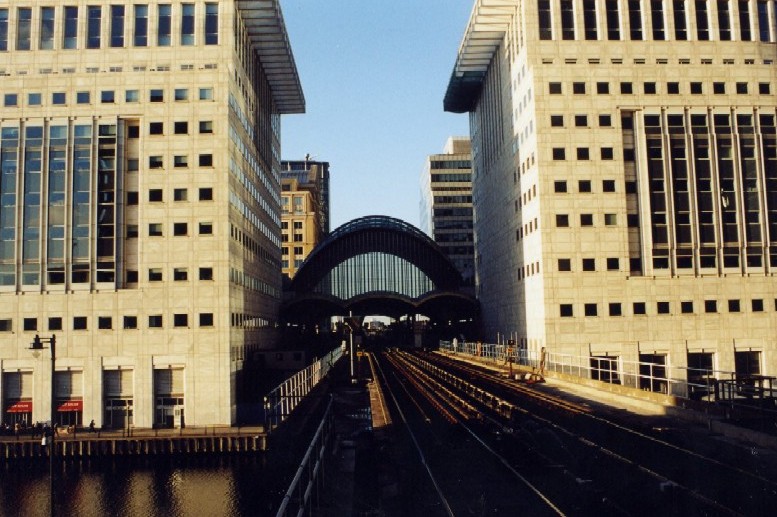 tramlink-g-dock-jp.jpg (131920 bytes)
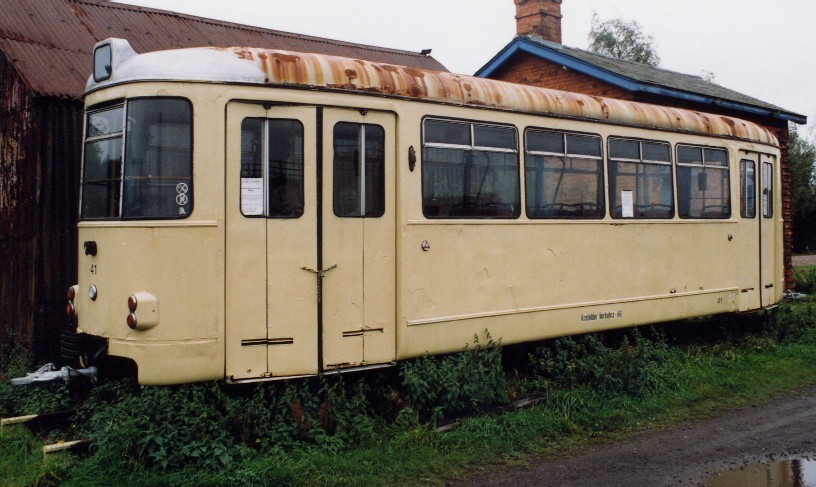 tramlink-oldtram-a-jp.jpg (120135 bytes)
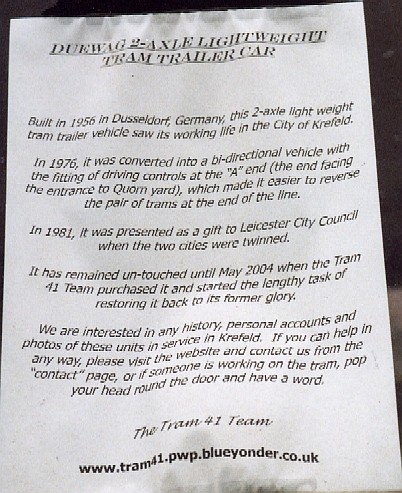 tramlink-oldtram-b-jp.jpg (82901 bytes)